Fancy Sunbonnet Christmas

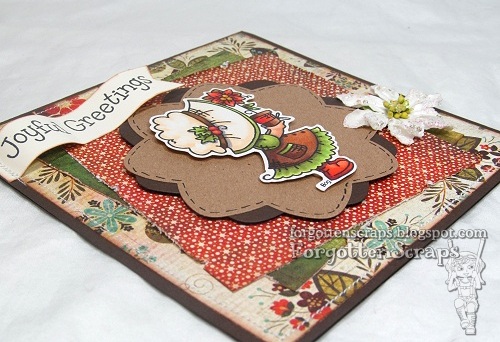
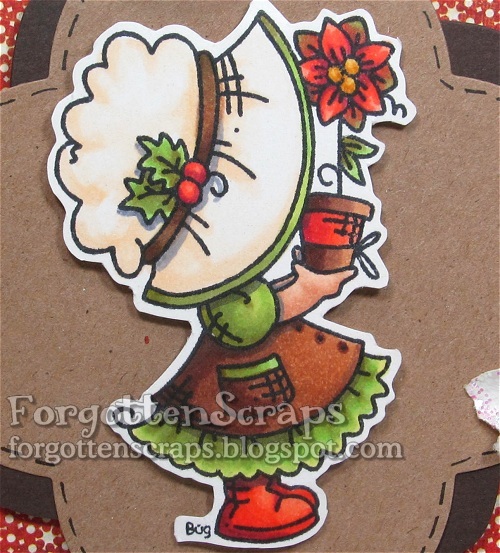
We’re taking a little break this holiday season with our challenges but that doesn’t mean we’re not crafting!  LOL   Instead today we’re sharing more inspiration from Little Miss Muffet Stamps and we’re allowed to create anything we want.  This is Inspiration Week 2 and sometimes they’re the best as our creativity can run wild.  Of course, I went with something in season and created this holiday card…

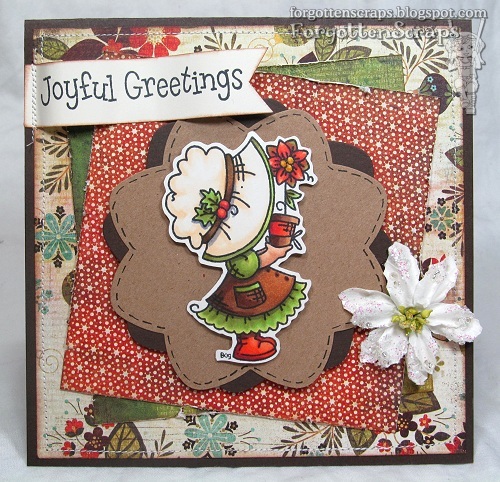
The image I used is Fancy Sunbonnet Christmas and a coordinating sentiment stamp from one of the other Sunbonnet stamps; both from Little Miss Muffet Stamps.  These Sunbonnet images bring back warm memories of my childhood and watching my Mom quilting so they’re some of my favorites! 

Thanks for coming by and I hope everyone enjoys the loot they received this year!  You can pick up this rubber stamp in the LMMS Store and don’t forget to visit the LMMS Store Blog for more fabulous inspiration from the design team – the projects are worth the time!  😀

Ivy Swings

Happy Holidays!  I don’t have a holiday project to share as I’ve broken out of the mold and created a spring card this week.  I’ve used the Ivy Swing rubber stamp from Make it Crafty and decided to pair it with a sentiment instead of a character.  I suppose this would be the perfect graduation or farewell card since the swing is empty, but in all honesty, I chose the sentiment (out of what I had available) solely for it’s shape.  It’s these kinds of decisions that later on make “deep” and “thought provoking” cards!  LOL 

One thing I wanted to do was to make image vibrant with color and to have all the elements stand out.  So I used many different colors and even grabbed a few unexpected ones to mix in – such as the pinks in the sky and the yellows on the red birds.  Once I was finished I mounted it on a card pulling out the purples and it’s ready for a new home!  Thanks for coming by and I hope this inspires you to make your day crafty.  😀

Letter Chester

Tis the season for lots of holiday cards and this blog is no exception.  We’re having a small break from our regular DT duties at Little Miss Muffet Stamps and instead we’re sharing projects to inspire you!  This is our Inspiration Week 1 and the ladies on the DT have done an exceptional job – they’re amazing!  For my project, I wanted to make something that wasn’t green and found this fun decorative paper in my stash – I thought the red, blue and black combination was perfect and this is what I ended up with…

For my project I’ve used Letter Chester rubber stamp from Little Miss Muffet Stamps and drawn by Pollycraft.  The stamp also comes with a coordinating postage stamp and I used that on the red cardstock behind Chester.  Without it, the red was just a tad bit overbearing and I think the extra stamp helped tone that down.

You can get this rubber stamp in the LMMS Store and make sure you visit the LMMS Store Blog for a whole lot more of holiday inspiration to get your creative juices going!  Happy Holidays and be safe!

Cheeks and Nose Tutorial

I should be doing a million other things at the moment but I finished the tutorial I was working on and couldn’t resist sharing the step by steps and colors!  I have the full image colored and can’t wait to get it on a card so I can share that as well but in the mean time, I hope this proves to be handy.

The image I used is Polka Dot Pals Leilani from Little Miss Muffets Stamps.  It has a typical dot-for-eyes face and I’ve colored it in using Copic markers.  The colors are listed on the image for each step and shows how to shape and form the cheeks and nose area.  I also have another tutorial for the face that you can see HERE; it uses a different image and different skin colors.

They say pictures are worth a thousand words so I’m not going into detail on each step.  However, with that said, just leave a comment if you have questions on a particular step and I’ll respond with more details.  😀  Thanks for dropping by and have a great Wednesday!

SS Deck the Halls

It’s been a busy season around here as I’m sure it has been for you too!  However, I’ve noticed that with all my running around and helping here and there, that I really haven’t had a lot of music playing in the background.  The odd thing is, I’ve had a constant jingle of Christmas music in my head!  Practically everything I’ve listened to growing up, at school, in the car, at functions and parities and even in the super markets – those songs are played over and over and over again to the point that this year, I don’t even need the radio. LOL  Maybe I should find something new to listen to… you know, to mix things up a bit.  But enough of that, here’s a project I made coloring up one the new Swings ‘n Slides Christmas images this year…

This image is Swings ‘n Slides Deck the Halls from Little Miss Muffet Stamps and I thoroughly enjoyed coloring her up!  I can’t say much for my card as I don’t like the paper nor the layout, but the coloring part was fun.  And check out that red dress… it almost looks velvety!  I might have to experiment with that some more. 

Hope you’ve enjoyed this little bit of inspiration and have a wonderful day!
P.S.  Now I’ve started signing Deck the Halls in my head too.  LOL

Desert Oasis & Tap Dancing

As you know there is a new challenge this month on the Make it Colourful blog and I wanted to share my projects that I made using the images I colored.  I had the opportunity to take my Prismacolor Pencils with me on a weekend excursion.  I normally don’t use the pencils very often since they’re more difficult for me to work with than the markers.  Sometimes I like my results and sometimes I don’t.  But as long as I keep trying then that’s my main goal.  🙂

For my first project I aimed for the basic challenge and wanted to use my reds and greens.  I focused on the redish hair, red dress and greenery in the background.   I think my favorite part is the face where I thought the colors blended in nicely.  The rest is just “meh” because there is too much white showing through the pencils and as a result, I think I gave up half way through.  However, with the image on the card it doesn’t look so bad and I think will still bring a smile to someone regardless.

The second project was just because I had time left over and I wanted to make up for the first one.  Unfortunately, I feel the same about it so my efforts to cheer me up didn’t work.  Ah well… that’ll all go away when I pick up my markers again.  LOL  

For this card, I attempted to add texture in the background.  I had envisioned a background that would look like a blurry city scape in the dark, maybe on a bridge with the blue sky and stars – something we’d see in the movies.  I’ll let you take a look at the result and decided how well I did.  LOL

All in all, sometimes ya win and sometimes ya don’t.  LOL   Hopefully these samples will still provided you with some inspiration and good luck with your projects this month in the Make it Colourful challenges!  Cheers
Make it Crafty Images:
Originally posted on the Make it Crafty store blog, click HERE to view post.