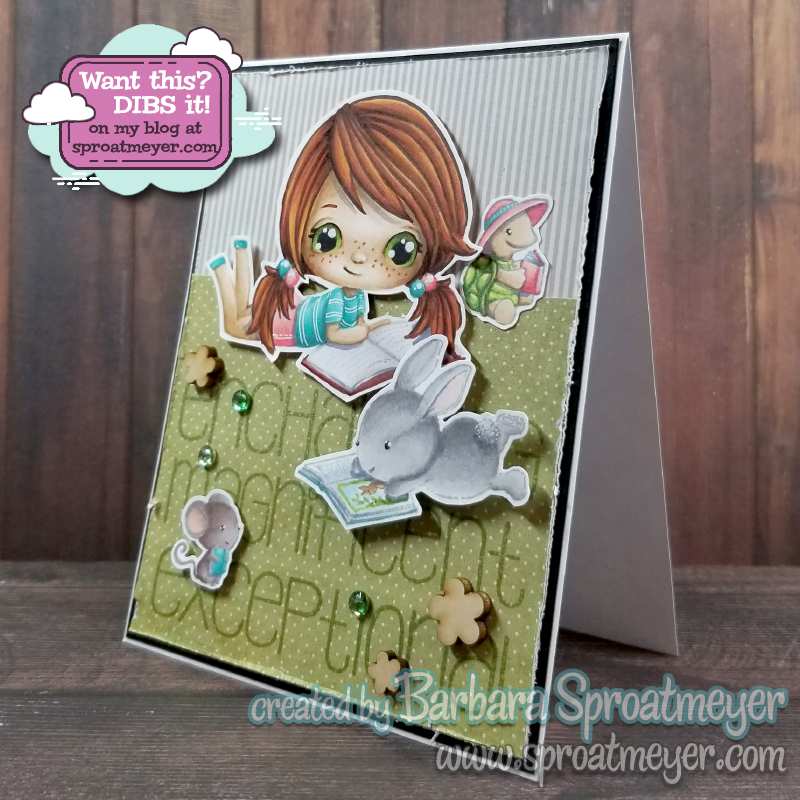
What this card? Dibs it! Read below for details below and it could be on it’s way to you! Welcome back crafty friends – today I have a fun reading card that I created that combines a few different companies for this story time mash-up. Continue reading for more details on how this card was created using these featured products:
Want this card? Dibs it in the comments below!! Be sure to add “DIBS” to be eligible in the random drawing and I will announce the winner with my next post on October 20. Then you’ll have another chance to dibs and both lucky winners will receive a happy smile in their mailbox. Goodluck!The star of this project is Kelly Book by Stamp Anniething and she’s surrounded by a bunch of her animal friends featuring stamps from Purple Onion Designs. These images were stamped with a light brown or gray ink for a softer no-lines look and then colored with Copic markers. I’ve received some requests on how to color her eyes so I’ll work on that this season. What do you like about this card and what would you like to see me do next? Thanks for stopping by and have a great week.
List of Common Supplies Miss Caroline paper by My Mind’s Eye
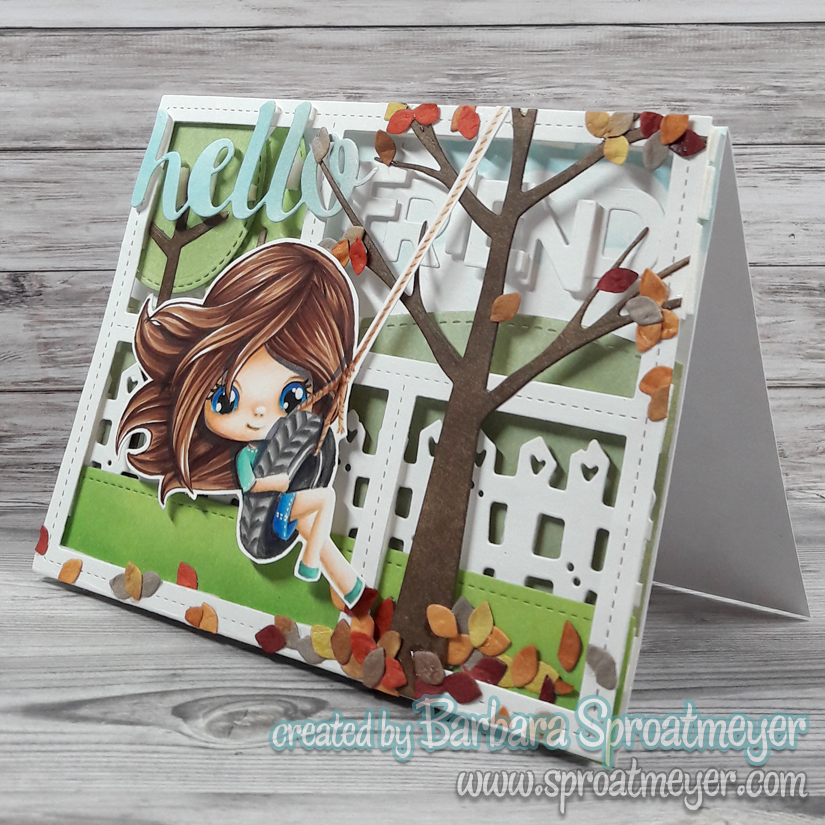
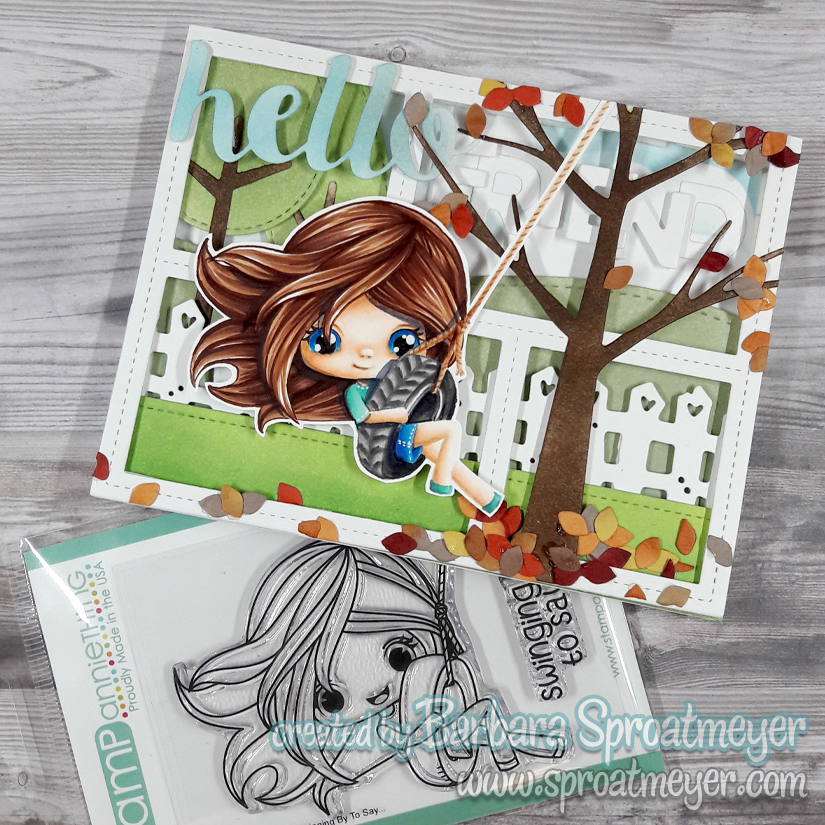
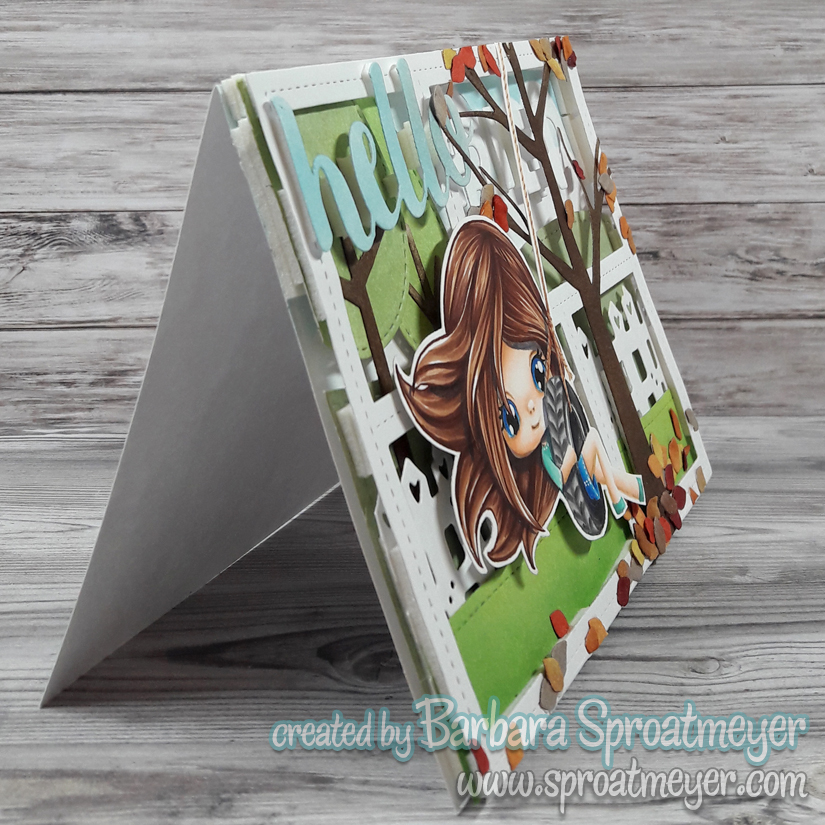
Hello friend! For this project I pulled out my stash of dies to create the scenery and then colored up Audrina Swinging By Tire Swing to enjoy it. It’s been so hot this summer that I’m ready for cooler temperatures and for those autumn colors to emerge. Sigh. It will be a while for that to happen. But in the mean time, I hope you enjoy this project.
I started this project by building from the background forward. I knew I was going to use the Peekaboo Backdrop Die so I kept that in mind when I was placing the other elements. The top-left window features trees and the word “Hello” on top. The top-right window features stenciled clouds and the word “FRIEND” in the sky.
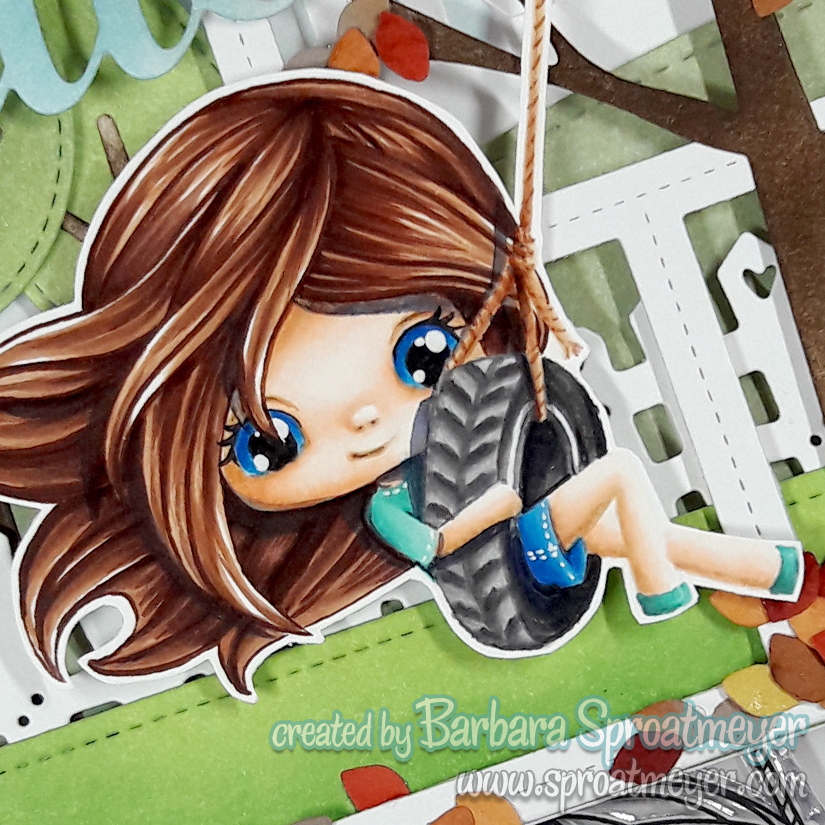
I colored Audrina Swinging By Tire Swing with the no-lines technique which means I stamped her in a light color. This allowed me to add a few more details such as more rope, add a nose and change her mouth. I colored her eyes the same way I did last time which seams to work out well with this style. I’ll have to try green eyes next time. 😉
The leaves were cut from mulberry paper that was already died in the autumn colors. That was so I didn’t have to worry about coloring them and they also have a bit of texture to them that is reminiscent of leaves. I chose autumn leave colors so that the tree and foreground would stand out more than the background and to keep the focal point moving around the card.
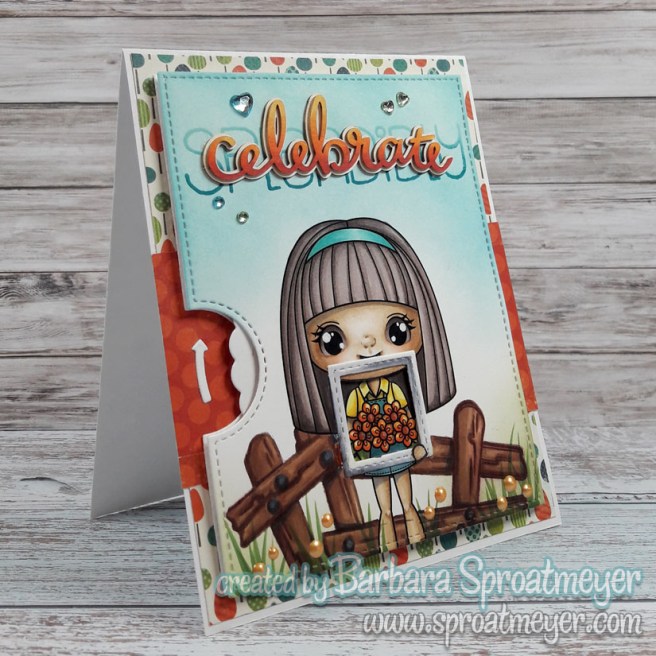
I have a love-hate relationship with this project and I for one am very happy it’s off my desk and ready to send to someone. The main components are Springtime Girl stamp from Stamp Anniething and the Lawn Fawn Reveal Wheel die. Either of these on their own would be simple but I had the idea of using all four images for Springtime Girl in the wheel. I mean, how cool is that?! I’ll describe some of my troubles below but in the end, I’m very happy that it worked out. Yay!
So my problems were two fold – first, I’ve never used the Reveal Wheel before so there was quite a learning curve. Then second, I was using a digital stamp and the Reveal Wheel relies on stamping the images on the wheel. My first wheel was a disaster but then I found a solution that worked by fussy cutting around the image and then gluing it onto the wheel.
Lastly, the puzzle I had to work out was where to put the window. I hadn’t taped down the wheel, like it was suggested, and ended up with a double cut in the window making it difficult to work around. (mainly because I had already cut the heads off of the part that goes on the wheel so the misalignment meant she didn’t have a chin. LOL Which really shows up with the cactus one.) So even though it’s higher than I would have liked, having the frame there (to help cover the mistake) was actually a cute addition.
The fence in the background is from Polka Dot Pals Fern to help complete the scene. My favorite part, beside feeling accomplished, is the face. I think I like how her eyes turned out and might be the right look I was searching for. It’ll be something I try again.
I’m back using Annie Special Delivery from Stamp Anniething and today my challenge was to color the face in a non-traditional manner. This was a difficult one for me and I’ve been mulling it over for a week or two. Then with inspiration from Annabel’s My Neighbor project, I took the leap and gave it a try. I recorded it and uploaded it to my YouTube channel – you can access the video below or HERE. This is what I came up with …
While coloring this one, I sketched out a few other ideas for faces and this one seemed to fit the best. I tilted the eyes a little which allowed enough room for a nose to fit in without feeling crowded. There are some things I would change for the next time but overall I think the challenge came out well. Below you can see the original stamp with the results.
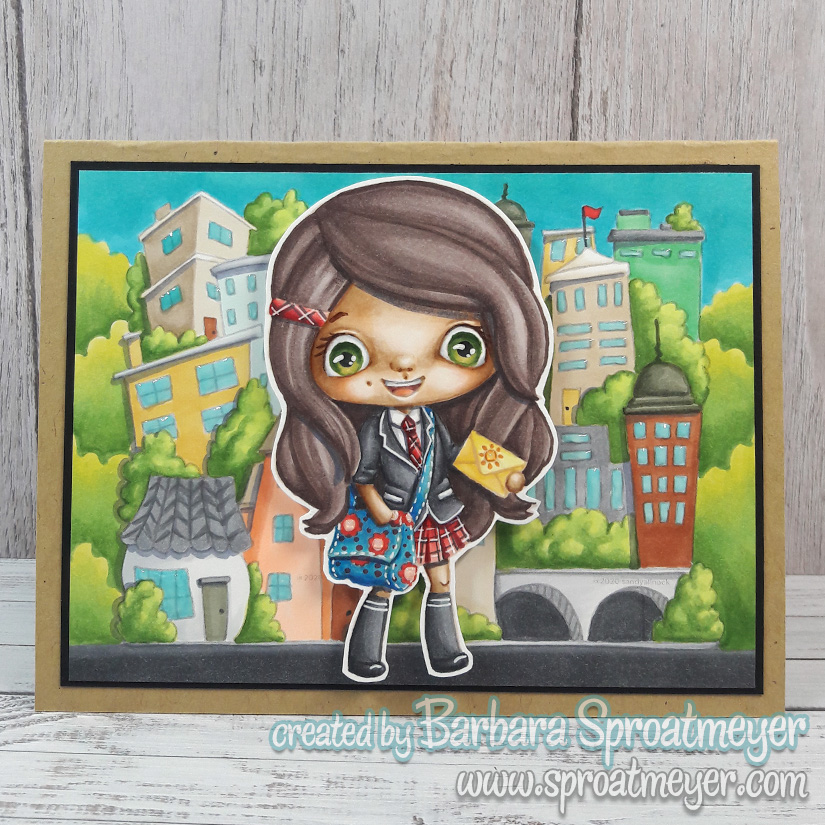
The background is from Sandy Allnock named Stay Home Stay Safe. (Currently a freebie.) I combined the two images together, flipped one and scaled them down to fit on one card. The signs were strategically hidden behind the character to make this an all purpose background. I imagine this girl lives in the metropolis and walking home from school.
The character was cut out and popped on the background with foam tape which helps her stand out as the focal point. The rest of the card was kept simple and I used some Nuvo Crystal Drops for texture on the windows, flowers on her satchel and the sun on the envelope. Subtle in the photographs but you can’t help run your fingers across it in real life.
The project I have to share today is a mixture of three different stamps plus some doodling on the side. The character is Cheshire Chibi Girl from Stamp Anything. She is part of the Down the Rabbit Hole kit and Ann was kind enough to share the digital version for me to color. The face was replaced with the one from Polka Dot Pals Syeda from Whimsy Stamps. Then the background is a freebie from Sandy Allnock called Stay Home Stay Safe. Lastly, I doodled some flying geese in the background to finish off the scene.
I started this project by coloring the sky. I knew I wanted to go with something non-blue and that would help me set the color pallet for the rest of the project. Unfortunately, it sort of threw me off and so I don’t think the colors coordinate as well as I would liked them to have. But it’s all good and still fun.
After coloring the background and buildings, I jumped into coloring the beanie hat. The original character has a cat but I really wanted to add some extra coloring details and went with a knitted hat instead. Since I printed the image out in a light gray, I just used creative color placement and colored right over the cat hat.
The face and hair was colored while recording so you can watch the video for those details. In the foreground, I added a sidewalk with some grass details. Lastly, I added some flying geese silhouettes in the background to help break up the skyline.
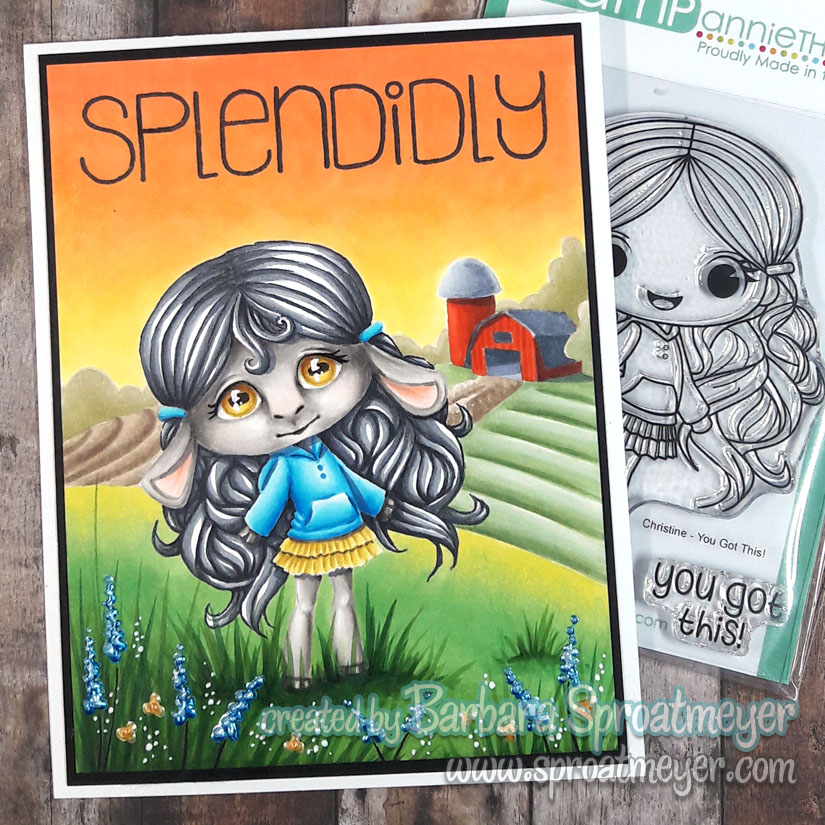
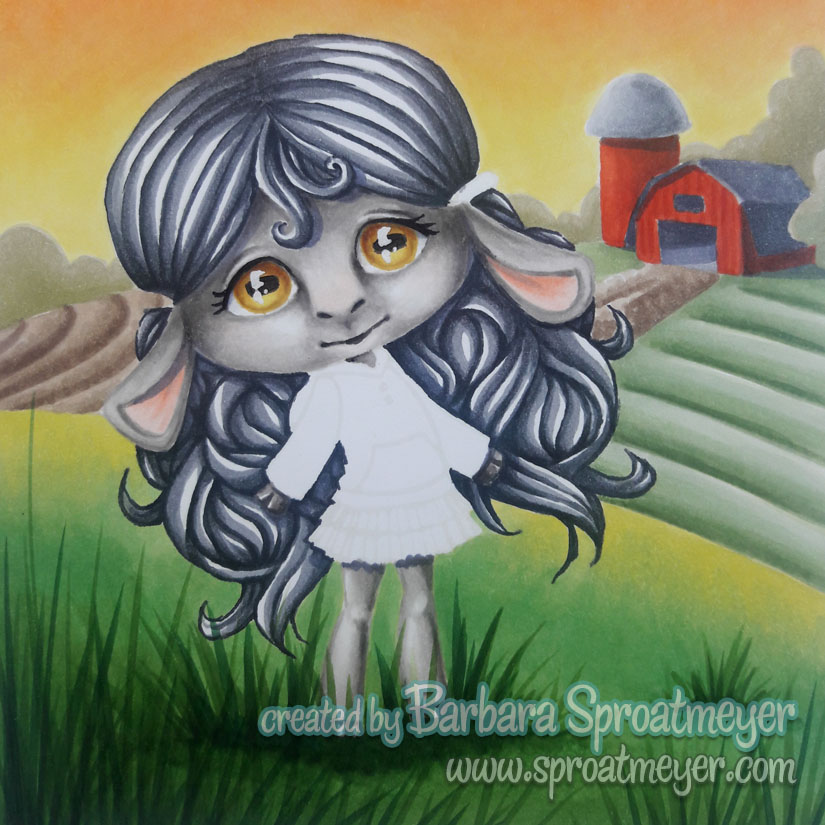
It’s Easter this weekend and I thought I should at least get one bunny, chick or lamb project done before it passes. So I settled on a lamb and transformed Christine You Got This from Stamp Anniething. Special thank you to Ann for the stamp! The sentiment is from a Polka Dot Pals set.
At first I wasn’t sure how to color this cutie but then found inspiration in my daughter’s latest drawing and took it from there.
I stamped the character without the original face and wiped off the ink before stamping it. This gave me a blank canvas to play with. I started out with W1 and started to sketch out the face and lay down my shadows. Then I built upon that with W3 and finally jumping to W8 before working my way back blending as I go.
With the face and hair done, it was time to think about the clothing. However, I wasn’t sure what color so I skipped this and went on to the background. This part stumped me and I wasn’t sure what to do. I stewed about it for a few hours and came back later in the evening with the farm idea and a bright yellow sunset.
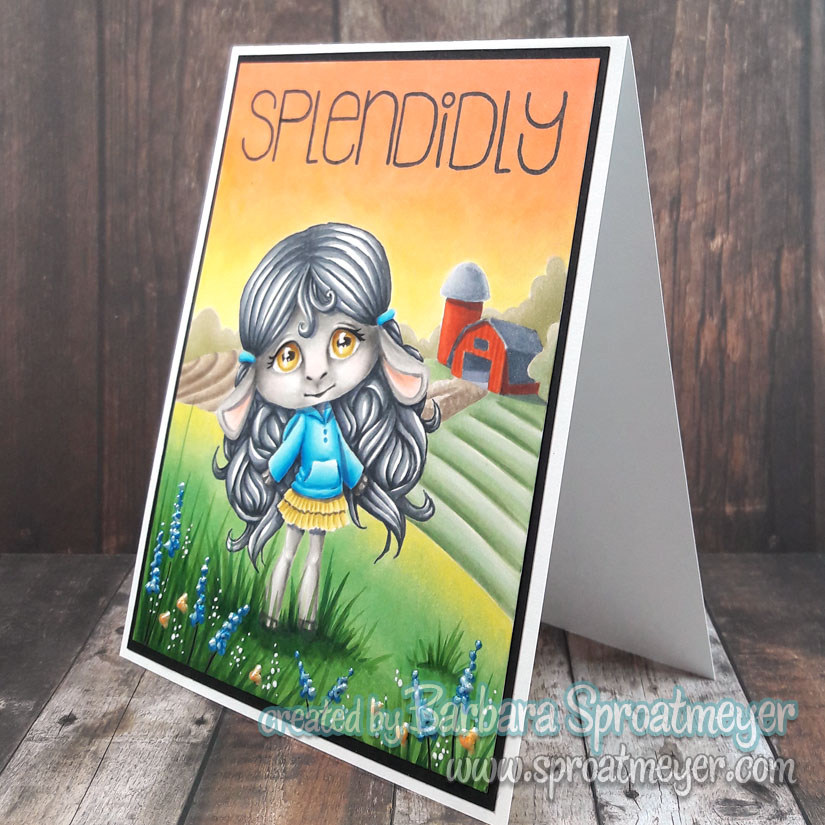
As you can see, I really did leave the clothing until last and it wasn’t until this point that I decided I should bring in some blue. I first had to fix my little mistake with her hair clip and then pressed on. After all was done, I placed it on a card, stamped the sentiment then used Liquid Pearls and a white gel pen to add some flowers.
“Baa-ram-ewe, baa-ram-ewe. To your breed, your fleece, your clan be true. Sheep be true. Baa-ram-ewe.” Thanks for stopping by!