Teaching in Fort Myers

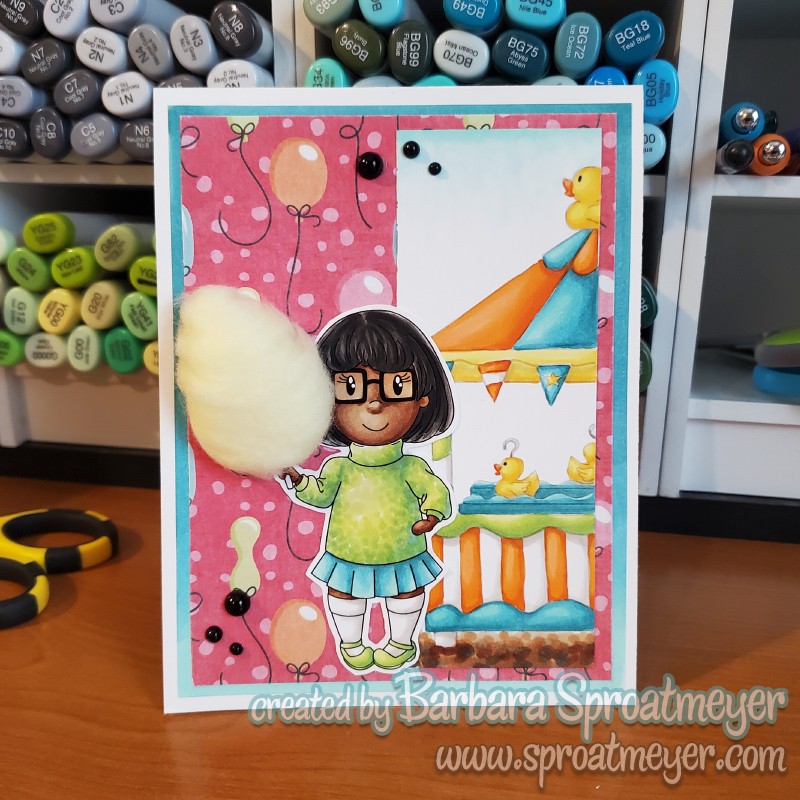
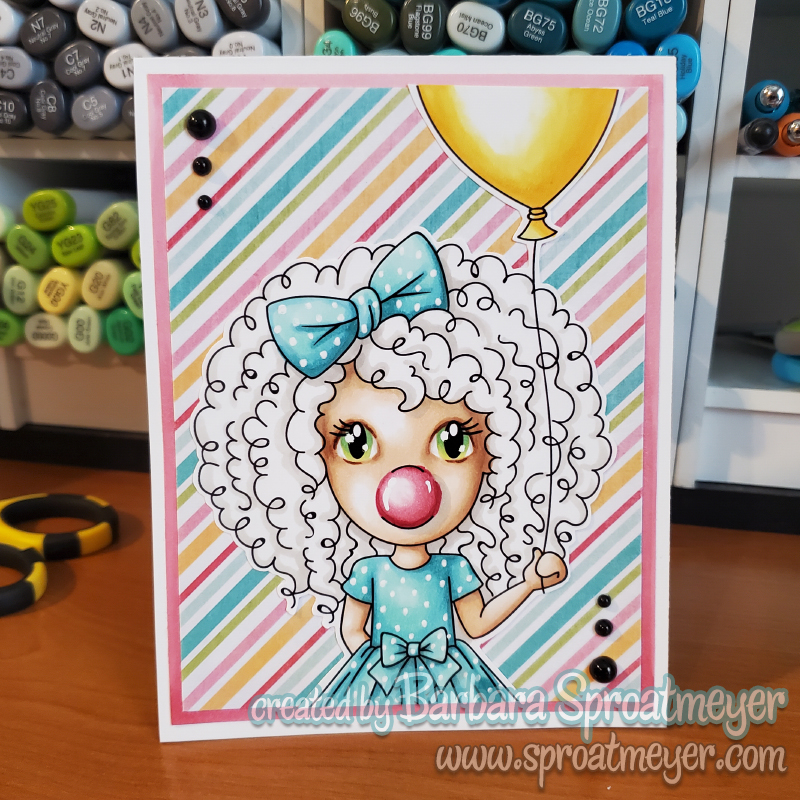
Last month, I joined Paper Nest Dolls in Fort Myers, Florida, and taught some classes at their weekend retreat. Each of the classes would build upon each other starting with basic techniques to harder ones. Here’s what we did…

Sometimes I think we take too long to color and forget our basic coloring skills. In this class that’s what I wanted to get back to – being able to color without a lot of blending. Making these kinds of cards stretches your creativity and they are also great birthday cards to give to someone who might not treasure them as much as we do. This is Owen with Ice Cream from Paper Nest Dolls. The face was kept simple.
In this class I build upon the lessons we learned from the previous class and took a little more time in blending. The background is Hook a Duck from Little Miss Muffet Stamps and we used light lines to give it a no-lines look. The character is Sleuth Girl from Paper Nest Dolls and her magnifying lens was replaced with a yellow cotton ball for cotton candy. On the face we added shadows around the nose and glasses and also colored the glasses a lighter color.
This last class also built upon the previous classes and we dived deep into creative color placement on the face. This balloon girl from Paper Nest Dolls was colored to look like a clown with a pink nose (or with bubblegum). We give her eyes a lot of details and spent some time shading around the face to define the shape more. This one is my favorite.
This last one was a private challenge given to me to see how I would color the puffer fish. I’ll admit, I had to spend some time thinking how to best emphasize the spikes and this is what I came up with. I then colored the little mermaid just so they could be friends together. Of course, I used creative color placement on the face to brighten her up – both images from Paper Nest Dolls.

Copic Boot Camp with Watercolors

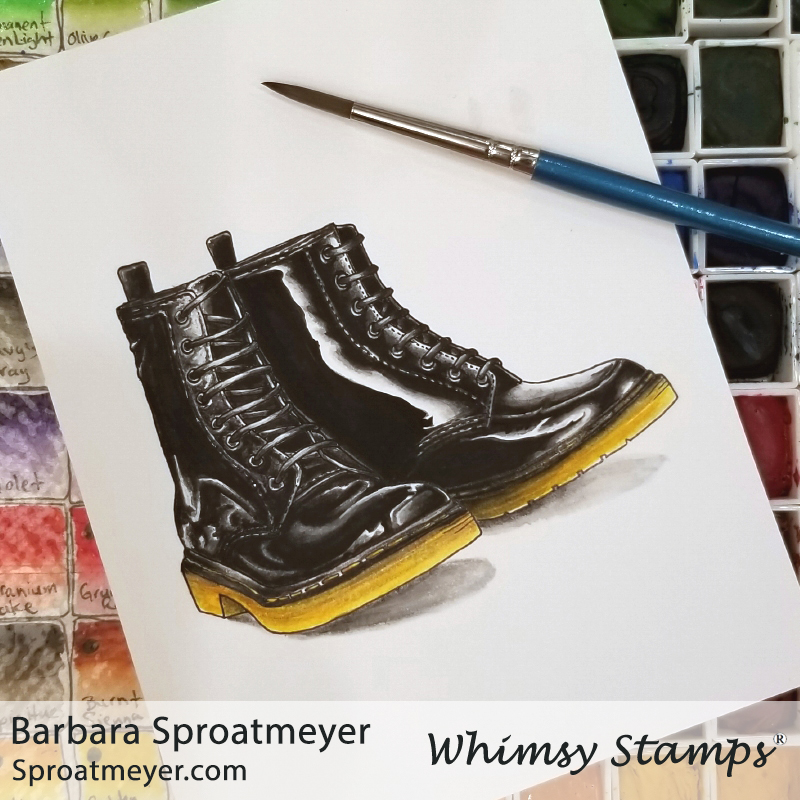
If you haven’t been yet, you should attend Jennifer Dove’s Boot Camp. It’s awesome and you learn so much! This last year I was blessed to attend but found myself without my Copic markers. Yikes! But never fear, my watercolors were near. So that’s what I took. I know it’s crazy, but what a great way to learn the medium in a different way. Check out what I did the first year HERE.

All of these images were colored on Hammermill Premium Color Copy paper with 30 year old student-grade watercolors. That’s right – these watercolors were so old and the caps so crusty that I had to cut the back ends off and squeeze the paint into trays so I could use them. But it was all good – I ended up getting five sets of watercolor trays so I shared them with my Mom and kiddos. Bonus! Anyway, without further ado, here’s what I colored at boot camp…

First off is the last image we colored which are the infamous Boots from Whimsy Stamps. Jennifer breaks this down into manageable steps and even though it looks difficult, she’s able to teach everyone in the class this shinny technique.
Next up are the images we started out with every morning. This four-square of the llama is from Fa La La Llama from Whimsy Stamps. My personal challenge was to do something completely different with each one. My favorite is the llama in space. What’s your favorite?
From this point, I don’t remember the order we colored everything so I’ll list the stamps and any notes I have for each. Here’s another set of four and again I challenged myself to make something different with each set of apples. This stamp is Back to School from Whimsy Stamps.
This cute mouse is from Deck the Halls from Whimsy Stamps and I was working on a shining light source – the star.
Speaking of shining light sources – here’s another one using Polka Dot Pals Atlas from Whimsy Stamps. With the sun being the brightest source, I colored it first and then colored the yellow glow on where I thought it would shine on the girl. Then when I colored the rest of the image, I tried to keep the yellow in that area without adding more colors.
Here’s the image completed – Polka Dot Pals Atlas from Whimsy Stamps.
This other image focuses on glass and glass reflection. This is the Atlas Jar clear stamp and Penguin Flies digital stamp, both from Whimsy Stamps. This photo shoes the original copy of the project we were doing plus the one I water colored on top of that one. I am surprised that I can’t see a lot of differences between the two mediums – they’re there but not from a glance. I think that’s pretty cool.
This stamp is Love Ewe from Whimsy Stamps.
Working on the fish scales and facial expressions, this is Mermaid Mona from La La Land Crafts.
I’ve colored this fun kitty before and converted the pumpkin into a watermelon so it was fun to color it again. This is Kitty and Watermelon from Whimsy Stamps.
Let’s move on from Halloween to some winter and Christmas stamps – this one is Rudolph from Whimsy Stamps and is available in both rubber and digital stamps.
Into the snow is Yeit Friends from Paper Nest Dolls. I think I had a hard time painting white with the water colors.
The last holiday stamp and is Gingerbread Man from Whimsy Stamps. Again, on the right you can see the one I watercolored and the one on the left is the original copy of our task.
On to some nature – this is Bee’s Knees from Whimsy Stamps and I decided to give them a rainbow color. This is one of the images I drew too and it comes with sentiments and little bees too. 😉
This little heifer friend is from Cow Friends from Whimsy Stamps.
Up into space we have UFWhoa from Whimsy Stamps. I loved coloring the alien and ship but the background was the bane of my watercoloring weekend. I couldn’t get a good blend on such a large area! That sore will pop up later on with another image too, unfortunately.
This cute image combination is from Pretty Little Things from Scrappy Boy Stamps.
Here it is – the other image I had a difficult time with because of the large open space that needed to be filled in. It would have been easier on different paper. Anyway, this little turtle is from Under the Sea Creatures from Whimsy Stamps.
This last one is Froggy Hoppy Day 2 digital stamp from Whimsy Stamps and we were working on the water droplets.
That leads us back to the Boots from Whimsy Stamps. It’s traditional to stick around Sunday afternoon and finish the other shoe – not everyone does this but apparently we made up the largest group this year. So exciting! I know that being my second year I should have colored it non-black for an extra challenge but I figured doing it in watercolor was all the extra challenge that I needed. Here’s to you Jenn – loved every minute of it! ❤

Accordion Scrapbook

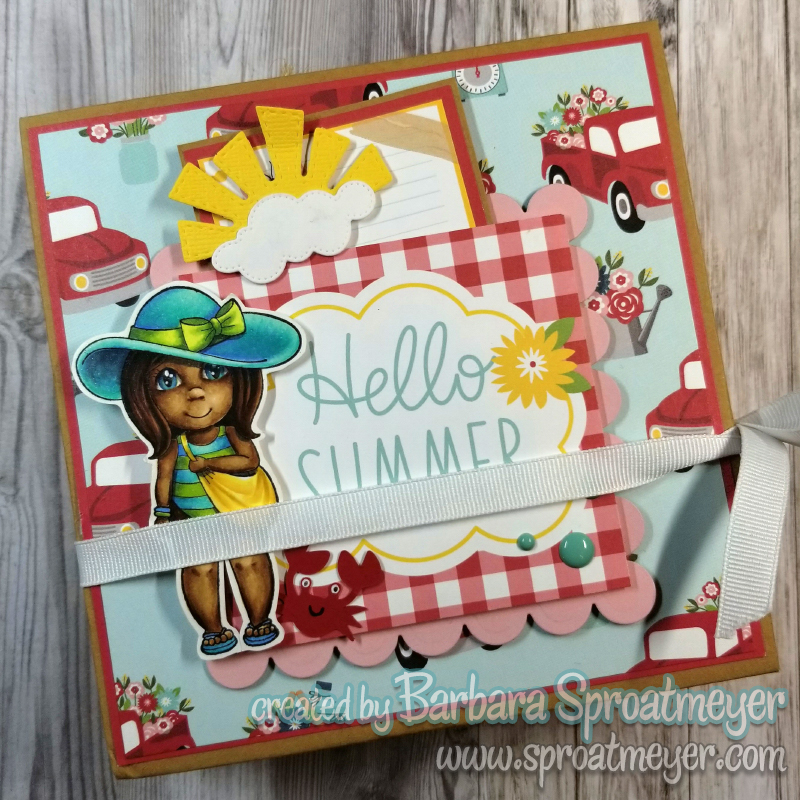
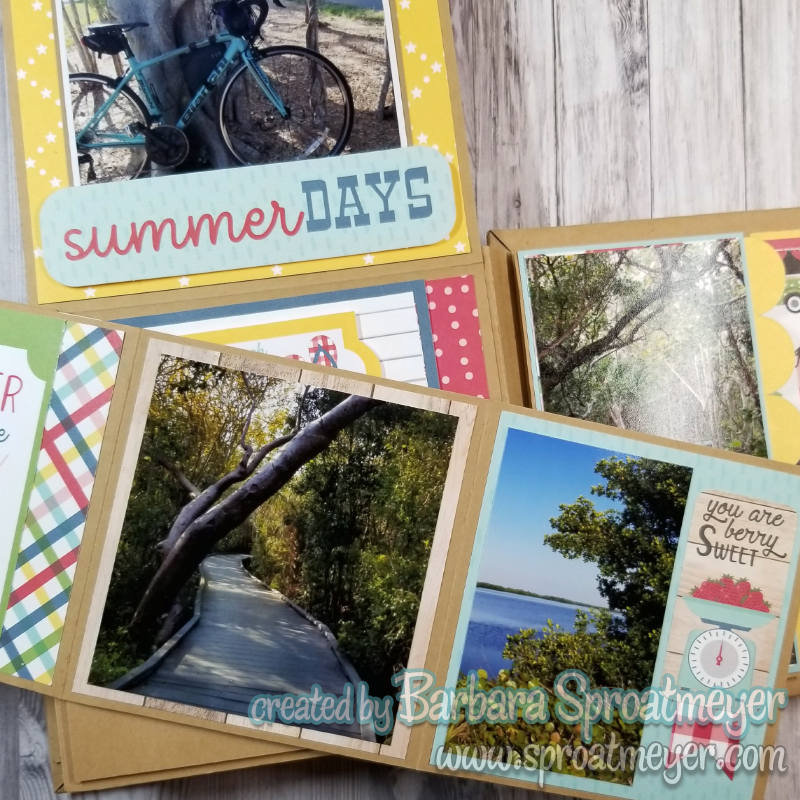
Here’s an inside look at the accordion scrapbook that Tina kitted up at the Paper Nest Dolls retreat in Florida. She put so much work into this project and it turned out great. I ended up putting all my picture in there from the bike rides that I took that weekend while I was in Fort Myers and Sanibel Island. The papers are from Echo Park and the images are from Paper Nest Dolls… colored in my style with creative color placement.

Mermaid Set from Paper Nest Dolls

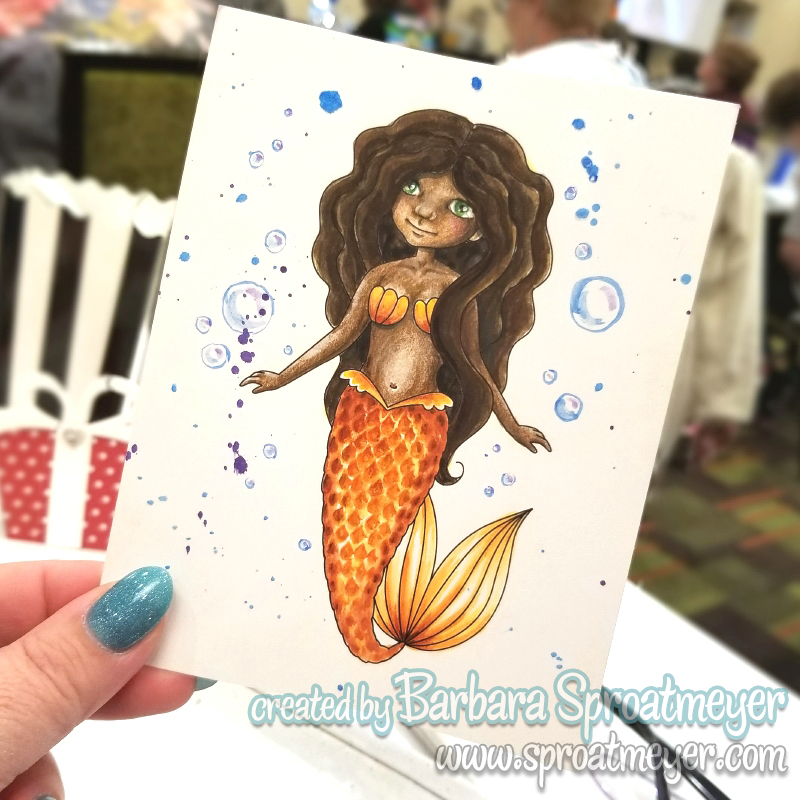
I had a fantastic time at the Paper Nest Dolls’ Sun & Fun Retreat in Florida this weekend and getting to know so many wonderful people!! For our final project, we created this bookmark using the alcohol drop method on the background. I love using handmade bookmarks so it’s fun to have another one to use. I’m using the Mermaid Set from Paper Nest Dolls to create this bookmark with papers and accessories from Echo Park “A Slice of Summer” series. Until next time… keep your world colorful! Ciao!

Bubbles Fun Owen from Paper Nest Dolls

It’s day three of the Paper Nest Dolls’ Sun and Fun Retreat and if you’re lucky enough to have attended then this is a card you colored yesterday. On this project I’m using Bubbles Fun Owen from Paper Nest Dolls with paper and accessories from Echo Park “A Slice of Summer” series. My goal was to give some color to the bubble and reflect some of the elements around the character. I didn’t want realism but something that would convey the magic of summer. To do this, I added a mini rainbow in the bubble and then some white twinkles floating around.

Mermaid Set from Paper Nest Dolls

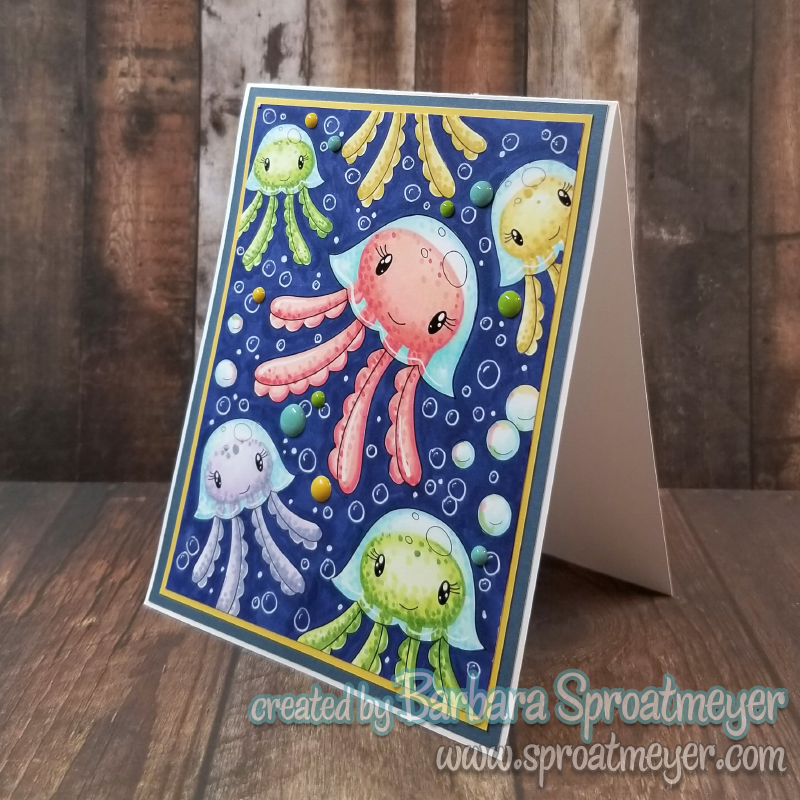
Next project we’ll be making at the Paper Net Dolls’ Sun and Fun Retreat is this jellyfish card. I’m using the Mermaid Set from Paper Nest Dolls to create this bookmark with papers and accessories from Echo Park “A Slice of Summer” series. I like to color unexpectedly and not following the lines is a major part of that. That method is called Creative Color Placement and it’s as simple as adding plaid to a shirt, polka dots on a skirt, or in this case, making the dome of the jellyfish transparent. I think it adds a whole new perspective on what can be done through coloring.