Copic Boot Camp with Watercolors

If you haven’t been yet, you should attend Jennifer Dove’s Boot Camp. It’s awesome and you learn so much! This last year I was blessed to attend but found myself without my Copic markers. Yikes! But never fear, my watercolors were near. So that’s what I took. I know it’s crazy, but what a great way to learn the medium in a different way. Check out what I did the first year HERE.

All of these images were colored on Hammermill Premium Color Copy paper with 30 year old student-grade watercolors. That’s right – these watercolors were so old and the caps so crusty that I had to cut the back ends off and squeeze the paint into trays so I could use them. But it was all good – I ended up getting five sets of watercolor trays so I shared them with my Mom and kiddos. Bonus! Anyway, without further ado, here’s what I colored at boot camp…

First off is the last image we colored which are the infamous Boots from Whimsy Stamps. Jennifer breaks this down into manageable steps and even though it looks difficult, she’s able to teach everyone in the class this shinny technique.
Next up are the images we started out with every morning. This four-square of the llama is from Fa La La Llama from Whimsy Stamps. My personal challenge was to do something completely different with each one. My favorite is the llama in space. What’s your favorite?
From this point, I don’t remember the order we colored everything so I’ll list the stamps and any notes I have for each. Here’s another set of four and again I challenged myself to make something different with each set of apples. This stamp is Back to School from Whimsy Stamps.
This cute mouse is from Deck the Halls from Whimsy Stamps and I was working on a shining light source – the star.
Speaking of shining light sources – here’s another one using Polka Dot Pals Atlas from Whimsy Stamps. With the sun being the brightest source, I colored it first and then colored the yellow glow on where I thought it would shine on the girl. Then when I colored the rest of the image, I tried to keep the yellow in that area without adding more colors.
Here’s the image completed – Polka Dot Pals Atlas from Whimsy Stamps.
This other image focuses on glass and glass reflection. This is the Atlas Jar clear stamp and Penguin Flies digital stamp, both from Whimsy Stamps. This photo shoes the original copy of the project we were doing plus the one I water colored on top of that one. I am surprised that I can’t see a lot of differences between the two mediums – they’re there but not from a glance. I think that’s pretty cool.
This stamp is Love Ewe from Whimsy Stamps.
Working on the fish scales and facial expressions, this is Mermaid Mona from La La Land Crafts.
I’ve colored this fun kitty before and converted the pumpkin into a watermelon so it was fun to color it again. This is Kitty and Watermelon from Whimsy Stamps.
Let’s move on from Halloween to some winter and Christmas stamps – this one is Rudolph from Whimsy Stamps and is available in both rubber and digital stamps.
Into the snow is Yeit Friends from Paper Nest Dolls. I think I had a hard time painting white with the water colors.
The last holiday stamp and is Gingerbread Man from Whimsy Stamps. Again, on the right you can see the one I watercolored and the one on the left is the original copy of our task.
On to some nature – this is Bee’s Knees from Whimsy Stamps and I decided to give them a rainbow color. This is one of the images I drew too and it comes with sentiments and little bees too. 😉
This little heifer friend is from Cow Friends from Whimsy Stamps.
Up into space we have UFWhoa from Whimsy Stamps. I loved coloring the alien and ship but the background was the bane of my watercoloring weekend. I couldn’t get a good blend on such a large area! That sore will pop up later on with another image too, unfortunately.
This cute image combination is from Pretty Little Things from Scrappy Boy Stamps.
Here it is – the other image I had a difficult time with because of the large open space that needed to be filled in. It would have been easier on different paper. Anyway, this little turtle is from Under the Sea Creatures from Whimsy Stamps.
This last one is Froggy Hoppy Day 2 digital stamp from Whimsy Stamps and we were working on the water droplets.
That leads us back to the Boots from Whimsy Stamps. It’s traditional to stick around Sunday afternoon and finish the other shoe – not everyone does this but apparently we made up the largest group this year. So exciting! I know that being my second year I should have colored it non-black for an extra challenge but I figured doing it in watercolor was all the extra challenge that I needed. Here’s to you Jenn – loved every minute of it! ❤

Polka Dot Pals and Paper Doll Marci

This project combines the Paper Doll Marci Sweetheart character with a new face from Polka Dot Pals Mason and fun background elements from Polka Dot Pals Vera – plus a whole lot of creative color placement makes this one unique card.

I stamped the character in black but before I did that, I wiped away the face with a cotton swab. This allowed me to use an Add-on Face from one of the Polka Dot Pals sets and I chose the one from Polka Dot Pals Mason. When I stamped that face, I also wiped away the mouth so I could color my own in.
This little girl has bubble powers so she’s have a bright cheery day in the backyard. Wouldn’t that be fun to be able to produce bubbles from your hands? The sentiment is a light chipboard and easy to color with the Copic markers so I colored it similar to the bubbles and tied it in with the theme that way. To help it stand out, I did the second layer with black.
The hat is actually part of the doll’s hair. That was a lot of hair so I decide she’d be perfect with a little beanie hat. Because I wanted to go with something bright, and I recently learned about Nooglers at Google, I went with a propeller beanie. Other creative color placement includes the mouth, extra hair, bubbles, pool and pool toys.
This is what the character looked like before the transformation using creative color placement.

Supplies Used:
Hammermill Premium Color Copy 100lb
Sakura Gelly Roll White Pen
Nuvo Crystal Drops
Chipboard Embellishments

Stamps:
Polka Dot Pals Mason (face)
Polka Dot Pals Vera (houses)
Paper Doll Marci Sweetheart (character)

Copic Markers:
T1, 2, 4, 6, 8, BV25
E23, 25, 27, 29, E30, 31, 35
YR21, 04, 09, 18
R32, 35, 37, 39
Y11, 15, 32, YR24
V000, 01, 12
BG11, 32
B01, 14, 16
YG21, 23, 25, 17, 67

Flower Garland Paper Doll Marci

Here’s a far out project that I wanted to share. This project combines three different stamps – Flower Garland Paper Doll Marci from La-La Land Crafts, Polka Dot Pals Khadija from Whimsy Stamps and Space Scape from High Hopes. This was an unusual combination for me and I’m not sure how one thing let to another – except I can say that I was tried of choosing a skin tone and wanted something different. Blue is different right? The rest is history.

I have to say this is one of my favorites projects this week. I think it has to do with using black in the sky (for space, of course) and for adding unique elements to make it even better.
In this section, I colored the white bow around the waist, added socks and glittery pink shoes. The pose on these hands always throw me for a loop on what to do so I went ahead and gave this girl some flower power. Her super power is to spread flowers and peace wherever she flies – oh yea, and she can fly too.
The faces from the Polka Dot Pals sets work naturally with the La-La Land characters. The images can be stamped in a light color or the ink can be wiped away from the character before stamping. Then the Polka Dot Pals Add-On Face can be added.

Supplies Used:
Hammermill Premium Color Copy 100lb
Lawn Fawn Jellyfish Ink
Sakura Gelly Roll White Pen
Ranger Stickles Glitter – Diamond
Ranger Liquid Pearls – Lemon Yellow

Stamps:
Flower Garland Paper Dolls Marci by La-La Land
Polka Dot Pals Khadija by Whimsy Stamps
Space Scapes by High Hopes

Copic Markers:
BG10, 11, 13, 23, 57, 49
R02, E04
C1, 3, 5
BV20, 23, V22
E70, 71, 74, 77
RV10, 13, 21, 23, 14
W1, 2, 3, 4, 5, 7, 8
YG21, 23, 13, 17
V12, 15, 17

Jennifer Dove’s Copic Boot Camp

It’s time to jump back and create the iconic post of “what I colored at boot camp” and show off all the things I did. These, of course, were all done using Copic markers. Jennifer’s Boot Camp is amazing and great friends too – shout out to everyone I was sitting next to during the camp and at lunch day after day: Kellie, Karen F, Wendy, Cathy T, Therese, Meenu, Taya, Cathy R, Janice W, Nan, Ginger, Charlene, Mags and Luigi. Thank you to all the helpers and it was so much fun getting to know you all: Patty, Cassandra, Ellie and Becky. Also thank you to all the sponsors. Thank you Jennifer for everything.

Elephant of Surprise by Heffy Doodle
Thankful Owl and It’s Owl Good by Technique Tuesday
Gnomey Drew by Make it Crafty
Wonder Moustache by Twistoon
Puppy Love (with my third addition above) by Picket Fence Studios
Polka Dot Pals Renata by Barbara Sproatmeyer
Vintage Artichoke by Concord & 9th (with some extra details by me)

Polka Dot Pals Syeda with Gnome Marci

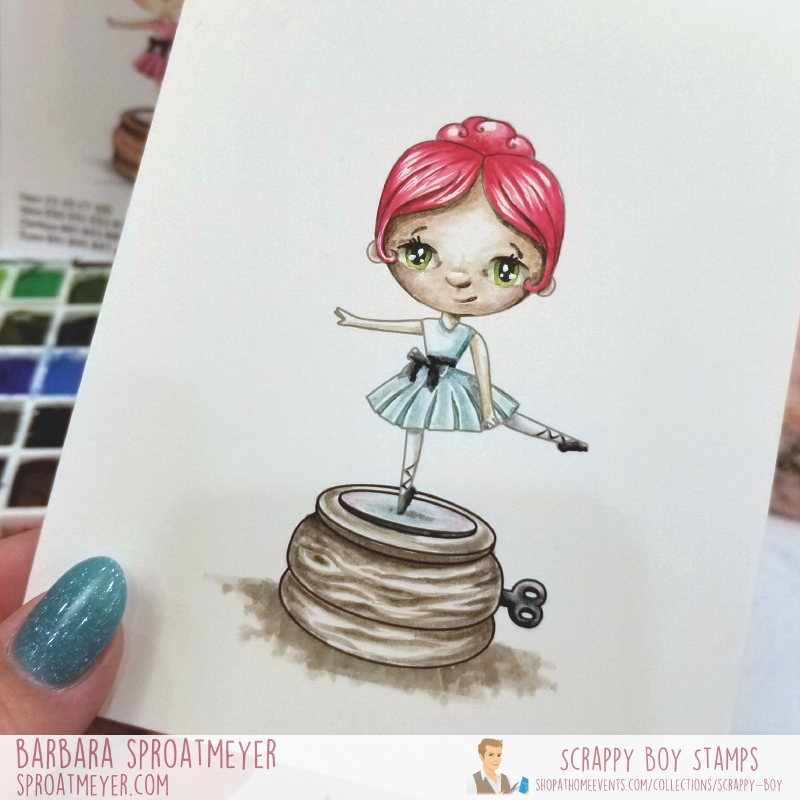
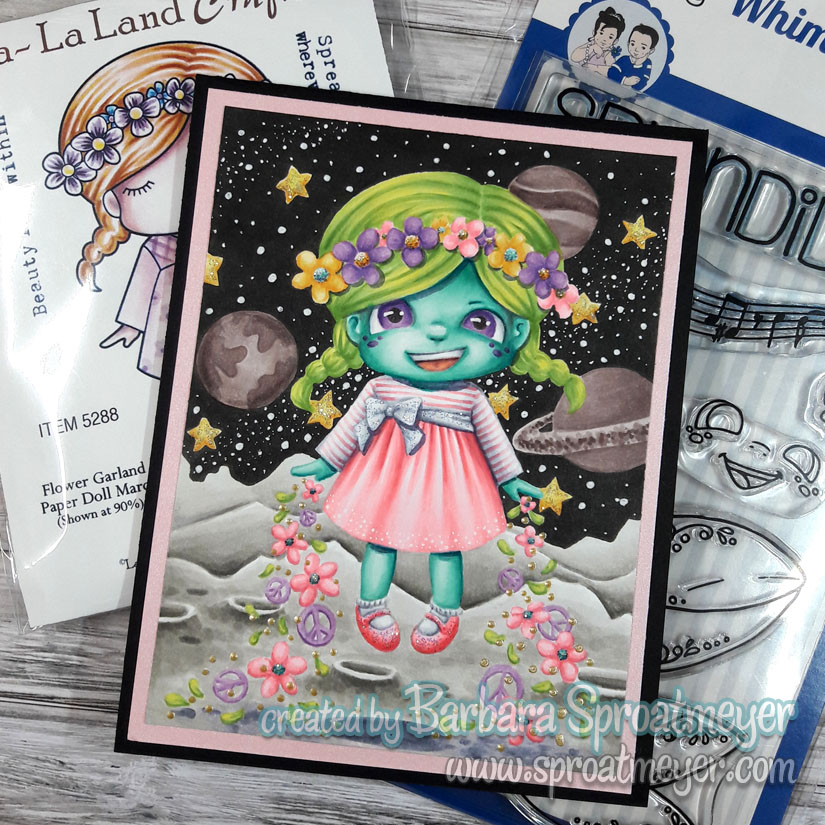
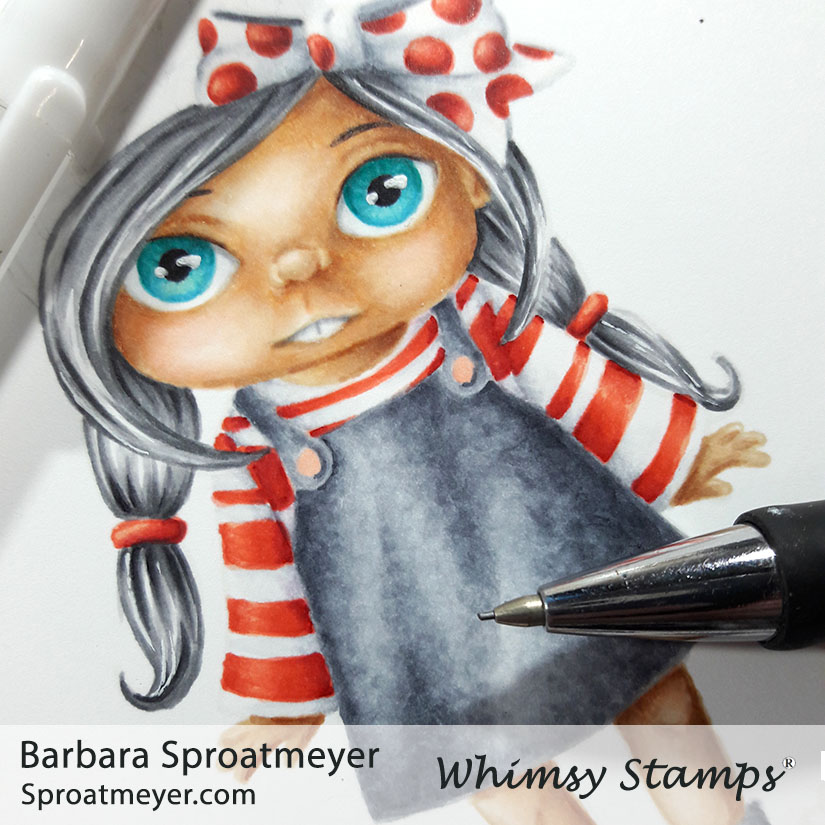
I had some fun over the winter break while the kids were out of school and wanted to play around with the faces from the Polka Dot Pals sets (clear stamps from Whimsy Stamps) to see how they would work with other stamps. In the past, I’ve stamped a face on a Magnolia Tilda stamp, Make it Crafty Mushrooms and a DoveArt Hot Sip mug. Now I’ve stamped a face on La-La Land Crafts Gnome Marci and I think she’s adorable.

To get this look, I first stamped Gnome Marci with a light color ink using a stamp press. Then I stamped the face on top using the same color but stamping it one more time to make it darker. This allowed me to do a no-line color while still seeing both faces – however, with the Polka Dot Pals face darker, I was able to ignore the Gnome Marci face when coloring.

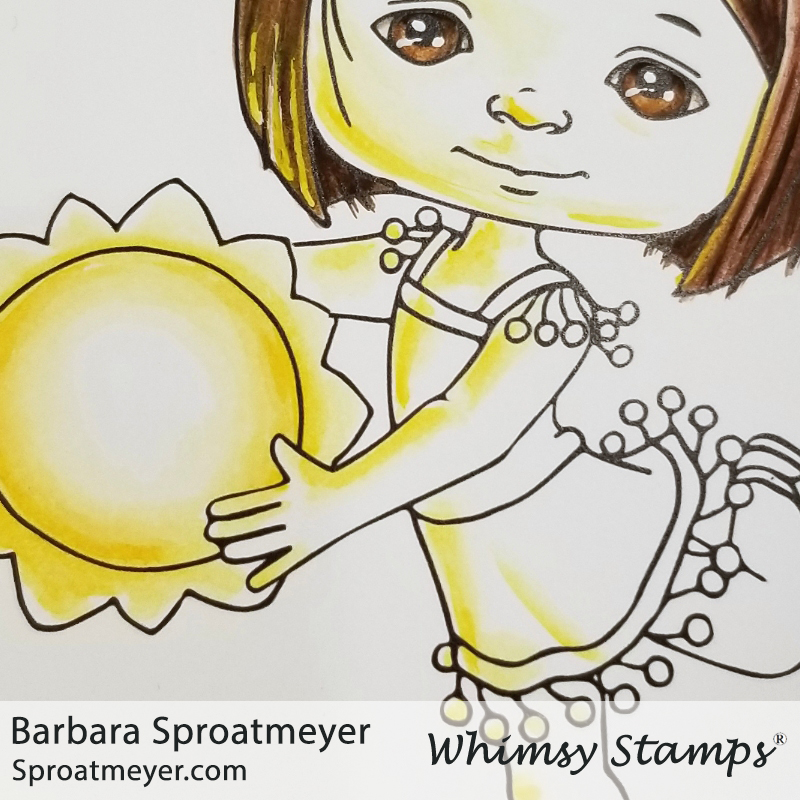
It was interesting to me to see that the faces were generally the same size. Seeing this tells me that the Polka Dot Pals faces could be used on all the La-La Land Marci and Luka stamps, perhaps more. Tip: In looking at the above image, you can see that the pupil from Marci doesn’t match up with the eyes from Syeda. So when coloring, completely color the iris from Syeda with your color choice before coloring in the pupil. This will help you get the pupil centered.

I also stamped the head bow accessory from the Polka Dot Pals Syeda set and then penciled in some knitting guidelines on her hat which would be erased prior to coloring.

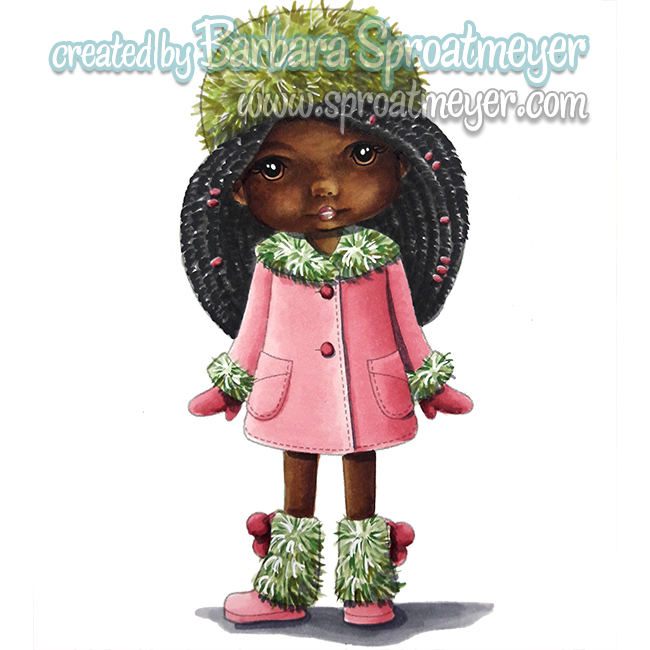
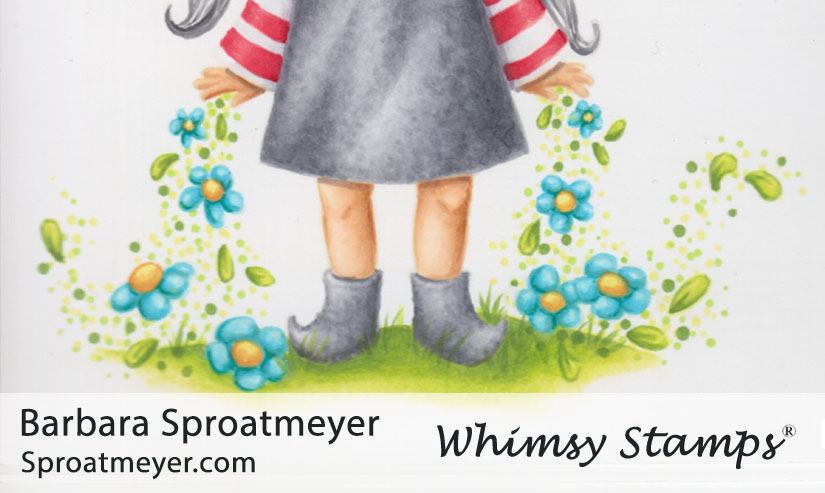
I usually start coloring the face first then work on the larger sections. For this girl, I wanted to go with a Swedish Tomte which is a mischievous domestic creature responsible for the protection and welfare of the farmstead and its buildings. They are usually dressed in gray with a bright red hat and have gray or white hair.

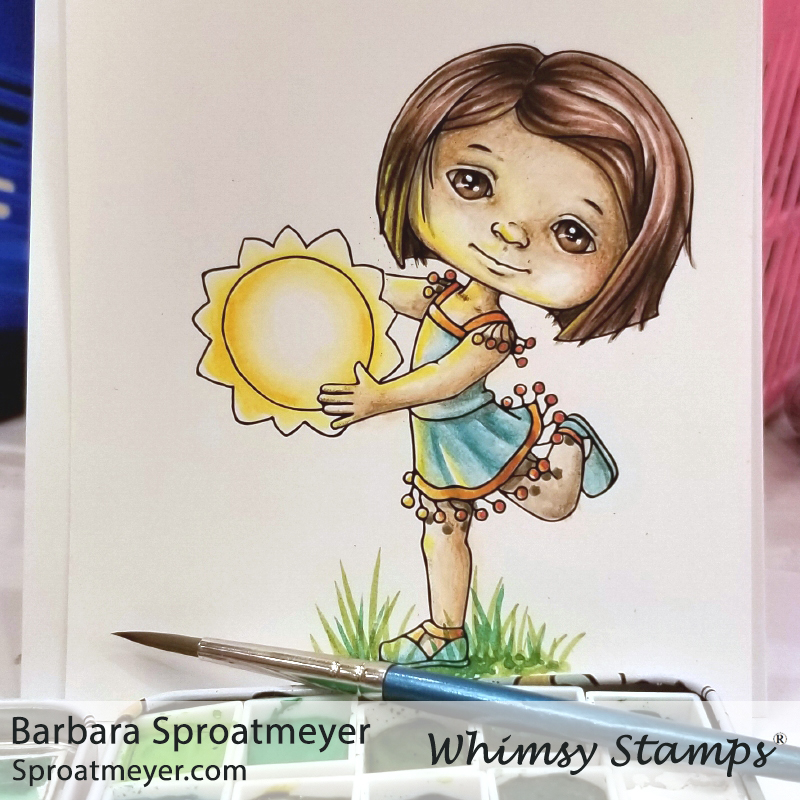
When finished coloring Gnome Marci, I thought the eyes stood out more than I wanted so I needed to introduce more turquoise to the image. The Polka Dot Pals Syeda set came with flowers too so I added those and began to color but it just wasn’t enough. Plus with Gnome Marci’s hands out like that, I quickly thought of Iron Man and with two and two together, that’s how she got her flower powers.

I hope this was inspiring for you to experiment with the Polka Dot Pal faces – what can you add them to?

Copic Markers:
R12, E0000, 30, 31, 33, 35, 47
N0, 2, 4, 6, 8
B00, 02, 49, 57
C1, 3, 5, 7
R12, 14, 24, 29, 39, 27
Y11, YR23, 24
YG17, 21, 23, 25

Stamps Used:
Polka Dot Pals Syeda clear stamp
Gnome Marci rubber stamp

Skeleton Luka

It’s October and that means the scary images are out and ready to be colored!  This project features Skeleton Luka from La La Land Crafts combined with images from Make it Crafty (Egyptian Chair, Egyptian Vase #1 and Egyptian Vase #4) to create this spooky scene.  Looks like the LLLC Customer Gallery is gone but if it comes back up then I’ll enter this into the mix.

The face was directly inspired by Jennifer‘s amazing skeleton image she colors with another Make it Crafty image – one, that I’m proud so say, that I own!  Eeek!  Jennifer put it in an awesome frame and I’ve got it out for the season – it’s amazing!  (If she doesn’t post pictures soon then I might leak a few of my own.  LOL)

One of the challenges at Make it Colourful this month is to color eyes and so this one, though red and yellow, is one of my attempts at doing realistic eyes.  I goofed on the highlights and should have kept the white parts the same on both eyes instead of mirroring it – but hay, learn and live.  😀

I’d like to enter this into the following challenges:
Stamp and Create October Challenge – Halloween or Thanksgiving
(I remembered the flat part but didn’t see the A2 size until now)
Cards in Envy Challenge – Now That’s Scary! (Just for fun only)