I tried out a bit of retail therapy this week and ended up with the new Spectrum Noir Aqua markers on my desk. Anyone who knows me would already guess that I bought the whole set! Just because I’m methodical about my coloring rainbows… as you can see with my custom color chart. This was my third attempt and I but finally came up with one that I could live with.
Now that the collection is complete and my color chart is sorted out, I need to figure out how to use them. Easy-peasy, right? Wow, was I wrong. Looks like I need to figure out the right kind of paper to use. So far I’ve tried five types…
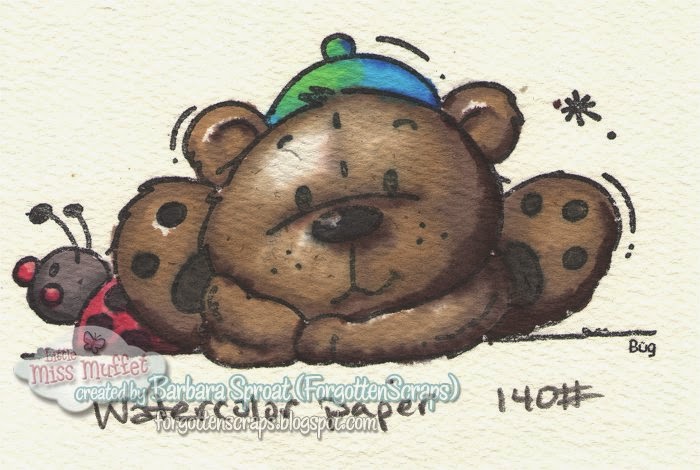
Take I – Watercolor Paper 140#. First I tried watercolor paper but it was so absorbent that it sucked the ink up so fast that I couldn’t reactivate it with water. Even tried putting water down first but then I started to get a crystallized effect as the ink quickly spread through the paper. I still wasn’t able to blend afterwards with a brush. However, marker on top of marker did ok as long as the color were close – for example the darker brown wouldn’t mix with the light brown but the two light browns would mix with each other.
Take II – Georgia Pacific White 110#. Next I tried using regular card paper from Walmart. However, there was even less of a chance of blending on this paper no matter what I did. The paper soon warped and disintegrated.
Take III – Curious Metallic Cryogen White 89#. This time I grabbed something that I knew could hold a lot of ink which is what I also use for my Copic markers. I was able to layer color on color multiple times, however, I couldn’t reactivate the inks with water. As long as I was using more marker then I could push the colors around and blend more. Still not the watercolor effect I was looking for and there aren’t that many light colors to make this work for all images.
Take IV – Gina K. Pure Luxury Pure White 120#. Next I brought out the heavy guns and tried a really thick card paper. I could layer as much as I wanted on this paper but blending was difficult. Also any water I added was thwarted by the paper as it sucked it up. Although the bonus this paper had was it didn’t matter how wet it got, the inks wouldn’t bleed outside of their designated zones.
Take V – Semi-Gloss Card. As a final attempt I decided to try a semi-gloss card paper. The only thing I had handy was a black and white dragon bookmark. When attempting to use the brush and watercolor brush on the clouds, it wouldn’t move around and I ended up wiping away most of it. However, just a whim, I tried the fine point and started coloring the dragons. I was surprised to see that the fine point on the semi-gloss paper would actually blend! Not the watercolor effect I was looking for but I was at least able to blend satisfactorily.
I have no idea what I’m going to try next but perhaps some more retail therapy might be involved. Stay tuned and maybe the next project will be successful.