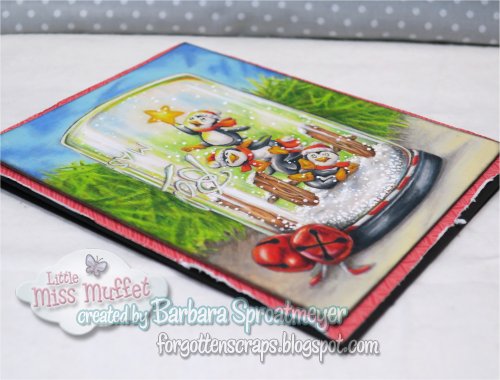
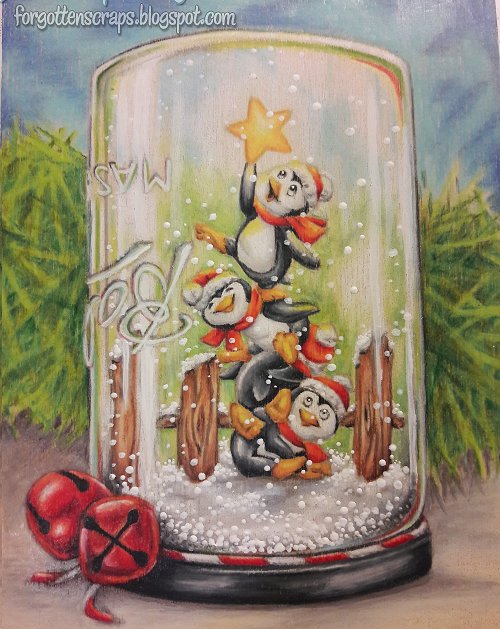
Many of you have seen this already but now here’s all the details plus a ton of pictures. This image was inspired by the coloring challenge with Zoe and Jennifer to color a snow globe. Other than using markers, pencils and white, the challenge was open but the idea was to study the way items reflect in the globe. I decided to go with a mason jar instead of a traditional globe but the challenge was still there. Here’s the end result…
For this project, I used the following rubber stamps – and how I used them you’ll find below:
Art Impressions Stackers Penguins
And newly created direct from this challenge, and special request by a fan, you’ll find the
Mason Jar Snow Globe digital from Little Miss Muffet Stamps.
The coloring medium was Prismacolor Pencils on
Balsa Wood. The Balsa wood is soft and has a lot of texture which makes it smooth to color on. When you start coloring the first couple of layers, make sure they are light and don’t press hard. Because the wood is soft, it’s easy to make a valley which will be difficult color around. With each layer of color, you can press a little harder – by time you’re to the end, you can easily press and create smooth blending.
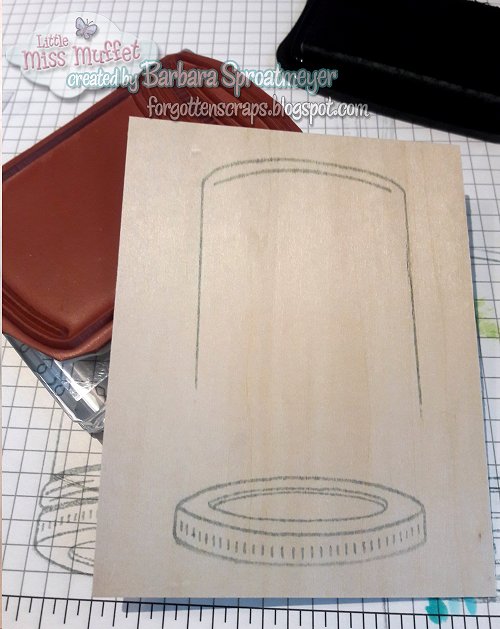
STEP 1: My first step was to stamp the Mason Jar twice so that I could create it upside down. The original jar’s lid has the perspective of being on top so I couldn’t just flip the jar around. I first stamped the bottom then inked part of the top and stamped it under the jar.
(Note: you can click on the image to see a larger version.)
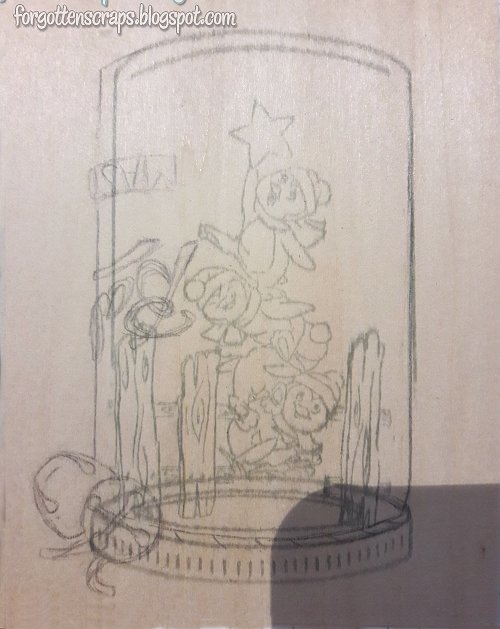
STEP 2: Next, I inked part of the Stackers Penguins to include just the top four penguins. Then I used the Spring Fence and stamped a portion of it on either side. I didn’t bother with masking and about how messy it was going to look because I knew the pencils would cover any lines I didn’t want.
(Note: you can click on the image to see a larger version.)
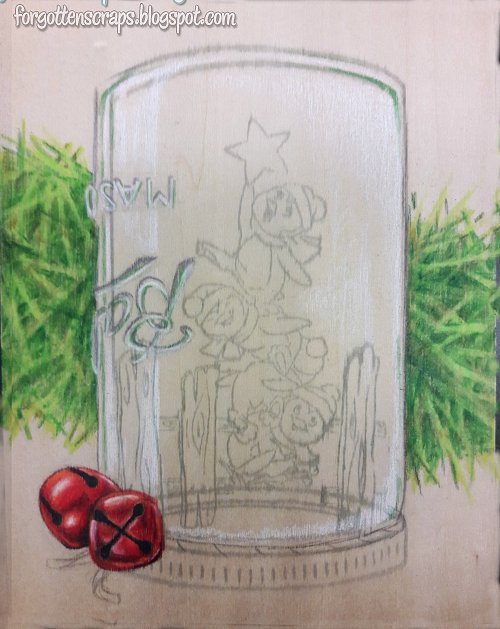
STEP 3: If just the jar wasn’t enough, I sketched in some elements too! The words Ball Mason on the partially on the jar and the twine and jingle bells around the lid. This will help me bring in some color from outside of the snow globe. This will be the challenging part to figure out how those colors will reflect in the jar.
(Note: you can click on the image to see a larger version.)
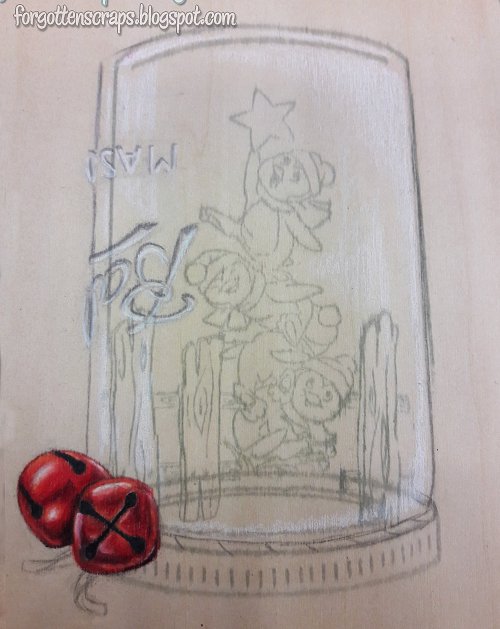
STEP 4: I started with the bells because they were calling to me and often red it one of the colors that can be daunting. And it helped me set the tone for the rest of the image. I then used white to help fill in where I wanted the highlighted ares to be on the surface of the jar.
(Note: you can click on the image to see a larger version.)
STEP 5: And then… crazy enough, if the challenge wasn’t hard enough, I threw in a background. These are suppose to be pine needles like a wreath or something back in the distance and sort of blurry.
(Note: you can click on the image to see a larger version.)
STEP 6: I then brought in some of the green to reflect on the jar and around the edges. Plus in the background I added light green. I didn’t add any details showing through the jar because it would be distorted from the liquid.
(Note: you can click on the image to see a larger version.)
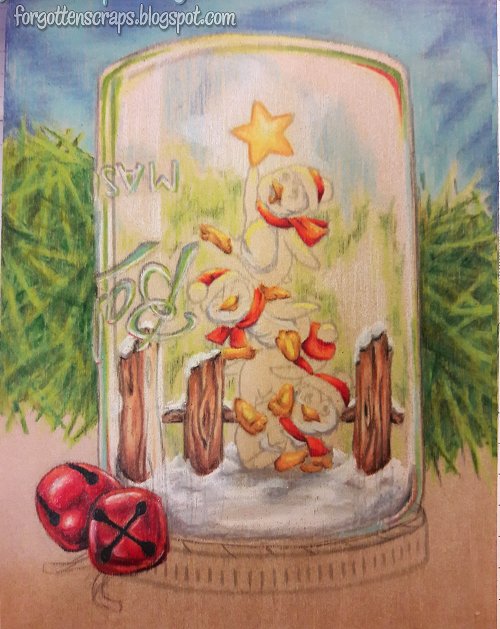
STEP 7: Sorry about jumping on this step – sometimes I get carried away and forget to take a photo! Here I added yellow to the star plus the highlights on the penguin. I colored the fence and added snow around the base and tops of the fence. I then colored the penguins’ feet and noses. Lastly I started on the scarves and hats. Each color, I added a little of it to the jar edges and to the jar’s lettering. I know I really jumped – because I did the blue background portion as well.
(Note: you can click on the image to see a larger version.)
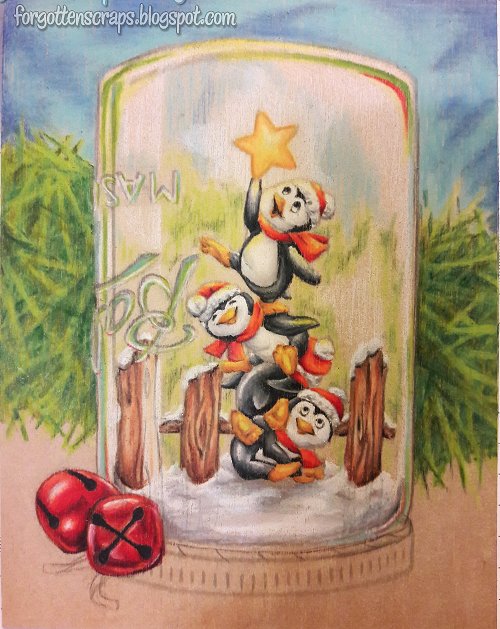
STEP 8: Below I finished the hats with white trim and then the penguins in black and white. I thought I had too much color in the jar’s wording so I tried to add some more white back in.
(Note: you can click on the image to see a larger version.)
STEP 9: On this step, I colored the twine and the jar’s lid. At this point, I feel it starting to come together but I’m still struggling with the jar’s reflections. I’m not sure how all these colors are going to reflect but I kept going.
(Note: you can click on the image to see a larger version.)
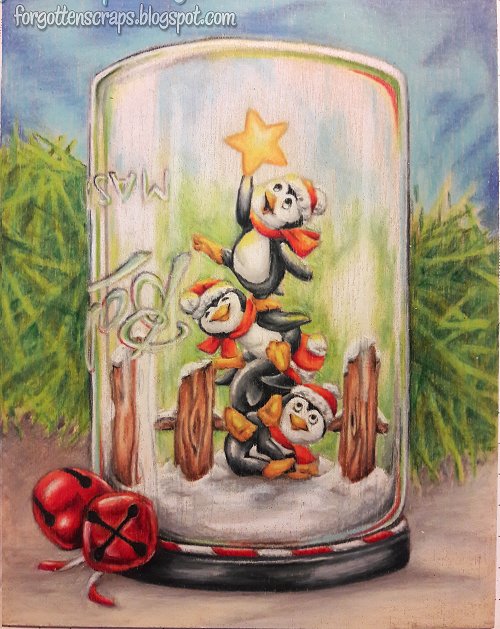
STEP 10: I added ground and shadows to the ground. Then I started to blend the white in the jar. I also blended around the edges of the jar and add some more white and color in areas. I also added more gray shadows around the base. This is the last of the pencils.
(Note: you can click on the image to see a larger version.)
STEP 11: For the snow I used, Liquitex Gesso paint. This was to create the snow flakes and also give my white areas the extra highlights. The Gesso white was much brighter than the pencils so it helped. I added it to the jar’s wording plus the streaks of white reflecting on the jar.
(Note: you can click on the image to see a larger version.)
STEP 12: After the Gesso dried, I used the Copic T4 and T2 to add some shadows. It’s a bit risky to get the markers dirty but it was just what I needed. This is where shaded some of the snow flakes around the bottom, just on the outer sides. I also added a little shadow behind the bells, twine and lid.
(Note: you can click on the image to see a larger version.)
The last step is to make a card, of course. I kept it simple since the Balsa wood canvas was already very large and I didn’t want the card to be gigantic. Hope you like it and feel free to ask me any questions.