Easy Mini Albums

A new linking challenge at Little Miss Muffet Stamps today – hop on over and link up one of your projects from today in the Anything Goes Challenge!

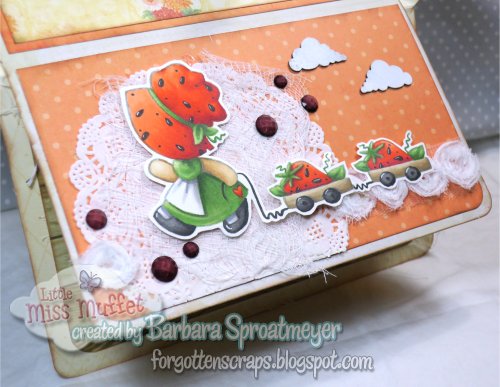
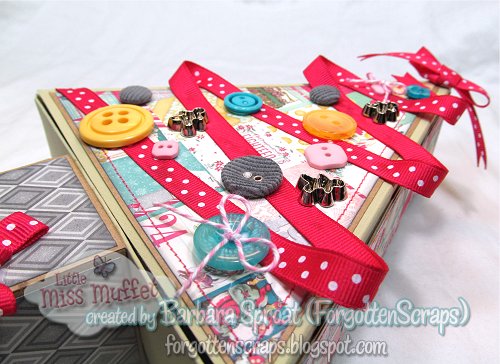
My project uses the Easy Mini Albums booklet to create this envelope gift. This is the outside which features a pocket on the side for a personal note. The image I used is From Me To You by Whimsy.

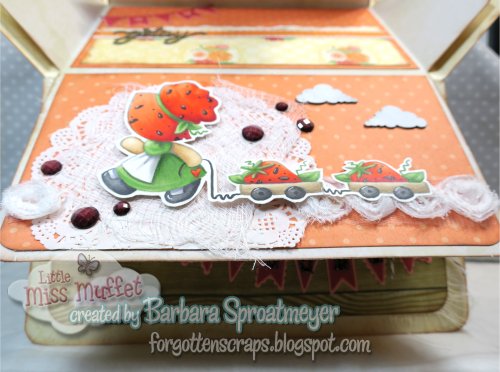
When it opens from the back, this is what it looks like… and another envelope to follow.  On the bottom panel I used the Party Banner metal die from Little Miss Muffet Stamps and the words are chipboard embellishments from Make it Crafty that have been painted black then covered with Sparkles glitter gel.

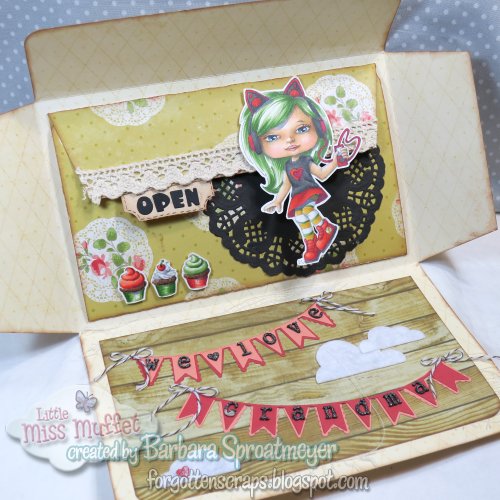
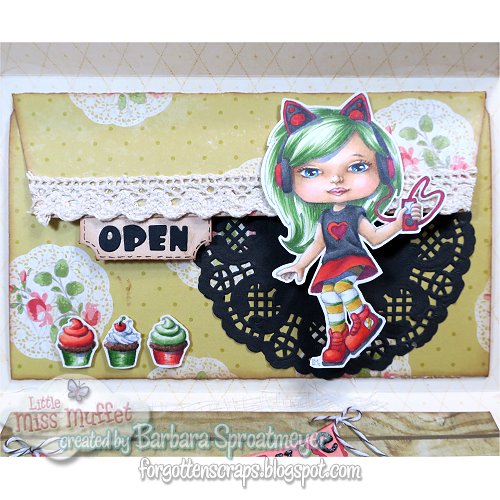
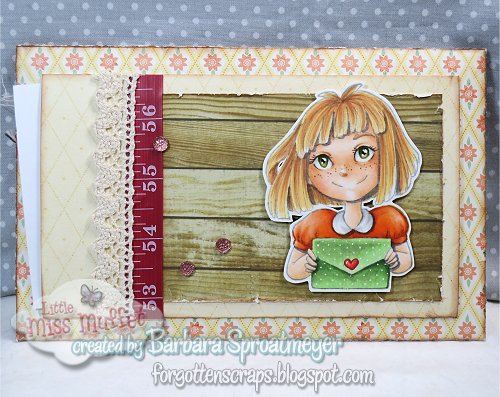
Looking at the center part of this panel, the nested envelope part, I’ve used Polka Dot Pals Tanzen rubber stamp with the Polka Dot Pals Add-on Faces. The cupcake are Cupcakes ‘n Books from Little Miss Muffet Stamps as well.

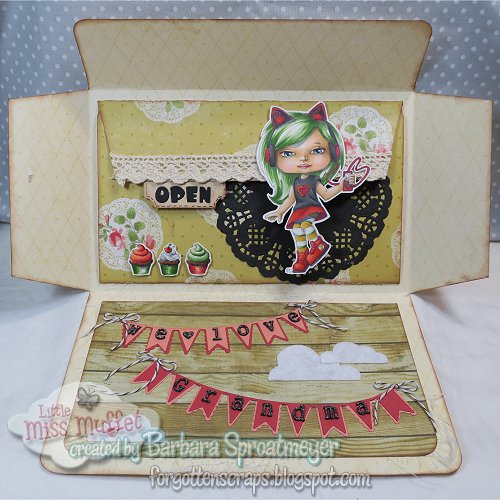
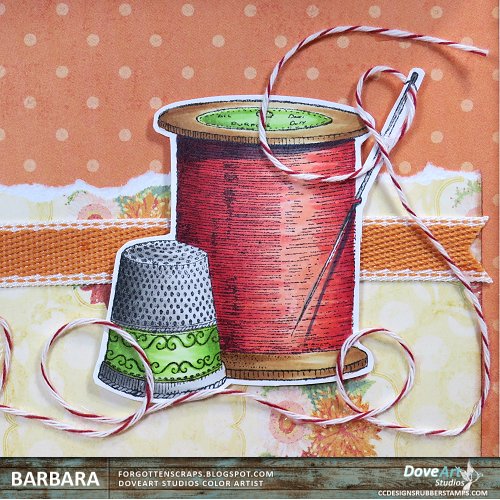
This last envelop reveals the inside.  In the center, I also used the Party Banner metal die plus the Needle and Thread from DoveArt Studios.  The sentiment is more chipboard embellishments from Make it Crafty.

When I cut around the needle, I cut off the thread part instead of fussy cutting around it.  Then I actually threaded the needle with Baker’s twine and glued it artistically to the background.  I thought that added a fun element.  I suppose I should have added a shadows with the marker as well so I’ll go back and do that before I give it away. 😀

On the bottom panel, I also used the Cupcakes ‘n Books stamp to replace one of the strawberries in the wagon. The girl is Sunbonnet Strawberry Wagon and I had stamped two wagons to create a train instead of one.  Now this project is nearly complete – I just need to write a letter to tuck into the front then I’m done.  Yay!

Strawberry Sunbonnet Wagon

I’ve added to my envelop project with another image on an inside flap. This one is Strawberry Sunbonnet Wagon rubber stamp from LMMS. I’ve stamped it twice to get the double wagon. You can see the colors I used below.  This project was started so long ago that I’ve already expended the first deadline but have set another for mid September and hope to make that one.  LOL

For this panel, I also added some Make it Craft chipboard embellishments, but also lacy ribbon, gems, doily and cheesecloth, as you can plainly see all that.  😀

There’s a new Anything Goes Challenge that opened up today – you can pop over and add your favorite creation from this week.

Here are the Copic markers I used on Strawberry Sunbonnet Wagon:
E30, 31, 34
YR02, 09, R37
G82, 24, YG17, 67
E42, 43, 44
0, BV23 
T2, 4, 6, 9

I would like to share this in the following challenges:

Polka Dot Pals Tanzen

There’s a new release today at Little Miss Muffet Stamps and one of them includes a rubber stamp – Polka Dot Pals Tanzen!  I’ve also used one of the new Polka Dot Pals Add-on Faces which will be released in full later this summer.  I also used the cupcakes from Cupcakes ‘n Books for some details on the side.

Update: The Polka Dot Pals Add-on Faces are now available in the shop. 

For my project, I’ve followed the instructions from the Easy Mini Albums craft book by Annie’s which includes 16 pages of great inspiration and diagrams.  This is the larger envelope one and I’m currently customizing the flaps.  The “OPEN” sentiment was created using the Cutters Mini Alpha and Numbers die.

Here you can see a sneak of one of the inside outer panels which I’ve used Party Banner Metal Die and Make it Crafty Alphabet Chipboard for the wording.

Polka Dot Pals Tanzen is one of my favorites and is so fun to color with the wild hair.  This face is one I’ve been curious to see how it changes after coloring.  With it uncolored, it looks like an angry expression but that completely changes with the color.  I love it!

Hope you enjoy this little bit of inspiration.  
Here are the Copic colors I used on this panel:
E25, 47, 49
W8, T2, 4, 5, 6, 7
B91, 93, 97, 99
G24, 82, YG67
R11, E00, 31, 34, R02, E04, T2, 1, E47
R39, 37, 08, 05, 02
YR23, 24, Y21
BV23

Christmas Tree Surprise Box

I managed to create another Christmas Tree Surprise Box using the instructions from Annie’s Paper Crafts.  This one I made with a more masculine theme for my neighbors.  I didn’t think guys would want something too frilly.  Although I’m not sure I can make anything papercraft related without it being a little girlish.

This makes a great gift box and I took a bunch of photos.  My daughter is in the process of finishing hers and I hope to show that off soon.  She has the box put together and now just needs to decorate it.  I’ll keep my fingers crossed. 

This box was a lot easier to make than the last.  Last time I didn’t make any mistakes but I fumbled a little.  This time, I knew what to expect and it was as easy as pie.  LOL.

I thought it would be a perfect treat box so I lined it with tissue paper and filled it with homemade goodies.  Yummy!  I hope you like it and thanks for dropping by today.

Christmas Tree Surprise Box

I added the Christmas Tree Surprise Box instruction booklet to the store, and ever since, I’ve been eager to make one myself.   I even had fun digging into my little button box to adorn the tree. 

This is my first experience creating something from Annie’s Paper Crafts and it was rather enjoyable.  The booklet includes both step-by-step instructions as well as the cutting/folding templates so you can follow whichever your learning preference is.  I chose the templates to follow and my daughter worked on the step-by-step – they both resulted in a tree box.  Surprise that!  LOL. 

I had actually wondered why this named the Christmas Tree Surprise Box but when I showed off this box to my hubby, I soon realized.  Of course, he felt the box was rather obvious.  However, when I showed how the tree trunk was also a box, he was genuinely surprised.  … and that surprised me!  So I guess the box is appropriately named.  LOL