Polka Dot Pals Add-on Faces Tutorial

Welcome! In this tutorial, I’m going to give some tips and tricks on how to add the Polka Dot Pals add-on faces to the Polka Dot Pals.

You’ll find Polka Dot Pals sold at Whimsy Stamps in clear sets with elements and accessories that and interchangeable between sets. So a forward face from one set will work with any of the other forward facing character.

There’s a lot of information here – if you want the reader’s digest then just look at the pictures but if you want the unabridged version like a true die-hard, then stick with me and read the text. 😛

For this tutorial, I used two sets: the character from Polka Dot Pals Khadija and the face from Polka Dot Pals Syeda. Product links shown at the bottom.
First, let’s get to know the characters and elements of the face. I know, you know what an eye and ear look like, but let’s do it for kicks and grins so we’re on the same page when it comes to terminology.

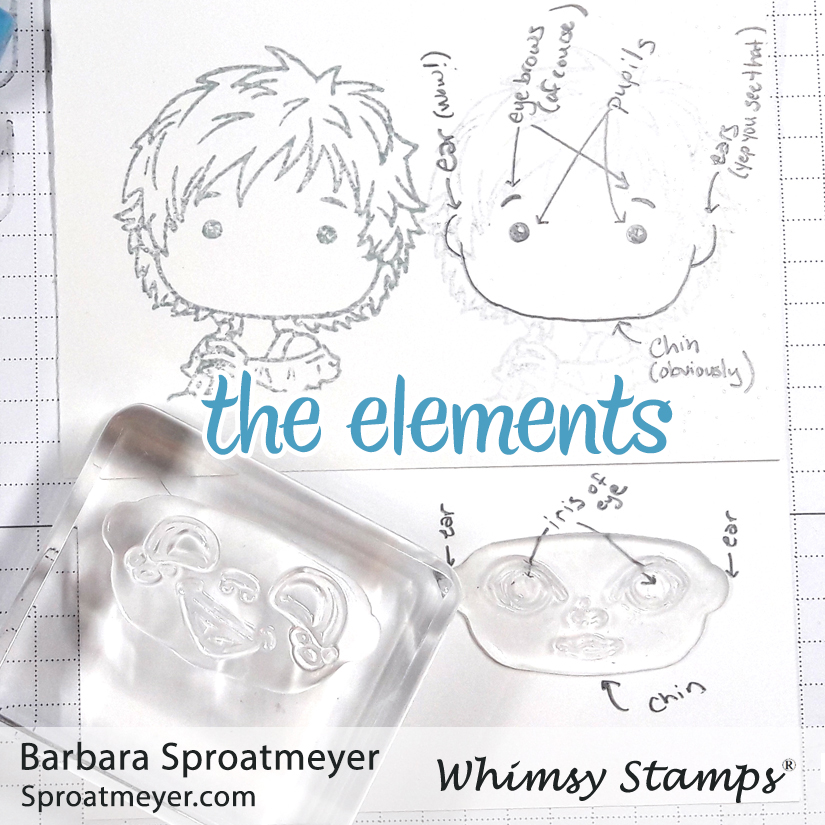
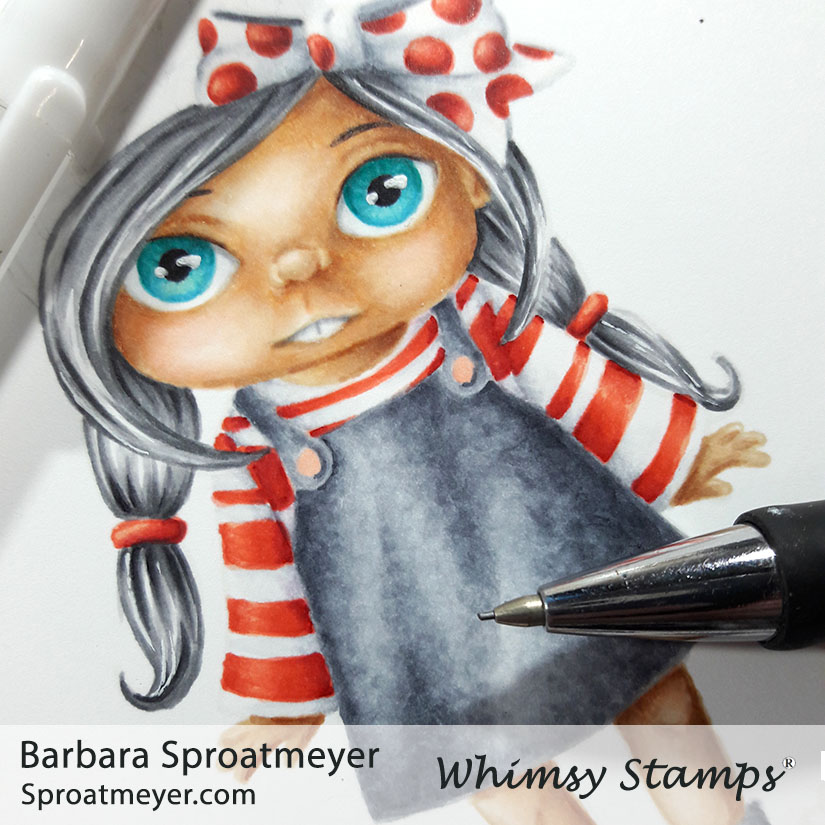
CHIN: The chin is visible on almost every character and is a wide sweeping smile shape. But you’ll also see this same shape on the face’s stamp. The base part that clings to the acrylic block will resemble the same shape which will help with placement. (Here’s an interesting note: sometimes the chin might not match exactly because more stability is needed for a mouth, such as the face shown on the left. When this happens, just ignore the bump and you can focus on the cheeks instead for alignment.)

EARS: Ears are not always visible on the characters especially if they are covered with hair, bows or other accessories. However, when you do see them, they also aid in placement for the same reasons as the chin – the base of the face stamp have those same protruding nubs that will align with the character’s own ears.

EYEBROWS: These are easy to spot but you may find it interesting that they are included with the character and not with the face. Why is that? For those that don’t want to add a face then the pupils and eyebrows are already there to give the character personality without having to add anything on.

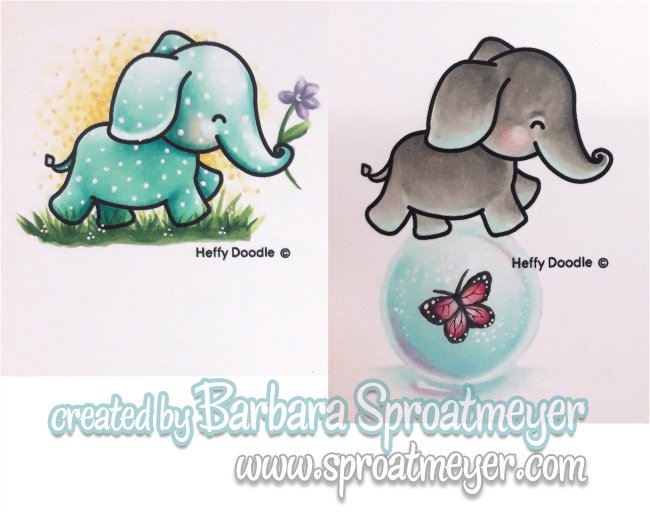
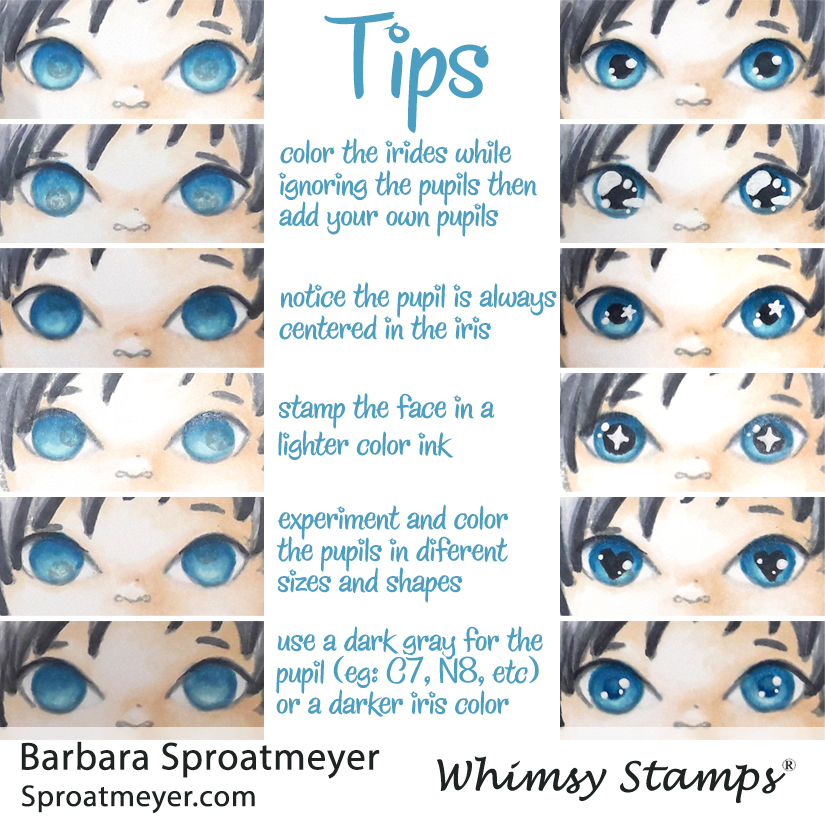
PUPILS: This brings us to the pupils which are the beady-eyed dots on the characters. They are positioned the same on every character so that the faces can be added. However, when not adding a face, those dots represent the character’s eyes. The face is a large blank canvas, per se, so there is enough room to play around and have fun – you can add color to the eyes, stamp a face, or color your own face.

IRIDES: Here’s the tricky part, did you know that the plural or iris (as in eyes) is irides?! I had no idea until this tutorial. Ok, so with the tricky part over, let’s talk about the irides. This is the large open circle on the face’s stamp which would be colored green, blue, brown or whatever color for your character. It’s circular because the pupil is curricular. When stamping, the pupils and irides should be centered with each other – hence the reason for this tutorial.

This step is specifically for those to prefer to eyeball (HA!) the position of the faces, like I do. For each face, I like to practice on my paper pad until I feel comfortable with the results. If this makes you uncomfortable, then using a stamp positioning tool will also help you get that perfect placement you’re looking for. But don’t stress it too much – if the faces are off, you’ll see below there are ways they can still be “saved” and you can “just keep coloring, just keep coloring.”
In this image and the one below, I have stamped a few common outcomes. In the example above, the first one is the desired result where the pupil is centered in the iris. For the other two, they appear to be looking down or up but when colored, it doesn’t exactly look right. Why is that? A quick answer from Wikipedia: in humans, the iris is a circular muscle in the eye, responsible for controlling the diameter and size of the pupil similar to optical aperture. Think of it as camera lenses and how they open and close but the opening part will always be in the center.
In this example, the top two faces have off-centered placement as well so when colored they look a little wonky. But if that’s what you’re going for, then ignore all this. LOL The last one, however, is one of the softest and quickest tips – if you find it frustrating to align the pupils and irides, then just use a cotton swab before stamping the character and remove the pupil. You can color it back in later, as seen below.
Lastly, I wanted to share this with you for two reasons – first on the left you can see these are all the faces from the above examples. I like to stamp my faces in a lighter color so that I can add the depth through color – however, this also allows me to color over the pupil and then later color it in the shape and size of my choosing. On the right, you would hardly notice those same wonky faces when looking at their eyes. The second reason? Just look at those possibilities and how much the pupil and highlights can change the look.

Try Coloring Your Own Faces

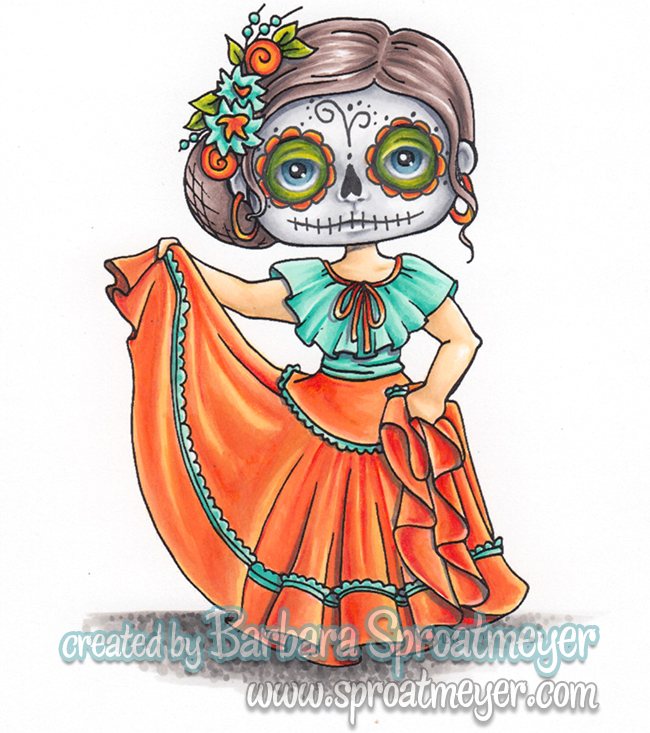
Here’s are some videos to watch where I colored in my own faces without using an add-on stamped face. This is a little more difficult but it also opens up the creativity box because you can color different expressions, animal faces, sugar skulls or clowns, or whatever you can think of.

View the finished project HERE.

Polka Dot Pals Imogen

I can’t believe it’s February already but that’s good because I get to introduce two more Polka Dot Pals that are being released at Whimsy Stamps. That’s two more sets to mix and match! For my project, I’ve used Polka Dot Pals Imogen and combined it with the Mason Jar and the fireflies from Polka Dot Pals Khadija.

I colored the face and added in my own details. Once the girl was finished I colored in the grass mound and added some grass strands. Then I colored the jar, trying to keep in mind that some white would show as a reflection of the jar. At this point, because I stamped in a light color, the fireflies were difficult for me to see but I got the essence of their shapes and colored them in anyway.

The white is important when coloring a jar but it’s also difficult to remember to keep in there. One trick that helps me is to go back in with white as a very last step. It would be better to do it with a paint but all I had at the time was a white gel pen so I used that and also added some details on the clothes and more highlights on the letters.

Here’s a closer details of the face that I colored in. This was the first time I added such details to a side looking face so I was still trying to figure it out. I might possibility have to create a side looking stamp for a future character. Yes?

Mason Jar Rubber Stamp

Colored with Copic Markers

Dragon Pull My Finger

I wanted to show some of my past watercolor attempts which were from a few weeks ago. This one features Dragon Pull My Finger rubber stamp from Whimsy Stamps. I love the images by Dustin Pike and his dragons are so easy to color…even if it is with watercolors.

Colored with Karin Brushmarker Pro watercolors on Craft Perfect cold press 300gsm paper.

I would say I had some difficulty with the watercolors, paper, brush or something. As you can see on the hand and the lamp, I tried to blend too much on the paper and scrubbed the paper away. Overall, it was somewhat frustrating and I wanted it to be more defined. So I pulled out the colored pencils and did some touch up work.

Touch up with Polychromos colored pencils and a white gel pen.

I like this result much better and felt that I salvaged the image. I can still see where the blue brush marker was used to color the sky in the background so I’ve been watching out for that to avoid. In the before and after, I can definitely see a difference on the eyes, tummy and lamp.

Jennifer Dove’s Copic Boot Camp

It’s time to jump back and create the iconic post of “what I colored at boot camp” and show off all the things I did. These, of course, were all done using Copic markers. Jennifer’s Boot Camp is amazing and great friends too – shout out to everyone I was sitting next to during the camp and at lunch day after day: Kellie, Karen F, Wendy, Cathy T, Therese, Meenu, Taya, Cathy R, Janice W, Nan, Ginger, Charlene, Mags and Luigi. Thank you to all the helpers and it was so much fun getting to know you all: Patty, Cassandra, Ellie and Becky. Also thank you to all the sponsors. Thank you Jennifer for everything.

Elephant of Surprise by Heffy Doodle
Thankful Owl and It’s Owl Good by Technique Tuesday
Gnomey Drew by Make it Crafty
Wonder Moustache by Twistoon
Puppy Love (with my third addition above) by Picket Fence Studios
Polka Dot Pals Renata by Barbara Sproatmeyer
Vintage Artichoke by Concord & 9th (with some extra details by me)

Polka Dot Pals Syeda with Gnome Marci

I had some fun over the winter break while the kids were out of school and wanted to play around with the faces from the Polka Dot Pals sets (clear stamps from Whimsy Stamps) to see how they would work with other stamps. In the past, I’ve stamped a face on a Magnolia Tilda stamp, Make it Crafty Mushrooms and a DoveArt Hot Sip mug. Now I’ve stamped a face on La-La Land Crafts Gnome Marci and I think she’s adorable.

To get this look, I first stamped Gnome Marci with a light color ink using a stamp press. Then I stamped the face on top using the same color but stamping it one more time to make it darker. This allowed me to do a no-line color while still seeing both faces – however, with the Polka Dot Pals face darker, I was able to ignore the Gnome Marci face when coloring.

It was interesting to me to see that the faces were generally the same size. Seeing this tells me that the Polka Dot Pals faces could be used on all the La-La Land Marci and Luka stamps, perhaps more. Tip: In looking at the above image, you can see that the pupil from Marci doesn’t match up with the eyes from Syeda. So when coloring, completely color the iris from Syeda with your color choice before coloring in the pupil. This will help you get the pupil centered.

I also stamped the head bow accessory from the Polka Dot Pals Syeda set and then penciled in some knitting guidelines on her hat which would be erased prior to coloring.

I usually start coloring the face first then work on the larger sections. For this girl, I wanted to go with a Swedish Tomte which is a mischievous domestic creature responsible for the protection and welfare of the farmstead and its buildings. They are usually dressed in gray with a bright red hat and have gray or white hair.

When finished coloring Gnome Marci, I thought the eyes stood out more than I wanted so I needed to introduce more turquoise to the image. The Polka Dot Pals Syeda set came with flowers too so I added those and began to color but it just wasn’t enough. Plus with Gnome Marci’s hands out like that, I quickly thought of Iron Man and with two and two together, that’s how she got her flower powers.

I hope this was inspiring for you to experiment with the Polka Dot Pal faces – what can you add them to?

Copic Markers:
R12, E0000, 30, 31, 33, 35, 47
N0, 2, 4, 6, 8
B00, 02, 49, 57
C1, 3, 5, 7
R12, 14, 24, 29, 39, 27
Y11, YR23, 24
YG17, 21, 23, 25

Stamps Used:
Polka Dot Pals Syeda clear stamp
Gnome Marci rubber stamp

Polka Dot Pals Syeda

Today I’m going to share with you an image I colored using the Polka Dot Pals Syeda stamp set available at Whimsy Stamps. When creating the scene, I used the glasses and clouds from the same set but also grabbed a few flowers from Polka Dot Pals Fern.

I like to see a comparison of the image before and after it was colored. I don’t have any progressive coloring photos to add but this will give you an idea on what I started with and how she ended up. The stamps was stamped in a light color for a no-lines coloring look.

She was a fun image to draw as well as the pig. The ears were especially hard to get them the way I wanted them to look – funny it would the the simple ears to cause problems. When coloring this project, I colored the pig with a pink band similar to a Hampshire Pig. For the face of the girl, I stamped the glasses and then colored in my own face instead this time around.

Colored with Copic markers

Stamps:
Polka Dot Pals Syeda
Polka Dot Pals Fern