This one should look familiar – this is Polka Dot Pals Fern and is what I’m currently using as my avatar. This was one of the first images that I released and colored with Whimsy Stamps. I used Polka Dot Pals Syeda for the face.
I’ve brought out Polka Dot Pals Atlas again with an added a puckered-up face from Polka Dot Pals Mason which was released yesterday. I thought sweet flowers and a kiss would be perfect to send someone. But I didn’t expect the creative juices to take over as I changed that kiss into blowing bubble gum. Now that’s one giant bubble!
Polka Dot Pals Atlas has her arms wide open and can hold a variety of thing or giving a great big hug to someone or something. She’s really a fun character to work with.
I colored the bubble first then the rest of the image. I avoided adding any color behind the bubble thinking that the wall of the bubblegum would be thick enough that one really couldn’t see through it. Did it work? I think so but that’s up to you to decide. For the glossy look, I used Nuvo Crystal Drops over the bubble.
New at Whimsy Stamps – Polka Dot Pals digital scenes! Oh yes, you heard that right … digital scenes! Now you can instantly download and color fabulous Polka Dot Pal scenes, like this one. I used Polka Dot Pals Imogen Garden Fairy Scene today. You’ll find this one plus five others to choose from.
I stared my project by selecting the color I wanted to do for the flowers. I was recently reading about the Texas Bluebonnets so my inspiration came from that. Did you know there are pink and purple bluebonnets too? I didn’t know that so that was a fun fact. Anyway, these aren’t bluebonnets but I was still going to color them blue.
The sky was difficult for me and I wasn’t able to get the colors blended very well. So I gave up on that and went with a dotted method. It wasn’t what I wanted but it works. Another thing I tried to do was bring the foreground to focus with all the flowers in the corner. I did this by adding tall strands of grass from the base of the image in both corners then adding some smaller flowers with a white gel pen and liquid pearls.
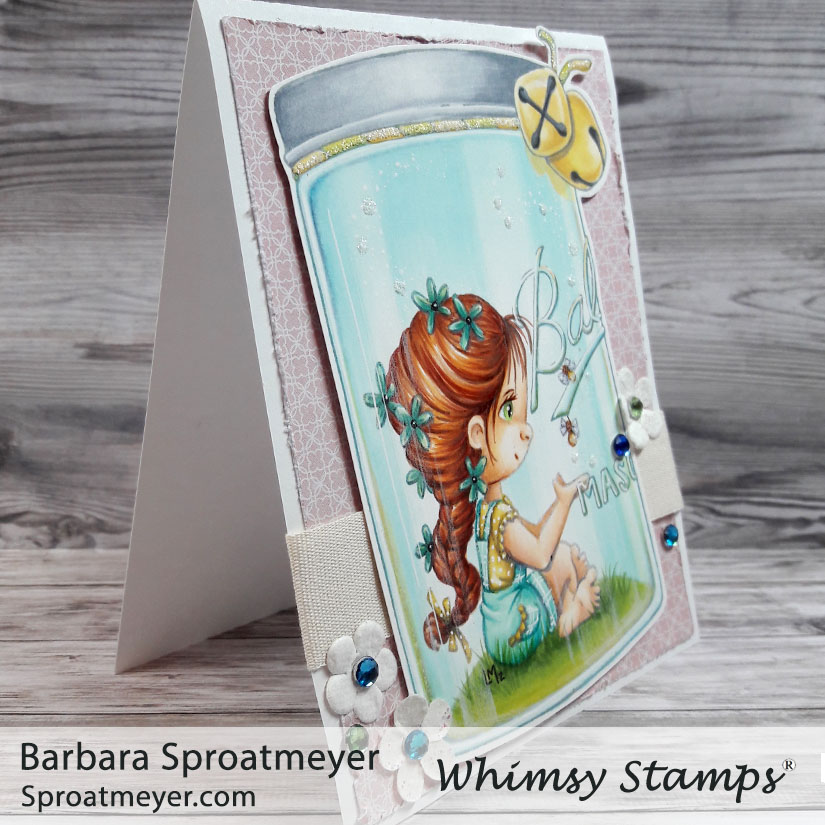
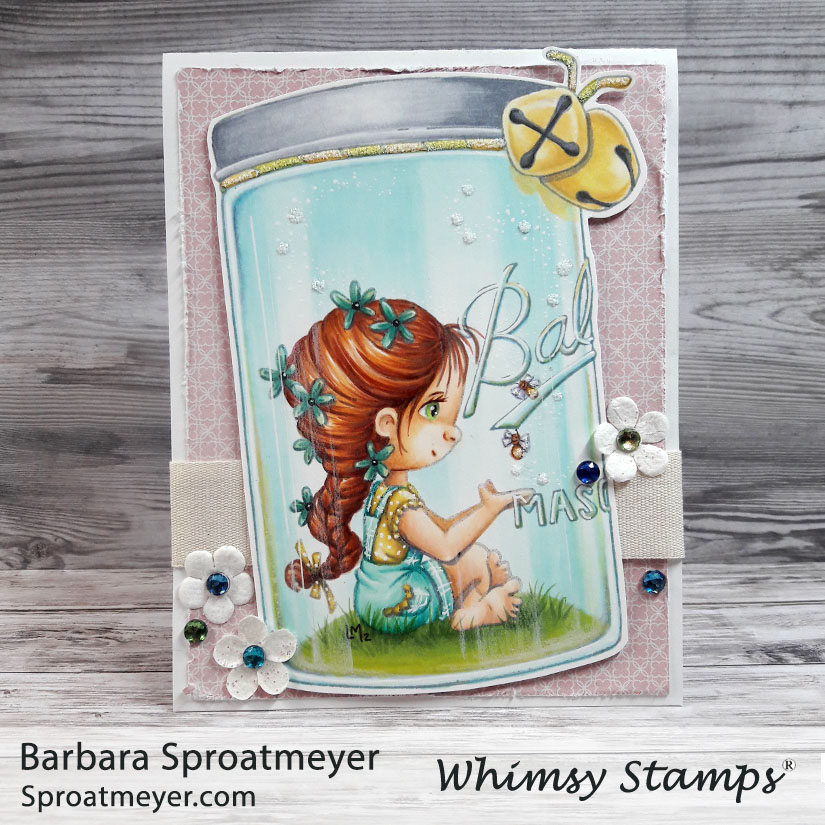
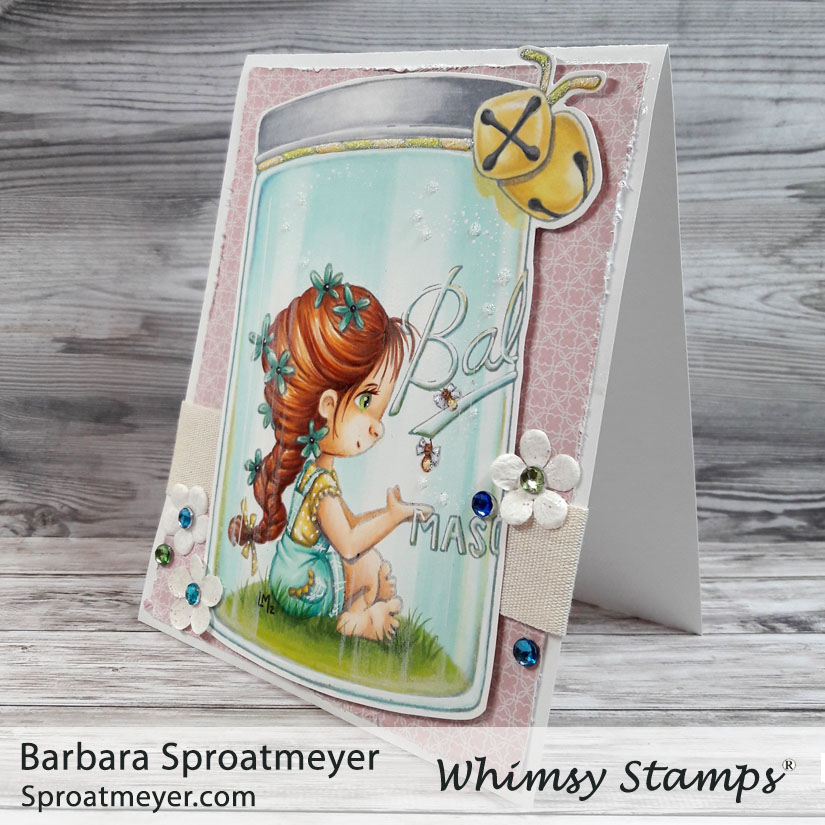
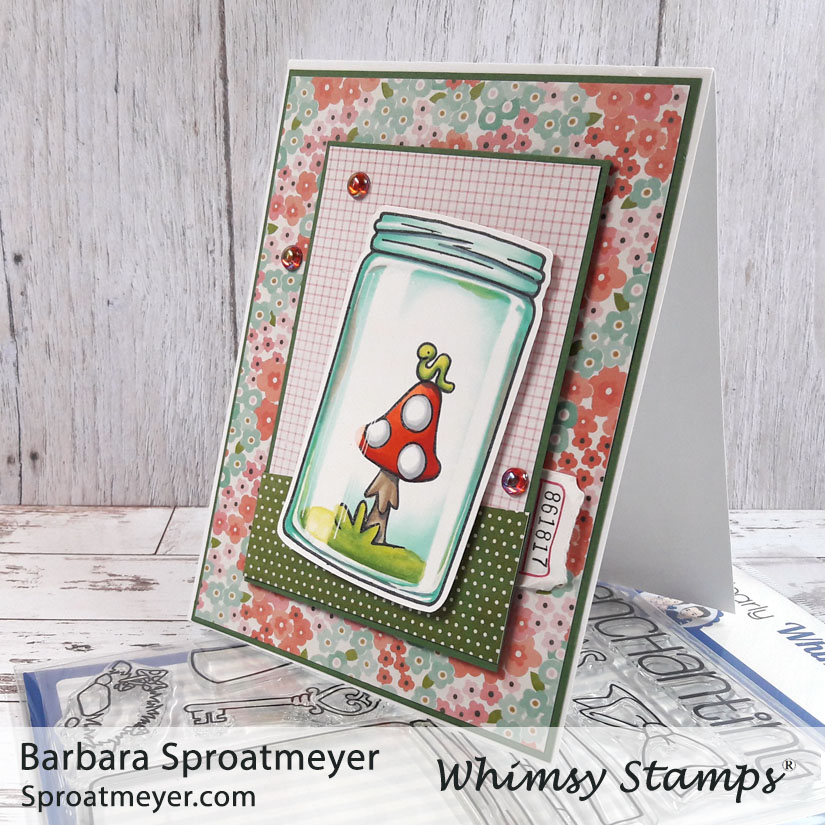
If you’ve been following my work then you’ve probably seen this colored image before. When I colored it, I wasn’t in the capacity to make any cards so it hung on my wall until now. I finally brought it down and put it to use. For this project, I used Polka Dot Pals Imogen and had her sitting in the Mason Jar.
The Mason Jar is so fun to use and put things inside especially this larger one which allows for characters and all sorts of things to be included.
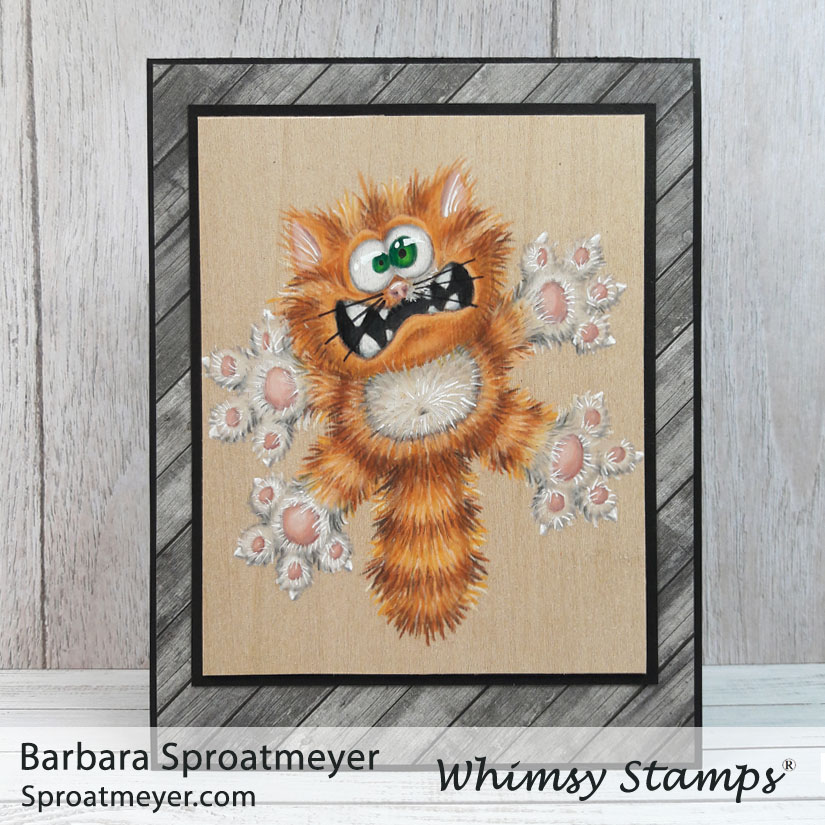
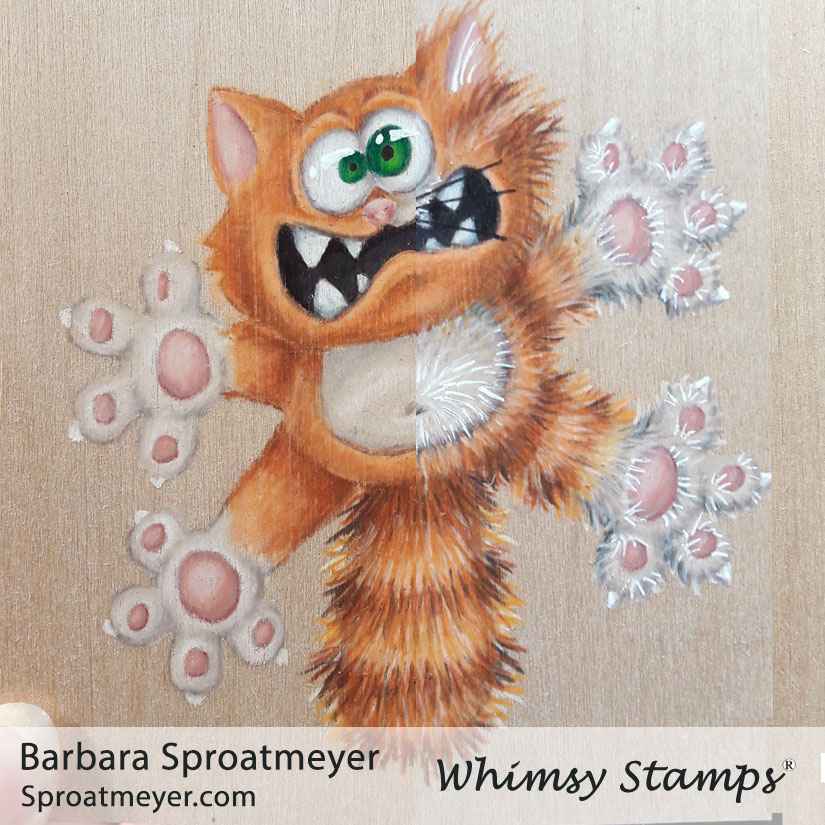
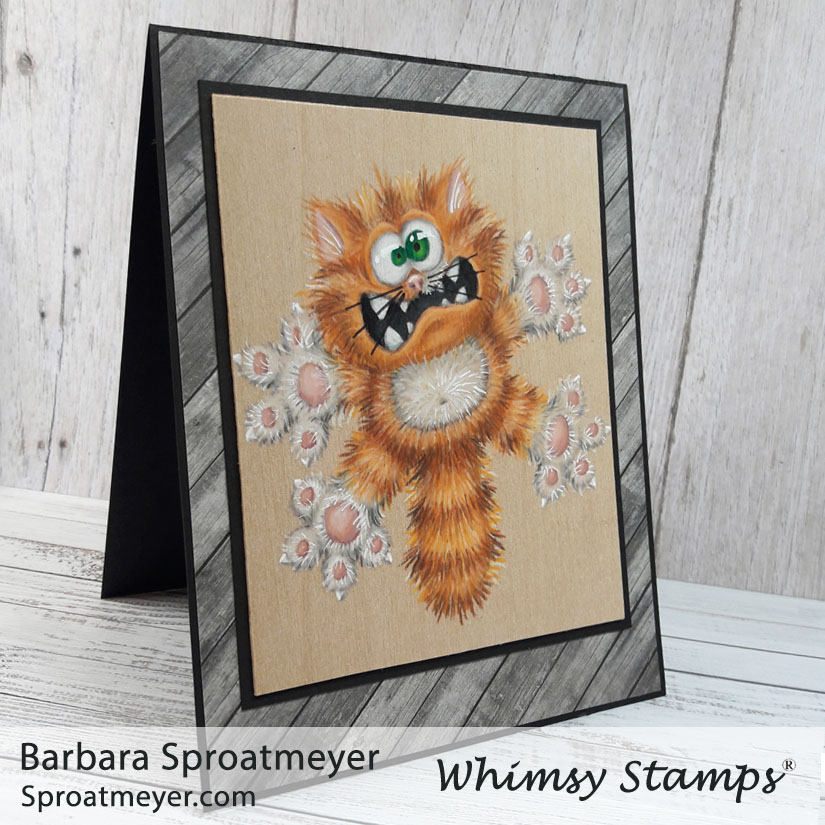
I’ve been studying Annabel Haines‘ style on fur because she does an incredible job. In fact, she does amazing on all her projects with added textures and details. So over the years, I’ve been working up the courage to give it a try. I practice here and there but this was the first time I’ve gone full furry on an image. It was good first attempt but I still have more to learn. The image I used was a retired Scaredy Cat rubber stamp which is now available in the Going Catty clear set by Whimsy Stamps.
Annabel has a fur coloring tutorial which shows step by step on how she colors the fur. It’s a great tutorial and is a lot easier than how I did mine. Plus hers turns out better so take your tips from her. 😀
For those who were looking for an eye tutorial on the dragon… well, here it is. Even though this is with colored pencils and not markers, the idea is the same. (1) First, the image’s eyes are usually white (if stamping on white paper) or you should color them white. (2) Then, since eye are not actually pure white, I add shading around the edges to make them look found. On a person, I add shading going from top down. But on this image, and the dragon image, I really wanted the eyes to bulge so I went with a round shape for shading. (3) Next is to color the irides. I like to have some dark at the top and light nearer the bottom. For this image and the dragon, I chose to have one large and one small. (4) The final step is to add black for the pupils and white for the highlight.
My coloring plan was to lay down a base of color for the cat, which you can see on the left side, then add all the fur texture, which you can see on the right. It worked ok but after having so much color down with the pencils, it was very difficult to get a sharp noticeable line for the fur. In some areas, especially the lightest and white areas, it didn’t look like I was adding any coloring at all. For the white, I decided to add more details with the white gel pen. Did it work? Eh, I’m not sure.
Here is the last jar for this week, using the Atlas Jar Coloring Tutorial posted earlier this week. On this project, I used the Atlas Jar clear set from Whimsy Stamps and used elements from the Polka Dot Pals Imogen set to fill it. What makes this jar unique is the color is different from the rest being a blue glass instead of gray. Also, added color to the sidewalls of the jar give this one a bit more character.