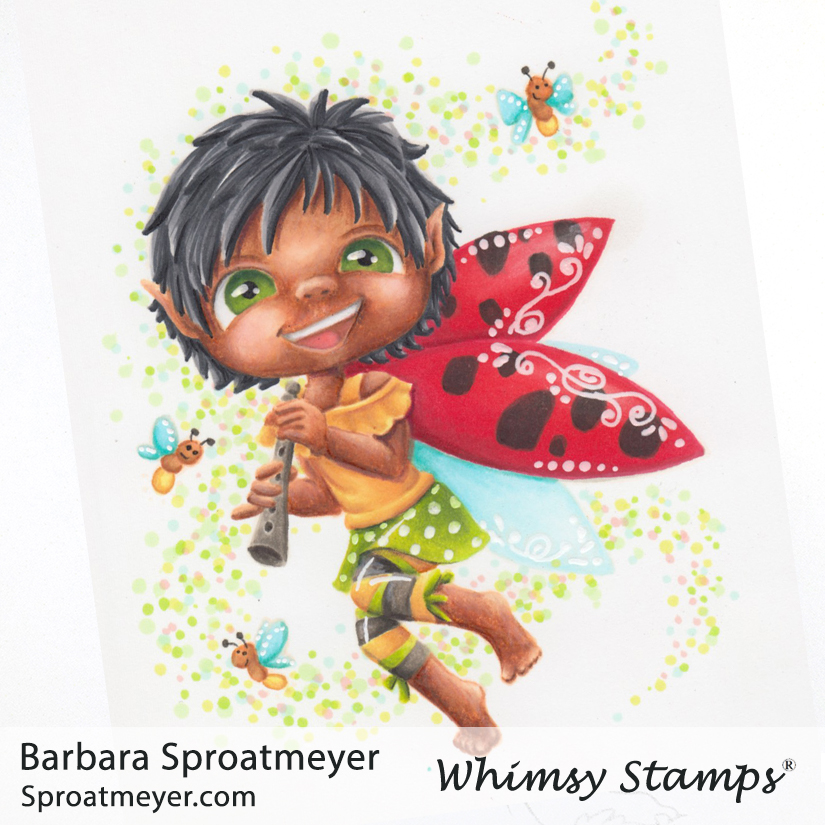
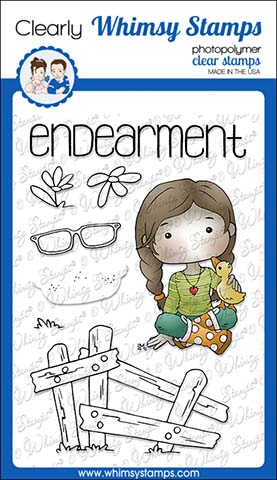
This is a new release at Whimsy Stamps for this month and she is named Polka Dot Pals Khadija. I added the face that was included and used the wings and fireflies together to create this little scene. In addition to using those elements from the set, I added pointy ears through creative color placement and made her more fairy like.
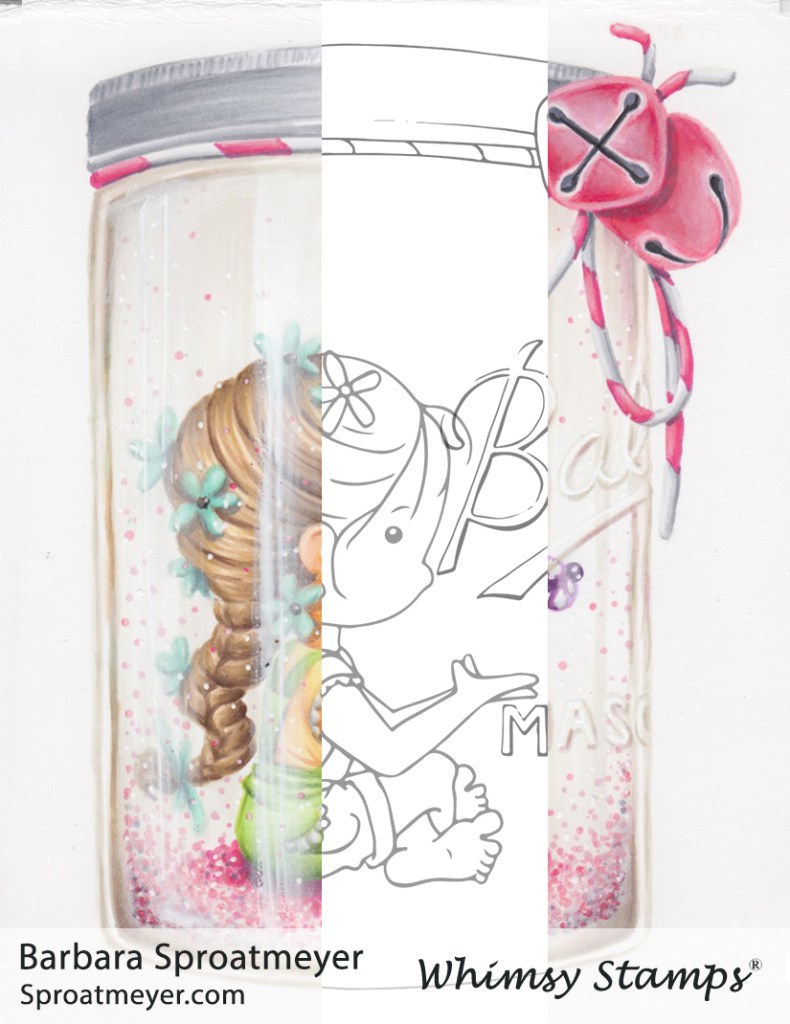
She was colored as a fairy ladybug with the bright red wings. From the top photo, you can see how much this Polka Dot Pal was transformed from the original uncolored state to the finished colored image. I love the Polka Dot Pals, even with those annoying beady eyes, because there are so many possibilities. And once colored (even without a face) they’re still adorable. So pick up your sets at Whimsy Stamps and let’s see what you can color!
This was so cool! In the past, I’ve enjoyed coloring with my Prismacolor pencils on kraft paper but I came across a card by Sandy Allnock that achieved the same thing except with Copic markers. What? How was that done? Turns out, Neenah comes out with a Desert Storm color that works the same way as their white that I like to use. It wasn’t more than two seconds after discovering this that I purchased my own pack to play with.
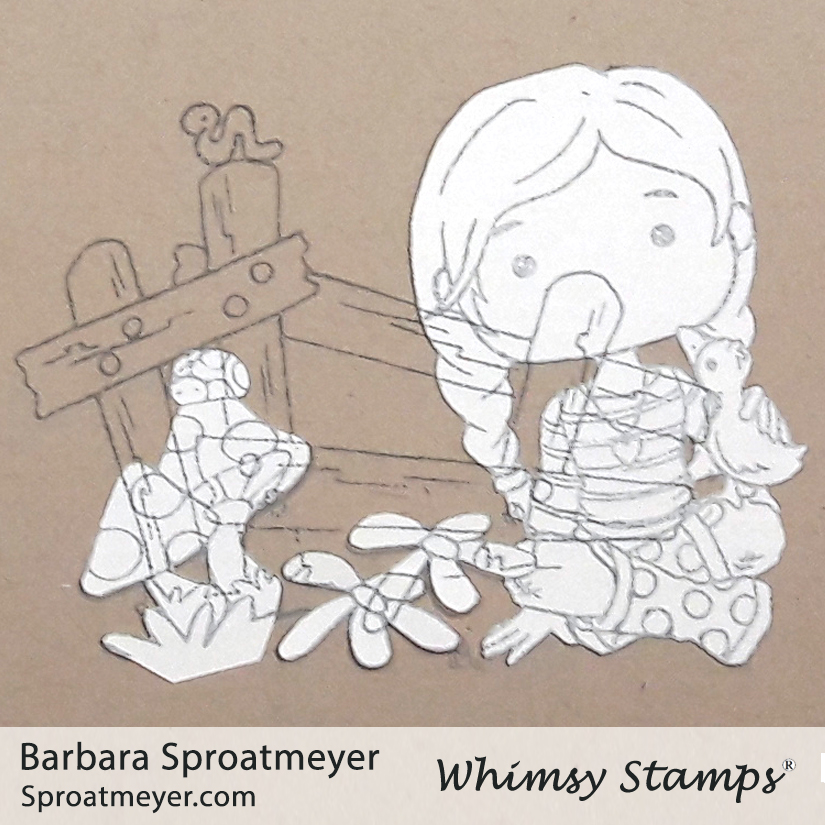
My project started with using a few sets to create a scene using the Polka Dot Pals from Whimsy Stamps. This one used the character, fence and flower from Polka Dot Pals Fern combined with the insects and mushrooms from Polka Dot Pals Imogen. Lastly I added the face from Polka Dot Pals Khadija. Everything in the foreground of the scene was masked and the fence was added.
It took a little while to get used to the way the paper worked. Unlike the white, the Desert Storm shows dark when it’s whet so often times I would have to wait for that area to dry before deciding to color more or not. It wasn’t a problem on larger areas such as the fence and hair but the smaller areas took a little more patience.
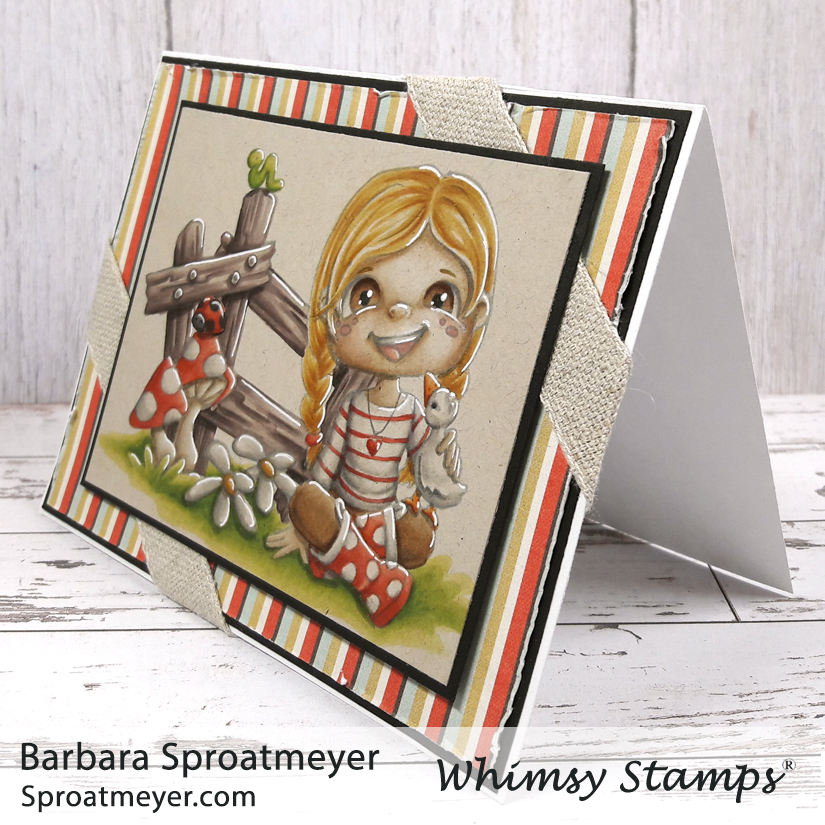
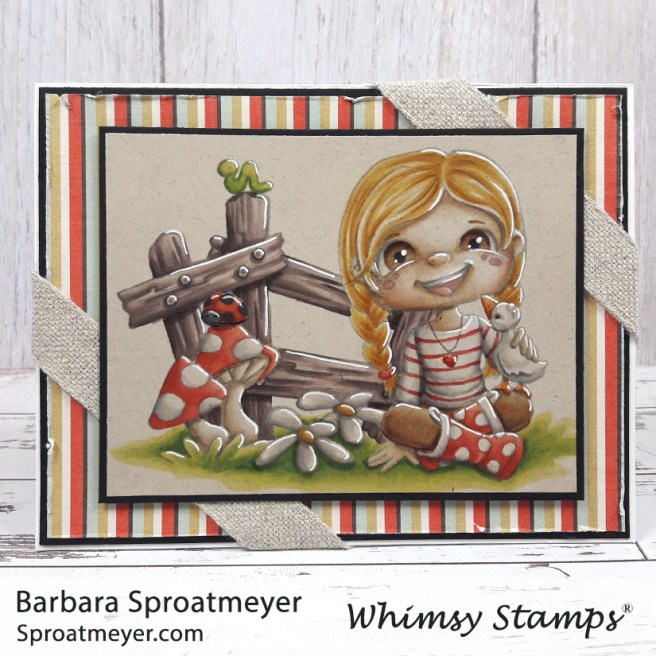
I wanted to add white but wasn’t sure how that was going to work. I first started with some water based white and a brush but the paper seemed to get too wet and I couldn’t see what I was doing. So I ended up using a gel pen and giving a stark highlight in the direction of the light source. I think it works but next time I’ll be interested to find a softer way to add white – in hindsight, pencils seems like the obvious choice so that will be my go to next time.
For the card, I kept it simple and was lucky to find a decorative paper that matched. I was worried about that so I consider that a gold-start find. Since there wasn’t a lot of white, I stayed away from white embellishments or white in the paper least it would provide too much of a contrast.
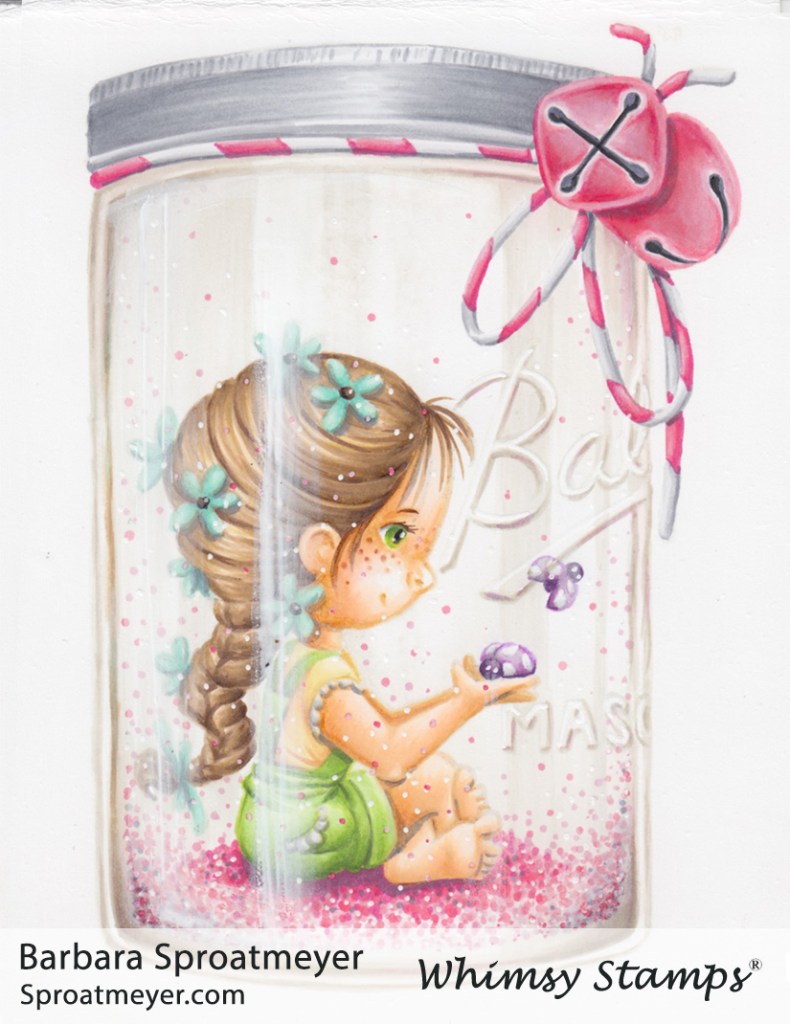
Here’s another version of Polka Dot Pals Imogen clear clear stamped inside the Mason Jar rubber stamp, both available at Whimsy Stamps. This time I went with pink fairy dust in the snow globe and also added some extra features. Can you spot them without me pointing them out?
This image was stamped in a very light beige color ink which allowed me to use something other than blue for the jar coloration. It worked well with the pink.
The Polka Dot Pals stamp line are so fun to color and so versatile as well – you can change the look of the whole image just by giving it different elements and or faces. Here are some of the ones I’ve already colored using the four release from last month and this month. I haven’t even begun to start with the elements yet.
Ok, times up! I added extra twine to create a bow under the bells and then, of course, added a face to this cutie pie and the fairy dust in the jar. Did you get those three? You could probably count the ladybugs as additions too or you can use the ones from the stamp set.
I hope this gal isn’t getting too much attention but after doing the Polka Dot Pals faces tutorial, I decided she actually needed to be colored and create my first card in over a year. So without further ado, this is my card using Polka Dot Pals Khadija…
But wait! There’s more! How about another tutorial!! This was actually all going to be one giant tutorial but I thought it best to break it up, one for the face and one for the background. So get ready for much ado!
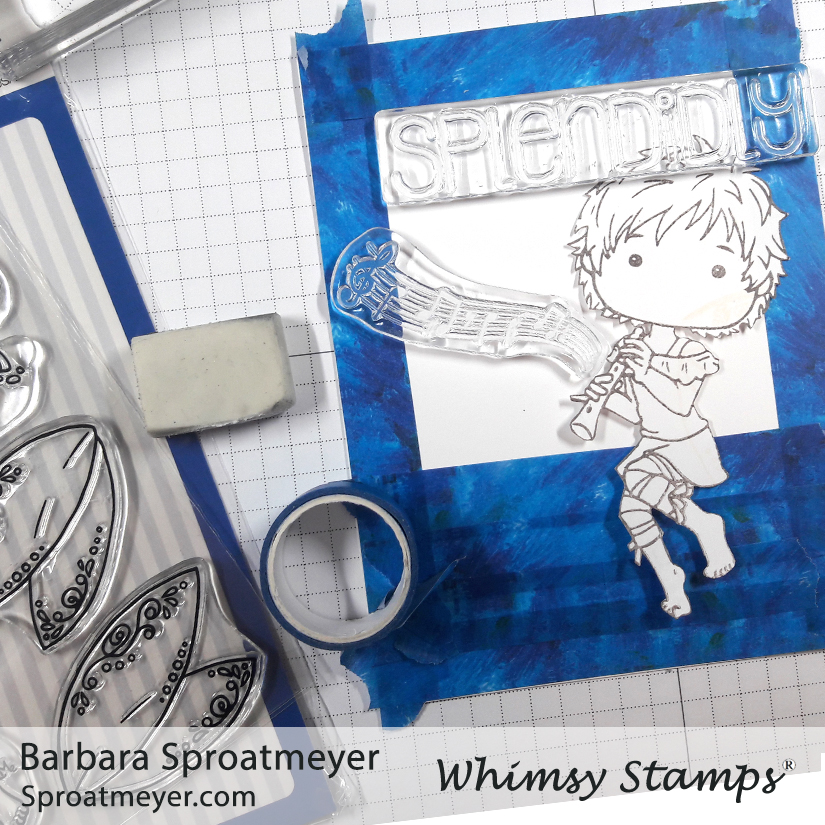
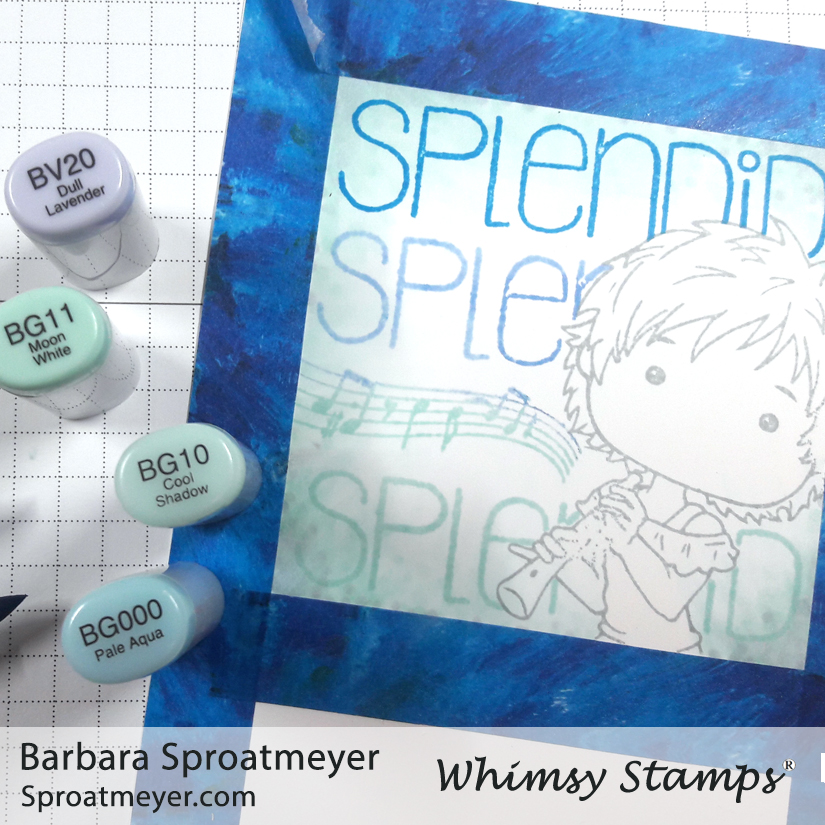
For this tutorial, I wanted to share one way that you could use the sentiments. In this picture, I’m planning out my layout. I try to pick long words and words that can be cropped are delightful such as this sentiment “splendidly.” Did you know I almost spelled this one wrong? That’s right, during production a valuable Whimsy DT member caught my error and I was able to fix it before production. Phew, that would have been embarrassing.
To use the sentiment so it would fit on my project, I chose to reduce it to “splendid” and did this by wiping away the ink on the last two letters. I did this for each time I stamped it.
I also used the music bar element from the set to fill in the area. I could have squeezed in another “splendid” sentiment for four in a row but I actually didn’t have another blue that coordinated. So this turned out to be a happy modification as I really liked how it turned out.
With the washi tape still masked around the outside, I used these colors to give the background more color and to separate it from the image more. (As you could probably deduce, the character was masked before stamping the sentiment. I did that with a scratch paper and covered up the girl.)
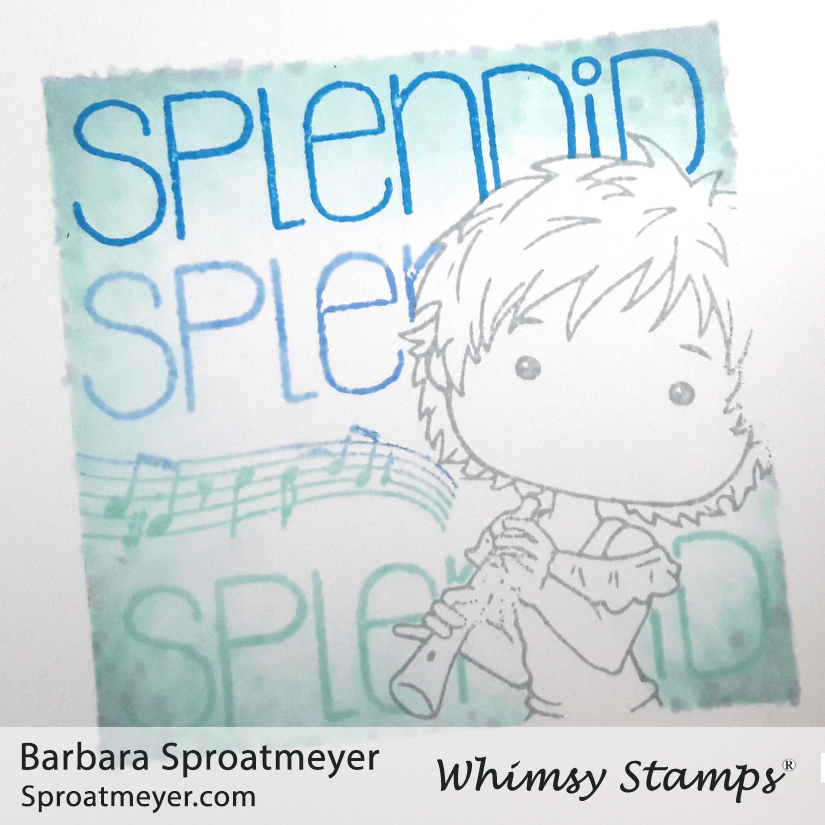
Here’s what it looks like after all the masking and washi tape was removed. Now I’m ready to do the coloring on the character. I need to remember to not color outside the imaginary line that is Polaroid photo area. That white border is important for that kind of look.
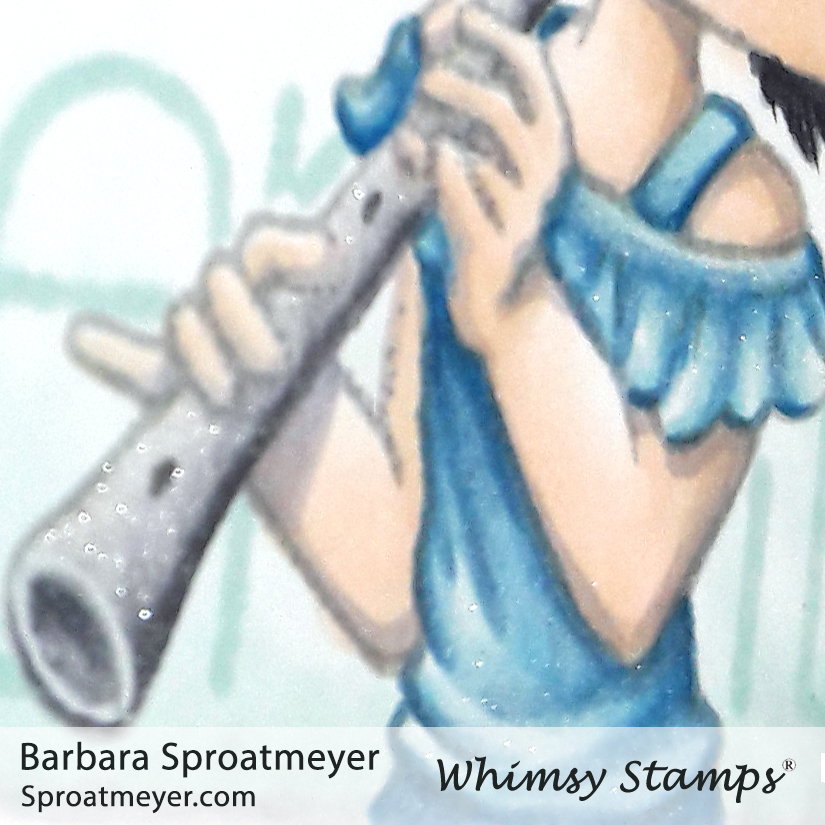
This was just a mini tutorial for the background so I didn’t take notes or photos while coloring Polka Dot Pals Khadija. The face is from the Polka Dot Pals Syeda stamp set.
The last thing I colored was some glitter using a glitter brush I had to give the dress and pipes some sparkle. It doesn’t show up on the photos very well but in person it’s a nice detail.
These are the Copic markers I used: C0, 2, 3, 5, 6, 7 BV20 R00, E000, 30 B00, 01, 12, 14, 06
Welcome! In this tutorial, I’m going to give some tips and tricks on how to add the Polka Dot Pals add-on faces to the Polka Dot Pals.
You’ll find Polka Dot Pals sold at Whimsy Stamps in clear sets with elements and accessories that and interchangeable between sets. So a forward face from one set will work with any of the other forward facing character.
There’s a lot of information here – if you want the reader’s digest then just look at the pictures but if you want the unabridged version like a true die-hard, then stick with me and read the text. 😛
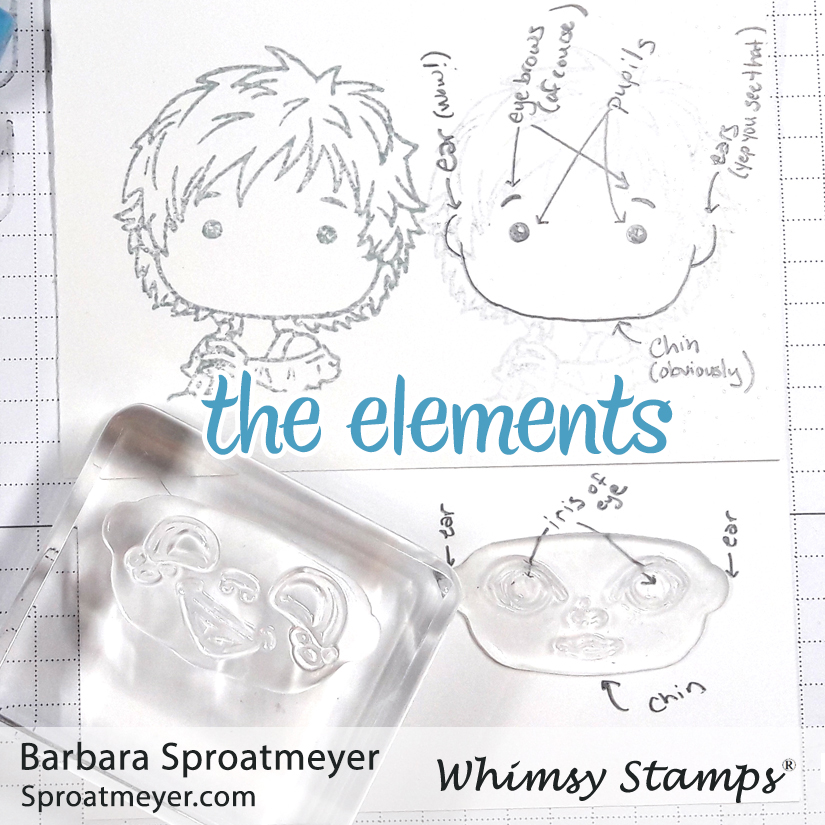
First, let’s get to know the characters and elements of the face. I know, you know what an eye and ear look like, but let’s do it for kicks and grins so we’re on the same page when it comes to terminology.
CHIN: The chin is visible on almost every character and is a wide sweeping smile shape. But you’ll also see this same shape on the face’s stamp. The base part that clings to the acrylic block will resemble the same shape which will help with placement. (Here’s an interesting note: sometimes the chin might not match exactly because more stability is needed for a mouth, such as the face shown on the left. When this happens, just ignore the bump and you can focus on the cheeks instead for alignment.)
EARS: Ears are not always visible on the characters especially if they are covered with hair, bows or other accessories. However, when you do see them, they also aid in placement for the same reasons as the chin – the base of the face stamp have those same protruding nubs that will align with the character’s own ears.
EYEBROWS: These are easy to spot but you may find it interesting that they are included with the character and not with the face. Why is that? For those that don’t want to add a face then the pupils and eyebrows are already there to give the character personality without having to add anything on.
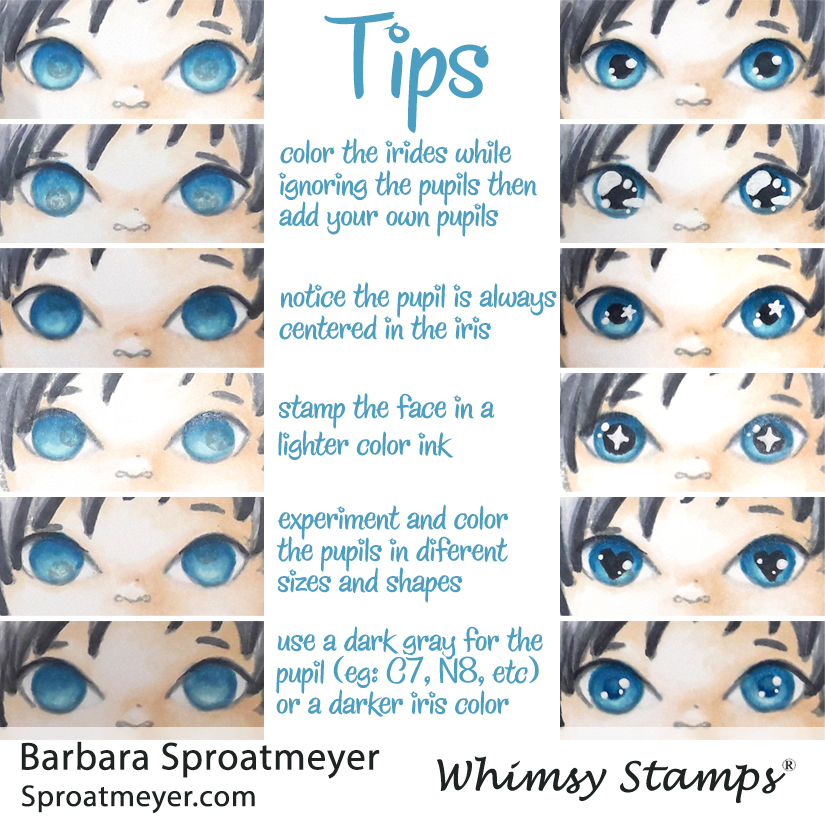
PUPILS: This brings us to the pupils which are the beady-eyed dots on the characters. They are positioned the same on every character so that the faces can be added. However, when not adding a face, those dots represent the character’s eyes. The face is a large blank canvas, per se, so there is enough room to play around and have fun – you can add color to the eyes, stamp a face, or color your own face.
IRIDES: Here’s the tricky part, did you know that the plural or iris (as in eyes) is irides?! I had no idea until this tutorial. Ok, so with the tricky part over, let’s talk about the irides. This is the large open circle on the face’s stamp which would be colored green, blue, brown or whatever color for your character. It’s circular because the pupil is curricular. When stamping, the pupils and irides should be centered with each other – hence the reason for this tutorial.
This step is specifically for those to prefer to eyeball (HA!) the position of the faces, like I do. For each face, I like to practice on my paper pad until I feel comfortable with the results. If this makes you uncomfortable, then using a stamp positioning tool will also help you get that perfect placement you’re looking for. But don’t stress it too much – if the faces are off, you’ll see below there are ways they can still be “saved” and you can “just keep coloring, just keep coloring.”
In this image and the one below, I have stamped a few common outcomes. In the example above, the first one is the desired result where the pupil is centered in the iris. For the other two, they appear to be looking down or up but when colored, it doesn’t exactly look right. Why is that? A quick answer from Wikipedia: in humans, the iris is a circular muscle in the eye, responsible for controlling the diameter and size of the pupil similar to optical aperture. Think of it as camera lenses and how they open and close but the opening part will always be in the center.
In this example, the top two faces have off-centered placement as well so when colored they look a little wonky. But if that’s what you’re going for, then ignore all this. LOL The last one, however, is one of the softest and quickest tips – if you find it frustrating to align the pupils and irides, then just use a cotton swab before stamping the character and remove the pupil. You can color it back in later, as seen below.
Lastly, I wanted to share this with you for two reasons – first on the left you can see these are all the faces from the above examples. I like to stamp my faces in a lighter color so that I can add the depth through color – however, this also allows me to color over the pupil and then later color it in the shape and size of my choosing. On the right, you would hardly notice those same wonky faces when looking at their eyes. The second reason? Just look at those possibilities and how much the pupil and highlights can change the look.
Try Coloring Your Own Faces
Here’s are some videos to watch where I colored in my own faces without using an add-on stamped face. This is a little more difficult but it also opens up the creativity box because you can color different expressions, animal faces, sugar skulls or clowns, or whatever you can think of.
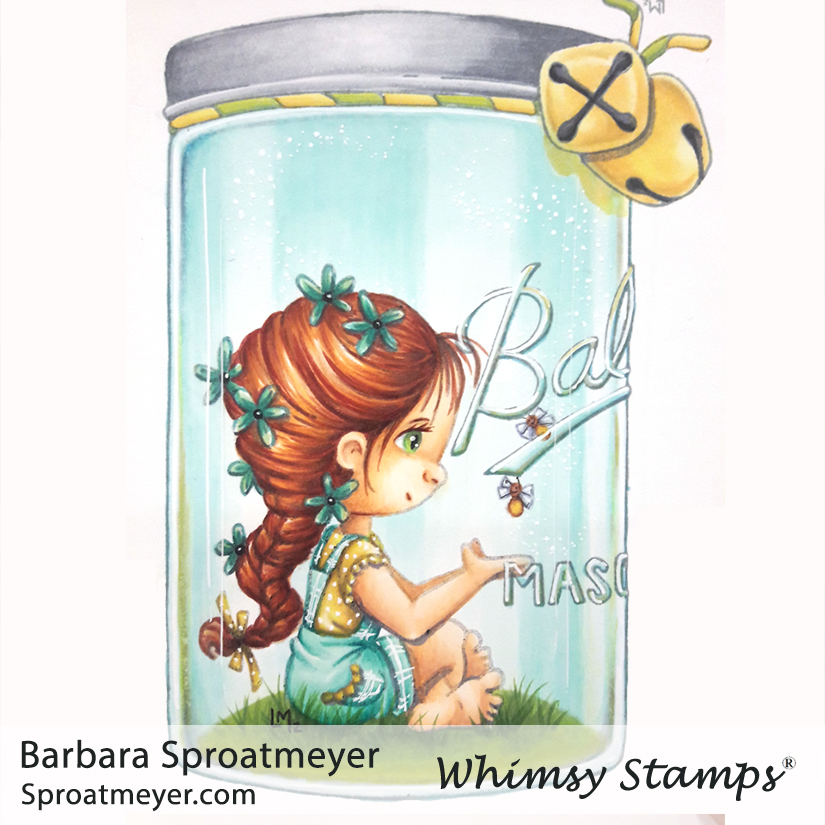
I can’t believe it’s February already but that’s good because I get to introduce two more Polka Dot Pals that are being released at Whimsy Stamps. That’s two more sets to mix and match! For my project, I’ve used Polka Dot Pals Imogen and combined it with the Mason Jar and the fireflies from Polka Dot Pals Khadija.
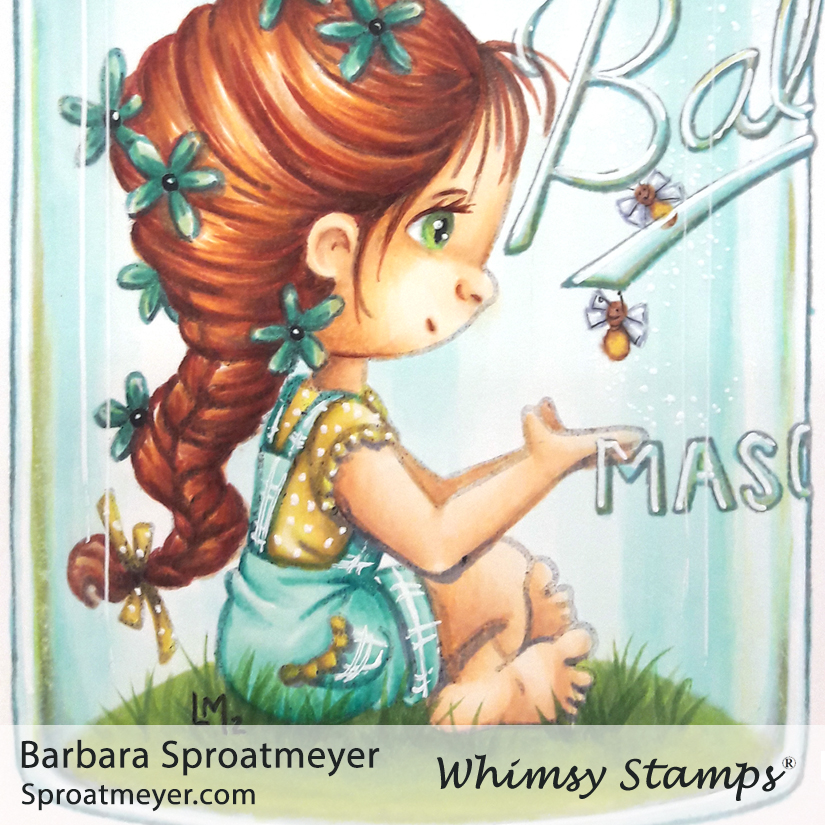
I colored the face and added in my own details. Once the girl was finished I colored in the grass mound and added some grass strands. Then I colored the jar, trying to keep in mind that some white would show as a reflection of the jar. At this point, because I stamped in a light color, the fireflies were difficult for me to see but I got the essence of their shapes and colored them in anyway.
The white is important when coloring a jar but it’s also difficult to remember to keep in there. One trick that helps me is to go back in with white as a very last step. It would be better to do it with a paint but all I had at the time was a white gel pen so I used that and also added some details on the clothes and more highlights on the letters.
Here’s a closer details of the face that I colored in. This was the first time I added such details to a side looking face so I was still trying to figure it out. I might possibility have to create a side looking stamp for a future character. Yes?