Little Avatar Navi Scene

Here’s a fun project I wanted to share using two images, Baby Fairy Flora from Mo Manning (Stampavie) and Anthuriumns Garden from Make it Crafty. I had recently watched the Avatar movie and wanted to color something using the bright fluorescent colors from that world.  So I had used a bit of creativity and decided to color up the fairy rubber stamp and the large flower background.

This was one of those coloring jobs where I went over everything about a hundred times and wasn’t sure what it would look like until I was nearly finished.  It was a new challenge and touch and go for a while.  LOL  To get the Avatar look, I colored with blues, green, blue/greens and even some yellows to create the skin tone and strip pattern.  Then once the skin was finished I added the white dots with the gel pen.  The eye were colored with greens and yellows and the lips were colored with a little bit of pink/purple.  Here’s a before and after slice of the fairy.

At first, I wasn’t sure what color to do the clothes but decided to bring in some neon purples and pinks which coordinated well.  The hair was done by dotting the gray tones and was a lot easier than I had anticipated. 

The background image is one that I’ve colored using some blues (BG and B).  For this one, I wanted a bright fluorescent type color of blue so I blended in some green (YG and G) on the tips of the leaves and some purples (BV) for the darker parts of the leaves.  I like how the effect really changes the blue/green color.

I wanted to keep the ground the same neon colors as the flowered background but I also wanted grass.  So I later went in and added green strands for grass and then placed my fairy image on top of that.  The mixture is a little different for me and I’d probably go for all green/grass the next time.  But I think in the end, this might be considered a “happy accident” which is always a bonus!  LOL

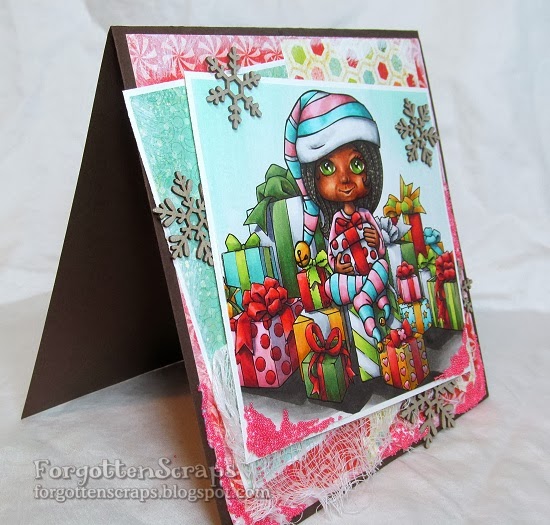
Finally the last thing I needed to do was place the images on a card – this was a challenge all in itself! But I managed to find some scraps that didn’t fight with the image and chose to go with something very basic and simple.  I hope you like it and maybe you’ll be trying a little Avatar Navi image in your future! Yes?!

I’d like to enter this into the following challenges:
DP2 Challenge E217 – “Something New” (coloring blue skin)
Card Mania #38 – Anything Goes
Make it Monday #175 – Anything Goes

Crystal

At Make it Colourful this month the challenge is blue and yellow and I had stamped and colored this image and showcased it before.  But now I have it on a card front and the paper I chose was a little more on the turquoise color than the blue I had originally colored.  But never fear… that’s the bonus of alcohol markers that we can change the colors!  So if you click HERE you can see the blue it was originally before I went over it with B10 and B32.  I didn’t have to blend too much so I used the B32 in the dark blue areas then b10 over the rest.  Voila!  Now I have my image to mach my papers.

Make it Crafty:
To see the post on the Make it Colourful page, click HERE to view post.

Crystal

It’s my turn to post on the Make it Crafty blog I took some time to color up an image this evening.  I worked with the challenge colors for this month, blue and yellow. This image is Crystal from Make it Crafty and I stamped her in a gray color.

For the blue, I combined some purple, blue and turquoise.  Then for the yellows I went with a platinum blond on the hair and a mustard yellow on the dress.  I messed up in a few places but it felt good to do some coloring after such a long break.

Polka Dot Pals Neva

If you’ve been following Make it Crafty on FaceBook you might have seen everyone share their Christmas Trees on that page.  There area so many gorgeous trees out there that I almost felt the urge to redecorate mine in a different style.  But I was saved because the kid’s already decorated it and there was no way I was going through all *that* again!  LOL  Anyway, if you posted your picture then Zoe generously sent out images to share in the Christmas giving spirit and one of those images was this stack of Christmas Pressies.  I love that they’re versatile for all occasions but I decided I wanted to go all out Christmas!

The image I paired it up with is also a freebie that can be earned at Little Miss Muffet Stamps named Polka Dot Pals Neva.  I had colored her face and added a cheek and nose tutorial in the LMMS FB group for those who want to give your beadie-eyed-friends a little more character.  😀  I hope to post another one for eyes but with Zoe’s challenge a while back, I think many have already experimented with those.  For this image I did an impromptu step-by-step coloring guide which you can also find in the LMMS FB group.

The stack of presents were colored mainly in reds, greens and white and the character was done in blues and pinks.  To help bring the images together I added a bit of blue and pinks to some of the outer packages then made sure to add reds to the package she was holding.  Finally I assembled the card (trying) to use the December Make it Crafty sketch – however, the image was so large that I ended up jumbling up the pieces and making something else work.

Lastly, I added some embellishments that I hadn’t used in a while including the chipboard, micro beads and cheesecloth.  The card is still reasonably flat so mailing it is still an easy possibility.  I hope you’ve enjoyed this bit of inspiration and thanks for checking out my project!  😀

Ivy Swings

Happy Holidays!  I don’t have a holiday project to share as I’ve broken out of the mold and created a spring card this week.  I’ve used the Ivy Swing rubber stamp from Make it Crafty and decided to pair it with a sentiment instead of a character.  I suppose this would be the perfect graduation or farewell card since the swing is empty, but in all honesty, I chose the sentiment (out of what I had available) solely for it’s shape.  It’s these kinds of decisions that later on make “deep” and “thought provoking” cards!  LOL 

One thing I wanted to do was to make image vibrant with color and to have all the elements stand out.  So I used many different colors and even grabbed a few unexpected ones to mix in – such as the pinks in the sky and the yellows on the red birds.  Once I was finished I mounted it on a card pulling out the purples and it’s ready for a new home!  Thanks for coming by and I hope this inspires you to make your day crafty.  😀

Desert Oasis & Tap Dancing

As you know there is a new challenge this month on the Make it Colourful blog and I wanted to share my projects that I made using the images I colored.  I had the opportunity to take my Prismacolor Pencils with me on a weekend excursion.  I normally don’t use the pencils very often since they’re more difficult for me to work with than the markers.  Sometimes I like my results and sometimes I don’t.  But as long as I keep trying then that’s my main goal.  🙂

For my first project I aimed for the basic challenge and wanted to use my reds and greens.  I focused on the redish hair, red dress and greenery in the background.   I think my favorite part is the face where I thought the colors blended in nicely.  The rest is just “meh” because there is too much white showing through the pencils and as a result, I think I gave up half way through.  However, with the image on the card it doesn’t look so bad and I think will still bring a smile to someone regardless.

The second project was just because I had time left over and I wanted to make up for the first one.  Unfortunately, I feel the same about it so my efforts to cheer me up didn’t work.  Ah well… that’ll all go away when I pick up my markers again.  LOL  

For this card, I attempted to add texture in the background.  I had envisioned a background that would look like a blurry city scape in the dark, maybe on a bridge with the blue sky and stars – something we’d see in the movies.  I’ll let you take a look at the result and decided how well I did.  LOL

All in all, sometimes ya win and sometimes ya don’t.  LOL   Hopefully these samples will still provided you with some inspiration and good luck with your projects this month in the Make it Colourful challenges!  Cheers
Make it Crafty Images:
Originally posted on the Make it Crafty store blog, click HERE to view post.