Sunbonnet Strawberry Big

We have new rubber stamps at Little Miss Muffet Stamps and today we’re featuring strawberries and sunbonnets!  There are four new Sunbonnet images from Bugaboo now available in deep red rubber – whoo hoo!  And today I have an extra special surprise to share since my daughter also made a card using one of these cute images.  😀  Check out our creations…

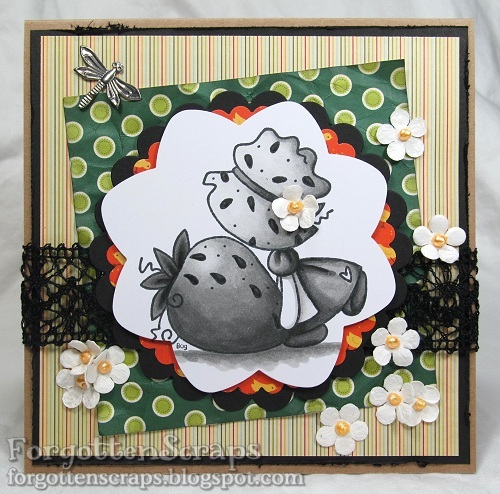
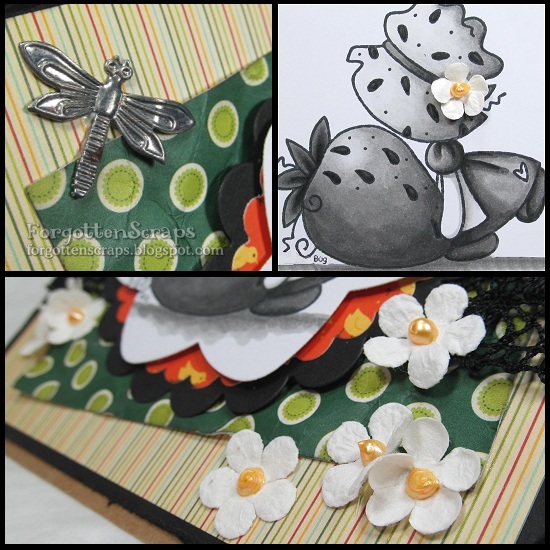
This is my project and I’ve used Sunbonnet Strawberry Big rubber stamp from Little Miss Muffet Stamps.  I thought I’d do something different and bring back some black and white; however, these images are adorable in pinks or reds!!  I’ve already colored the others up but this was the only one I have on a card.  😛  The flowers have been in my stash for a long time but I’ve found that a touch of yellow puff paint brings them back to life!

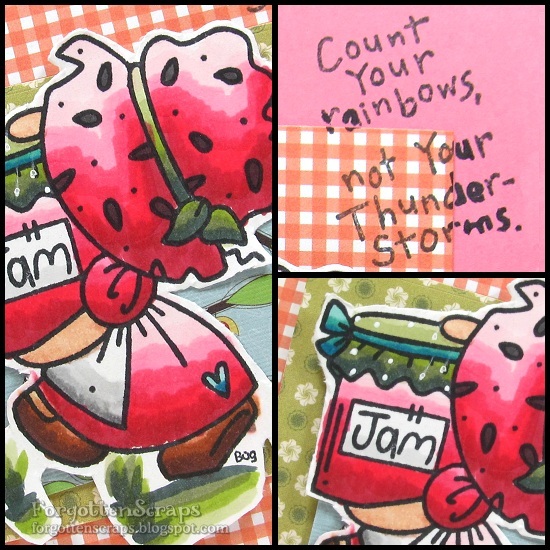
Below is the card that my daughter, Cassandra, created.  She used Sunbonnet Strawberry Jam to color.  I’ve increased my marker stash and bought a bunch of Marvy La Plume alcohol markers so my kids have gotten excited about them.  We spent this week learning how to color with them and this was her first image she colored. 

We colored the same image together and she’s done a wonderful job!  She did a second one right after this and I could tell she was thinking about it.  At the moment I didn’t bother with shading or shapes, so we just worked on choosing colors.  she was really worried about the grass and I had to show her two time before she’d even attempt to try it.  I think it was because the rest of the image was already colored, and like most of us, we don’t want to have to start over again.  LOL

You can find these stamps now in the LMMS Store and lots of more inspiration over in the LMMS Store Blog where the design team has done an incredibly yummy job with these!  My local farmer’s market is filled with watermelons, grapes and cherries but I’m sure they’ll have some strawberries because I have a hankering for homemade strawberry jam! Yummmm!

Forest Friends Stuart

Hi! For lack of a better introductions, I’ll let the card give the opening line.  😀  Another weekend is gone and we’re getting closer to the end of the year – it always goes by so fast these days!  I have to get the kids signed up for school and the hobby stores already have shelves lined with holiday stuff.  There’s just no reprieve from the endless to-do list.  Ever feel that way sometimes?  I guess that’s why we have hobbies! 😀

The image on this card is Stuart the squirrel in the Forest Friends Stuart & Rosa stamp set from Little Miss Muffet Stamps.  There are five stamps all together in the set and I’ve used a mushroom from one of the other Friend Friends set to complete this scene. I’ve been able to make a card with each of the Forest Friends so I’ll be excited to share those with you along the way.

I love being able to use rubber stamps and these images were stamped and masked to create this scene.  All of the Forest Friends can be found in the LMMS Store now and they’re especially easy to find when you’re using the Search tool.  I still have a lot to do in the store to get everything converted over but it’s finally all coming together.  Phew… this was a bigger task than I originally thought.

Cora Agnes Hatter and Silverstar

Welcome to Super Saturdays with Little Miss Muffet Stamps!  For a couple weeks we’ve had Friday Freebies and Sunday Spotlights but now they’re going to be combined into one grad day… Saturdays!  So today I have a project to show using the spotlighted image and the freebie.  😀  Both can be found in the store, either discounted or free, for a limited time.  Click HERE to go shopping and to see all the new products added this week!

Spotlighted Image: Cora Agnes Hatter
Save $2.50 on the rubber stamp for a limited time!!

The dragonfly is a chipboard embellishment from Make it Crafty and fir this time, I decided to get the colored pencils out.  Fancy, I know!  The pencils go on smooth and I think the blending is a lot easier on these than on paper.  It also gives me a chance to pull out the colors on my project and add it somewhere else.

Spotlighted Image: Lightning and Silverstar
Lightning is the freebie today for a limited time!!

Thanks for coming by and have a great weekend!!

MiC Alice in Wonderland Release

It’s time for the Make it Crafty to pour a round of drinks at the super special tea party celebrations! Not only are we celebrating the magical release of Alice in Wonderland, but Make it Crafty has turned 3! All thanks to YOU, the incredible artists and the amazing Make it Crafty team!

Let’s dance around from chair to chair, sipping a drink, eating a cake, shrinking then growing with excitement as you watch the entertainment unfold before your eyes. Be careful not to miss the hidden words as you’ll need to collect them along the way and string them all together to form a quote. Simply enter the quote at the end of the hop for a chance to win!

Hopefully you’ve found your way from TRUDIE
but if you’ve just skipped a chair or two you might want to start back at Zoe’s Blog.  
For my project I’ve used three of the newest images and composed a page in my art journal.  It’s been a while since I added a page in there and these kinds of releases are perfect for that.  😀  The images I used are Alice, Hidden Hole and the Chesire Cat.  Many of the embellishments are from Zoe herself (thank you!) and my favorite by far are the gumnut thingies on the lower left side.  I only had three and wish I hadn’t used them up so quickly since those are they’re surprisingly a rarity here in Texas.  Zoe… you need to send me more!  LOL
Now for the best part of this post… a small tutorial on coloring the tree.  Now, mind you, this isn’t a tutorial on “how to color,” rather it a breakdown of how each color is applied.  (For a small giggle regarding tutorials, click HERE and see “How to Draw The Tick.”)
For the tree, I used much the same technique as coloring hair.  The colors I used are Copic E57, E55, E41, E44 and E47 and each panel shows how that color was applied.  I started with a mid-tone brown and worked my way up to the lightest color. Then to add more depth, I went back to a mid-tone brown and finally a dark brown for the darkest areas.
There are many different ways to color this tree especially when you get down to the knotty parts.  I wasn’t sure what to do with them myself until the fourth color!  I thought if a tree like this is going to have a large hole into Wonderland, then a small concave area would be fitting.  You can also fill the area around with all grass or all wood… it’s quiet the versatile little tree.  
The fun doesn’t stop here and if you head over to JENN’s blog
she’ll be sure to treat you with even more fabulous inspiration!

Clover I Believe

I believe it’s time for another challenge at Little Miss Muffet Stamps!  This one was postponed for a week while I setup a few thing in the new stop.  However, the theme is worth waiting for … “Away with the Fairies!”  It’s always such a fun theme and your faries don’t even have to have any wings on them.  😀 

For this project I’ve used Clover I Believe rubber stamp from Little Miss Muffet Stamps.  It’s a design by Pollycraft and was such a fun one to color!  I had just a few scraps of my Christmas papers out and decided to go with non-traditional colors… I could have gone with a more Christmas feel to it but I was lucky to find papers that were void of the holidays – which makes for a great summer card. 

Thanks for coming by today and I hope you get to a chance to visit the LMMS blog for more inspiration and to enter this challenge.  Have a great week!

Clover Dancing with Dragonflies

I’m still working in the background trying to convert all the products into the new store but I wanted to take a break and show off one of the cards I created this month.  I think it’s the colors, but it’s one of my favorites so I took lots of pictures!  😀

The products I used from Little Miss Muffet Stamps are Clover Dancing with Dragonflies rubber stamps and Birds on a Wire metal die.  There’s lots of other things as well and I’m even using up some of my white resin flowers that I like to stash away. 

I colored the image to match the paper but also wanted to bring out some yellows.  I was tempted to color the mushroom red and it took all my concentration to remember not to.  LOL  Don’t get me wrong, the traditional red mushroom is adorable, but also wanted to try something different.  As a final touch, I added white dots on the wings with the White Gel pen.