

 This is a test that builds upon the finished results from the last experiment. The results on this one are much more exciting and I love it when there is a clear divide between the good, the bad and the ugly. ;D The image used is Muffy Ketto from Stamping Bella.
The purpose of this experiment is three fold: first to see if the dried ink can be reactivated for more blending; second to see how additional blending works from a dark gray to a light red; and third to see which papers can hold even more ink! The same red colors were used from last time (R22, R24, R27, and R29) and the grays added are N4, N6, N8. The colored working surface from the previous test was allowed to air dry for two days. The darkest gray (N8) was applied first then the subsequent lighter grays followed by all the reds working my way from the darkest to the lightest and blending as I go.
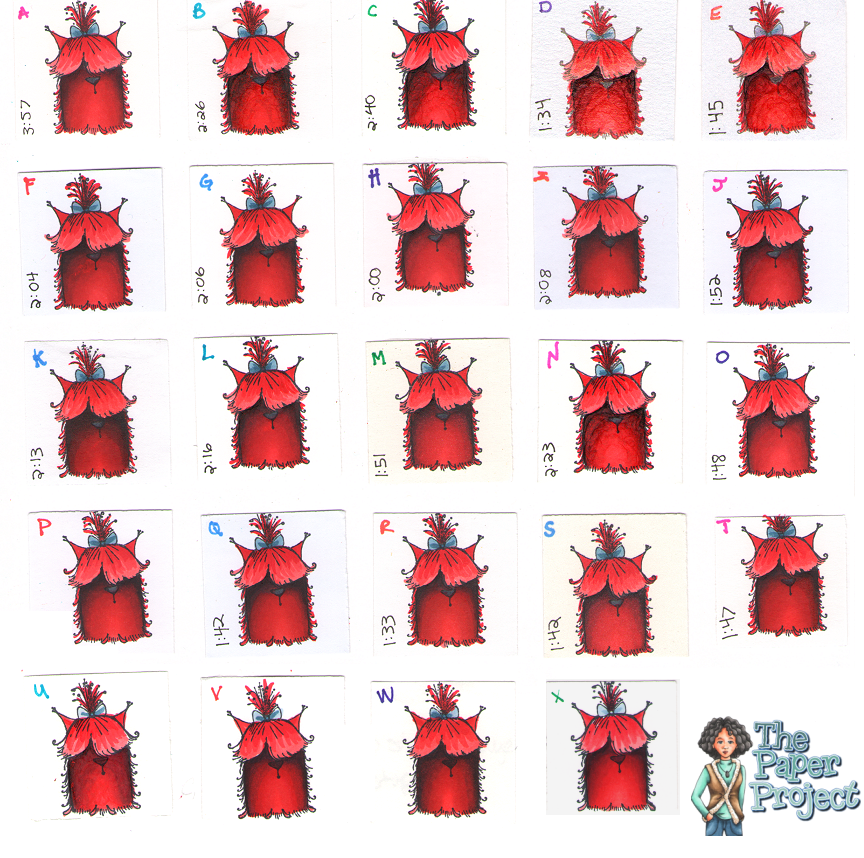
If you take a another look at the last experiment and compare it with this one you’ll notice right away how much darker the dog’s body is. This is the result from adding in the gray tones which is a nice effect.
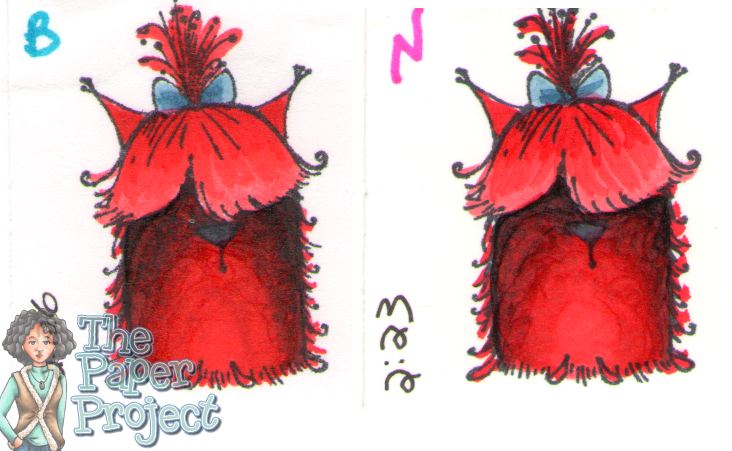
Those that did bad in the previous test did really bad here! They were B, C, D, E, and N where the paper just couldn’t hold any more ink or didn’t reactivate the ink for more blending. Here is a close up of B and N where it shows how the ink sits on top of the first layer and just gets moved around which I would describe as blotchy.
There were a few papers that started to show impurities in the paper fibers (inconsistencies) or possibly areas that had absorbed finger oils. This would show up as little patches or dots that wouldn’t change color. Somehow those little areas are different from the rest of the paper and may or may not show up on another test. These were found on F, H, J, K, L, P and U. Below you can see a close up of F, which shows one of these large patches near the left side of the nose; and P where the impurities in the paper show up as speckled dots throughout the sample.

All the other samples reactivated the ink easily and allowed for more blending without any problems. In my opinion, and direct experience with this test, that leaves A, G, I, M, O, Q, R, S, T, V, W and X to be some of the better papers to work with.

This was exactly what I was mentioning in the last experiment. It's when I second guess my \”doneness\” and try to reactivate the ink that I have tackiness. This is so far has been the best test, since for myself any way, this is the biggest issue I have had.
LikeLike
Very interesting! Thanks for the great info! I might have to try out one of your recommended papers!Arabella
LikeLike