Winter Marci

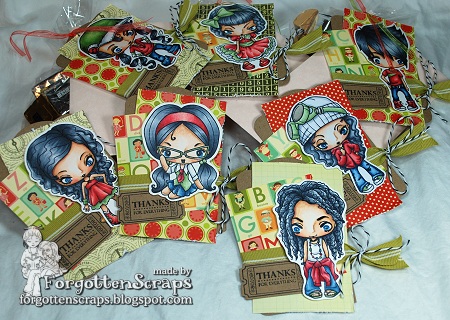
It’s time to announce last week’s Blog Candy winner and thank you to everyone who participated.  😀  The little Krafin’ Kimmie stamp is waiting for a new home so I’ve used random.org to pick a lucky winner and that person is…

Congratulations!  My email is on the sidebar and you can send me your mailing address.   😀

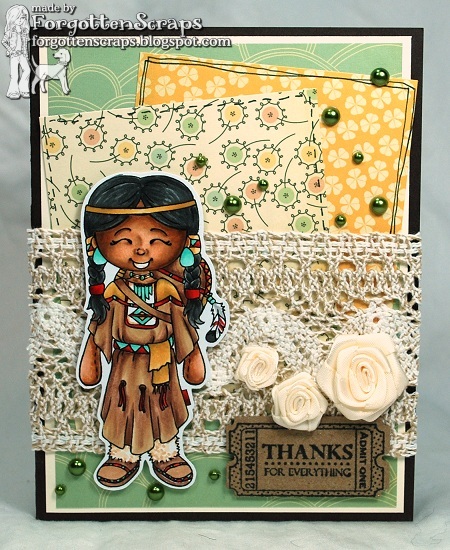
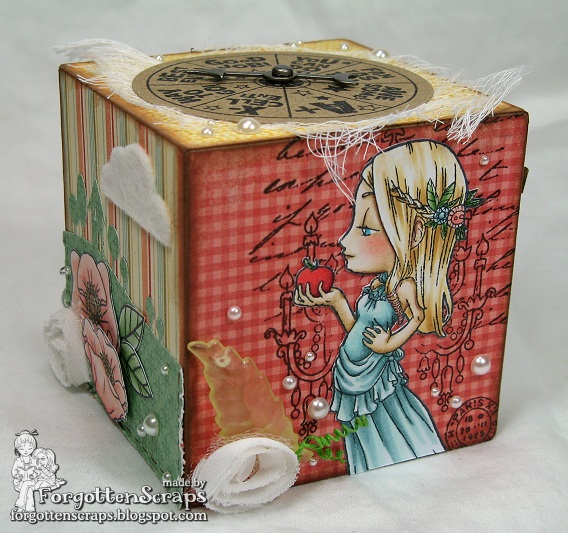
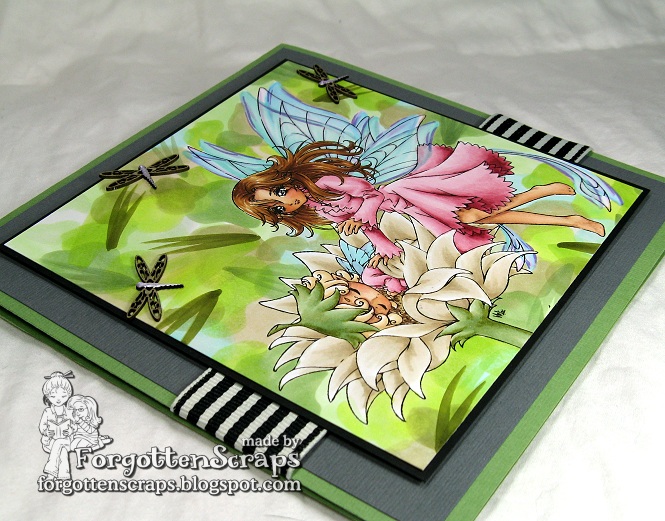
For my project today I’m showing a card that I had created last winter using Winter Marci from La-la Land Crafts that I purchased and combined her with Winter Sleigh from Make it Crafty. The ticket sentiment is from Whimsy as well as the coordinating diecut – been loving that combo!

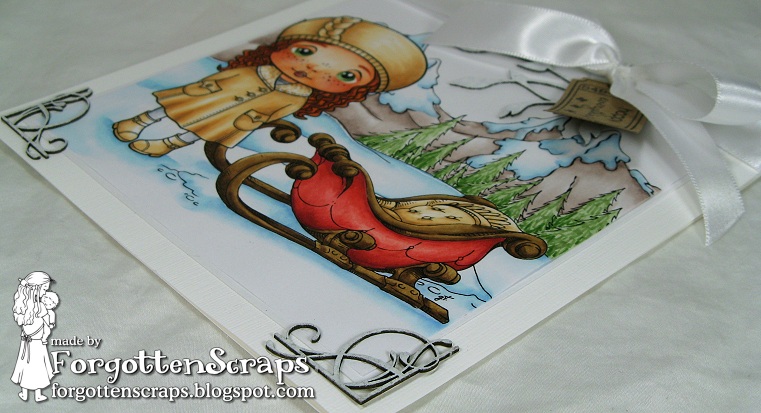
It’s been so long since I’ve colored this but if you can believe I have the list of Copic colors I used on card!  Woah, is right!  LOL  But thanks to Sandie I was able to keep a list and here they are…

Copic Colors: R21, R14, R17, R37, R46, R59, YG61, YG63, YG67, B000, B00, B01, 0, E000, E00, E11, E13, E53, E04, YR14, E08, E19, E59, E55, E57, E59, E50, E51, E53, E70, E71, E74, C1, C3

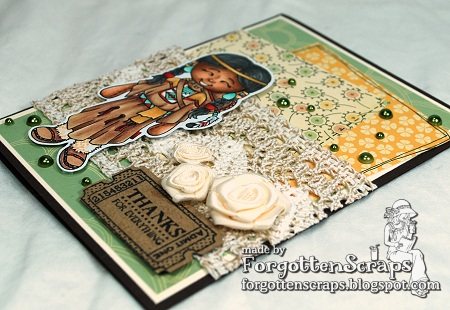
For this card I was going for the white on white look with a colored image but I think my image is so large that it doesn’t really fit in the catagory.  However, almost everything else is white so it counts in the game of horseshoes, right?  LOL  Thanks for dropping by and I hope you’ve enjoyed this winter scene.

Creepin’ Kit

I have some great tags to show off using the Creepin’ Kit from The Greeting Farm plus Cheeky Geeky because she’s so cute and I needed an 8th image!  I made these tags for two reason… first to try out a bunch of different paper types (more on that in a separate post) and second, I needed some year-end Teacher gifts.  School gets out this week and I’m soo looking forward to the break – I think my kids are too!  LOL  Unfortunately for me, my own break is only for another week before my summer classes start.  Bummer. 

Each image is basically colored using the same way but on different paper types.  I wanted to experiment more with The Paper Project so you get a sneak peek at the end results before post about the experiment details.  😀  Lucky you!  So if you see an uncannily similarity between the boys and girls… well, that was planned.  He he he

Everything is built upon a large tag die from Stampin ‘Up and the little ticket tags I used are from Whimsy Stamps and their coordinating ticket die was super quick to use.  So other than just grabbing a few colorful sheets of paper, the coloring is what took the longest on these projects.

I made eight tags and gift bags all together and if you’re familiar with the Creepin’ Kit then you know I would be short one image for all eight tags.  I could have duplicate one, but nah, I was too excited abut Cheeky Geeky which was released this month to pass her by…. some perhaps some would say “With Eight You Get Cheeky Geeky!”  LOL  Ok, movie reference – a bad one, but still a reference.  Can anyone guess which movie?

Each tag was tied together with an envelop onto a small bag full of chocolate… the tag is eye candy, the gold and silver wrapped chocolate is the real candy, but the real treasure is found in the envelope!!  😀  Hmmm, what do you think… a simple Thank You card? A gift certificate somewhere?  Or maybe small promises to redeem later on?  It could be any of those things but unless you find your name on it, then I’m not telling.  ;P

Thanks for letting me share my projects with you today and hope you’re having a fantastic week!  If you get a chance to stop by again, I’ve got some fun things planned including a combined release of Make it Crafty and Simply Betty Stamps, updates on The Paper Project (of course), and exciting news about Little Miss Muffet Stamps!!

Sacagawea and Red Cloud

I’ve got some fabulous new releases for you today with Little Miss Muffet Stamps and today we’re featuring four “Legends of the West” images!  Then tomorrow we’ll be back with six more images of various themes – you’re going love them!  Also remember to visit the LMM Blog for the rest of the design team’s inspiration! My first card uses Sacagawea…

On this card I used Ginger as Sacagawea from Little Miss Muffet Stamps and Ticket Sentiments and die from Whimsy Stamps.  For the card base, I got out some older paper packs and used up some scraps.  Then I was even able to empty a contain and use the last of my silk ribbon roses – sounds like a good excuse for shopping to me!  LOL  

I’d like to enter this into the following challenges:
Waste Not Wednesday Week #18 – Neglected and forgotten stash

Here’s my second card which uses Parsley as Red Cloudand the same paper.  However, this time I got out the Clouds Trio die from My Favorite Things and also a few corduroy buttons to give a different look and feel.  Parsley is also one of two boys that are now available!!

I’d like to enter this into the following challenges:
Crafts and Me Challenge #83 – Punches and Die Cuts
Divas by Design Challenge #34 – One for the Boys
Digital Tuesday Challenge #15 – Ribbons and Buttons

Grow

Today is my day to show off a project over at the Some Odd Girl Blog and I’ve got a fun project to share using one of the Nouveau Girls from Some Odd Girl… Grow! Check it out…


I’ve had four cubes for the longest time and was going to do decorate something with the word “READ” for the bookshelf. However, when I was cleaning, I had place them next to a spinner I had stamps and well, one thing led to another and I sacrificed one of the reading cubes to make this block.


I thought this would be a great teacher gift (yes, I need lots of those!) and so I chose to use the image Grow from Some Odd Girl because of the apple. I also used the flowers from Believe, another of the Nouveau Girls from Some Odd Girl. The other stamps on this block that I used are Stylized Notables 1 and coordinating die from Whimsy plus the N1 Fancy Frame chipboard from Make it Crafty. The top of the block uses Take a Spin from Stampin’ Up and on two of the side I used the Chandelier from Stampavie in the background.

Here are the five decorated sides going around the block…


The paper I used is from My Mind’s Eye (Howdy Doody) and I started the block by glueing down a square on each of the sides. Then I sanded down the edges/corners so the paper wasn’t sticking out (but next time i’ll just cut it a bit smaller for the same effect) and then used brown ink to smudge around the edges. After that, each side it was like decorating a tiny card or small tag!


There are a few metal dies I used including two news ones I got this week from Memory Box… Modern Landscape Border and Chloe Stem. It was also fun to dig out the Notebook Edge and Flat-Bottom Clouds from My Favorite Things.

I think that’s about all the details on the block. 😀 I hope you enjoyed it and thanks so much for stopping by and for your wonderful comments. *Hugs

Nora Claire Hatter

Just wanted to share with you a tag I had made using one of the Hatter girls – I actually had this one colored up and sitting on my desk for a while now and decided to do something. So I grabbed my trusty diecut tag and put this together. 😀


The stamp I used is Nora Claire Hatter from Little Miss Muffet Stamps and I added a few postage type sentiments in the background from Whimsy Stamps, Vintage Travel Postage. I had later gone in and added pearls scatter around witch really finished it off but had given it away before I could take another picture – so you’ll have to image those for now. LOL


And yes, for those keeping track, I managed to color and make 19 cards this weekend – phew! Now only if I can do it again tomorrow then I’ll finally be on top of things… but only for a week or two. He he he. What I can’t figure out, is should I post them all at once, in large groupings or individually day by day? Hmmm, I guess you’ll just have to find out. ;D

Thanks for dropping by and hope you’ve been inspired to make some tags!

Mother & Baby Fairy

Are you ready for the next challenge at Make it Colourful? It’s all about movement and there are already some fantastic samples in the gallery to show off – especially Ruby! Make sure you check them all out. 😀 But don’t get discouraged, because there have been so many ways to show movement that I’m sure one will suit your creativity.


For my project I used Mother and Baby Fairy by Make it Crafty and also added a few Mini Dragonfly chippies in the scene. I wanted to try showing movement in the Mother’s wings, however, I’m not sure how it worked out. I colored the wings in a set of two and offset them a bit from the actual line art. I’m not sure if the color is too dark or the wings are too large but it kind of works and kinda doesn’t. LOL


I also colored the left offset wing in more of a green and the right offset wing in more of a blue. For the background I wanted to try coloring a blurry scene as if it was full of foliage that was too far in the distance to be in focus. But again, I’m not sure it turned out to my liking. It was a good try and as a last resort, I threw in some crazy brush strokes to distract you from the real mess in the background.


But the best part about the project is the adorable little baby sleeping on the flower – I mean, who wouldn’t love coloring that sweet pea?! My daughters love to curl up like that and they look so snugly! 😀


Speaking of which, here’s a project my oldest daughter make the other day. She loves to use my Copic markers and begs me every chance she gets so we often color side by side – elbow to elbow more like it – as we share the desk with the markers on it. I love the crazy color combinations she comes up wth!


For her project, she used Zippy from Make it Crafty and Frienship Ticket Sentiments and ticket die from Whimsy. (She also likes to use tape instead of glue – can’t believe it!)

Thanks for stopping by and hope you have a great weekend planned with lots of creativity!