Summer is almost over and school is upon us yet again – this card features the school house from the Polka Dot Pals Delia set plus two of the paper airplanes to celebrate the season. I used the Sun Rays Stencil to indicate how much each of us can shine as we learn. I think this would be a perfect card for a teacher.
I began this card by using the Sun Rays Stencil and my Copic markers to create the rainbow rays. That piece was then cut out using two sets of stitched dies so I could layer them and give the card more of a 3D effect. I used three from Wonky Stitched Rectangles and the large one from Card Builder Windows (which is useful for that 1/8″ border around the outside of the card and the bonus part is it also has stitches on it. I really like this size die and use it all the time.)
After the background was layered on a card base, I then start with the front. The school and paper airplanes are accessory stamps from Polka Dot Pals Delia. Then I used some other dies to cut out the scalloped circle, circle, tree and ground so those could be layered in the background too. I colored the tree and ground but chose to keep the circle white so the focus would be more on the school than having it look like a rising sun. It’s more for calming that area down than anything else. Lastly, I added some dashes for the airplanes to indicate they were flying.
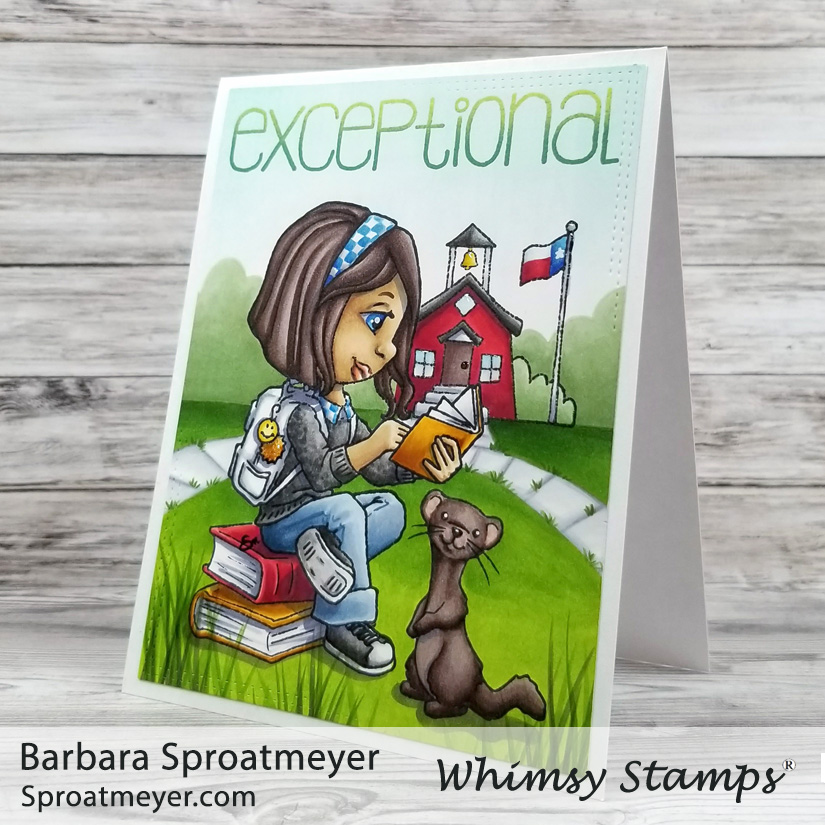
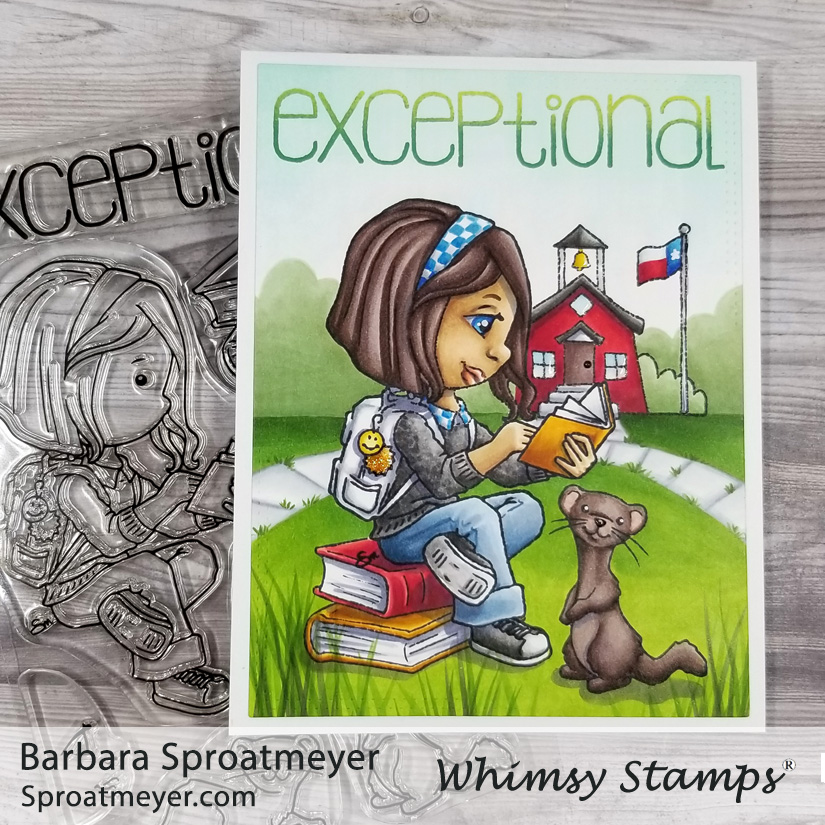
Have you seen the new releases yet at Whimsy Stamps yet? This is one collection that you don’t want to miss and so much inspiration from the Design Team. For my project, I chose to use Polka Dot Pals Eileen and create an outdoor scene with her reading her little buddy.
I started this card by stamping the Polka Dot Pals Eileen character on the stack of books. I used the add-on face that is include with this and stamped it on her face. Then I added her little ferret friend next to her. They’re enjoying a good read together. Yup. In the background I added the schoolhouse and finally the sentiment at the top. That’s all the stamping I did and got right into coloring.
There are other elements to this set so quiet a few options for scenes especially if you mix and match them with Polka Dot Pals Delia, the other set that was released yesterday. Those two would be adorable together and good study pals. Anyway, back to this card – after coloring the stamped images, I colored in the bushes, sidewalk and grass to complete the scene. The flag I chose to day was the Texas flag with it’s lone-star in the center of the blue.
GIVEAWAY ALERT – Details are at the bottom of this post! This giveaway is closed and the lucky winner is “Hege” – congratulations!
It’s release day at Whimsy Stamps and oh my, you’re going to love all the New Stuff! There are so many fun products but I chose to show off Polka Dot Pals Delia on my project with a few elements from Polka Dot Pals Eileen. The two Polka Dot Pals clear sets released this month are school themed and I’m sure everyone is ready for that to start… well, almost everyone. LOL
Polka Dot Pals Delia is all set for school and has her backpack in hand. I thought it would be a fun scene to make with books all over and the globe in the background. So I created a shelf, which turned into a cabinet. I used a ruler to sketch that out then stamped the items sitting on the counter.
The globe is from the Polka Dot Pals Eileen set and the face that I stamped on is from Polka Dot Pals Syeda set. I had to use the turtle on this one as it looked like the perfect class pet. I loved coloring this scene and the bright colors make it a cheery card. Lastly, I used the Card Builder Windows die and framed it with black cardstock to layer this card.
This giveaway is closed. Thank you everyone who participated! Sign up to received inspiration in your inbox by following this blog and get notified of future giveaways too.
Now it’s time for the giveaway details – become a follower of this blog plus leave a comment on this post and tell me what time of day you like to be inspired. When do you like to see inspiration in your inbox – is it (1) Mornings, (2) Afternoons, (3) Evenings or (4) (fill in the blank)? Comment between now and Tuesday night, August 4 for a chance to win this loot: A card I made using Polka Dot Pals Zara Fairy Dreams and the clear stamp featuring Polka Dot Pals Khadija with some glasses. The random winner will be announced on Friday, August 6. Good luck!
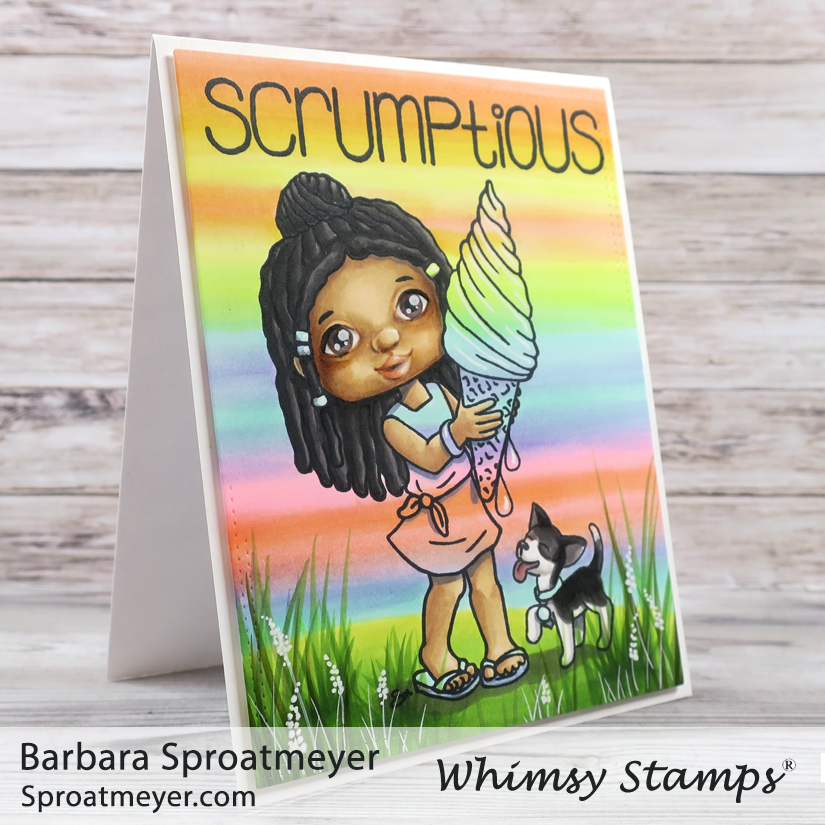
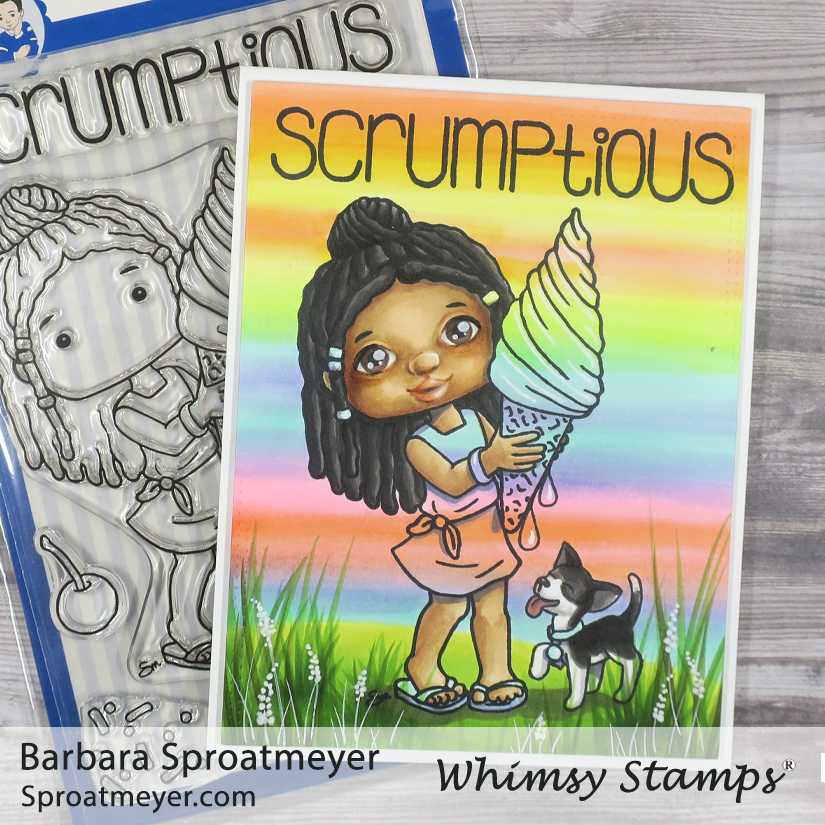
This card is one scrumptious sherbert-tastic card! I took an idea from my daughter who had colored an image as a rainbow through everything except for the head. I thought that was an intriguing idea and gave it a try with this gal, Polka Dot Pals Kezia and her little puppy.
The image my daughter used was a winter image so there wasn’t as much skin showing so I don’t think the effect worked as well on my image as it did hers. However, having the ice cream in the picture helps show the idea.
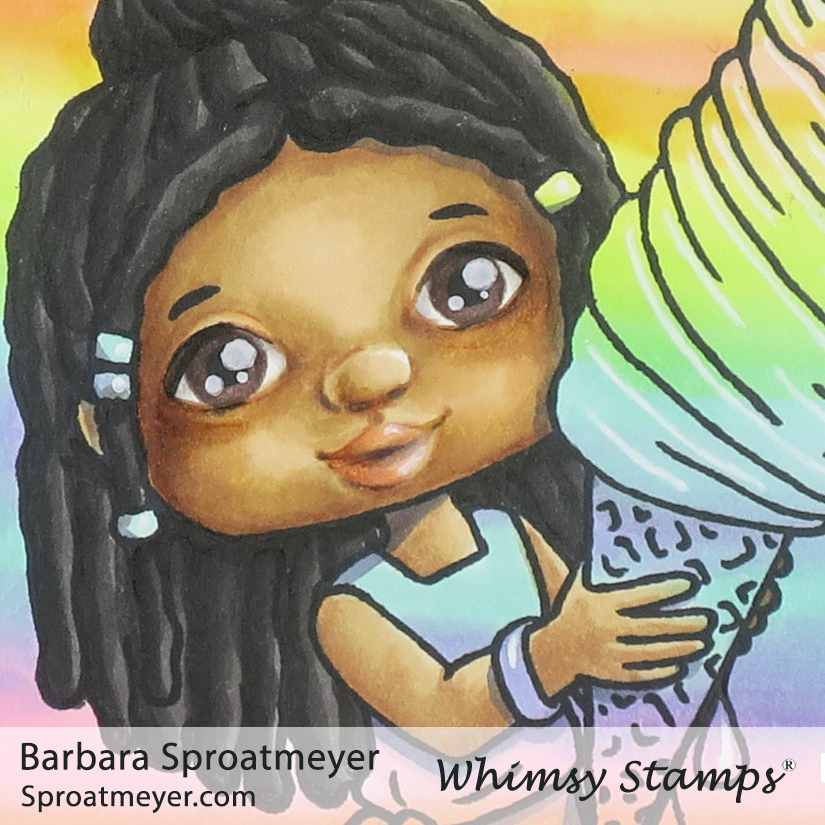
For the face of Polka Dot Pals Kezia, I decided to color in my own and not use one of the add-on faces. I’ve been trying to adjust the way I color the eyelids by giving a highlight above the eye and a lighter one below the eye. Then I’m also trying out new eyelashes and just making a thick line instead of individual lashes. How do you think it’s working out?
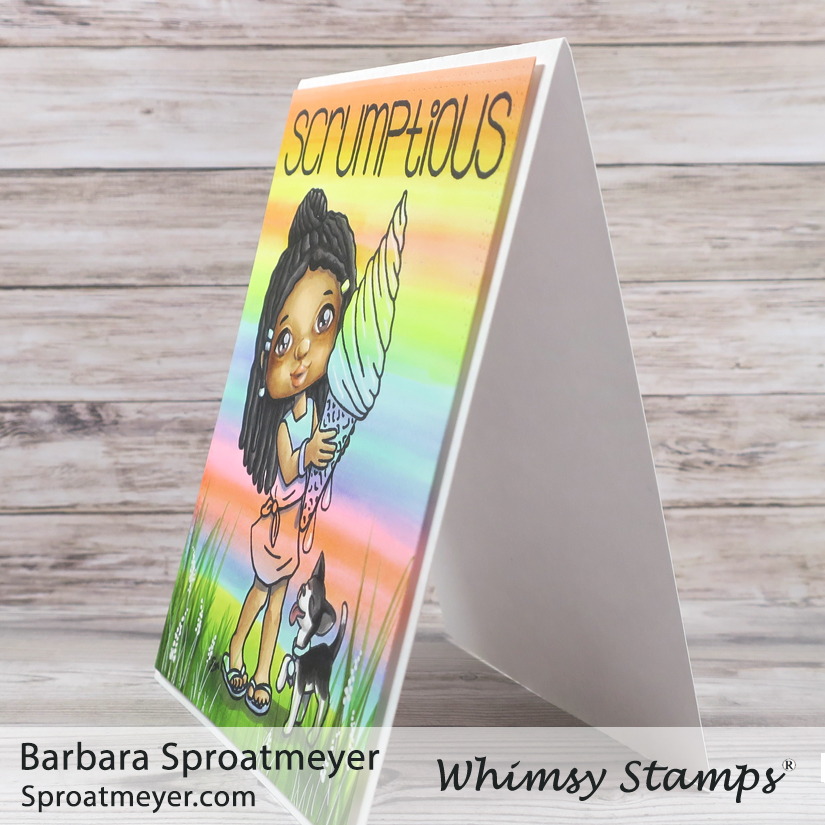
This was one hard card to photograph. I had lots of problems with my camera but I think the psychedelic colors in the background threw it for a loop. I had to pull out my trusty handheld camera for this one. LOL But I love the bright colors and know it will cheer up someone’s day.
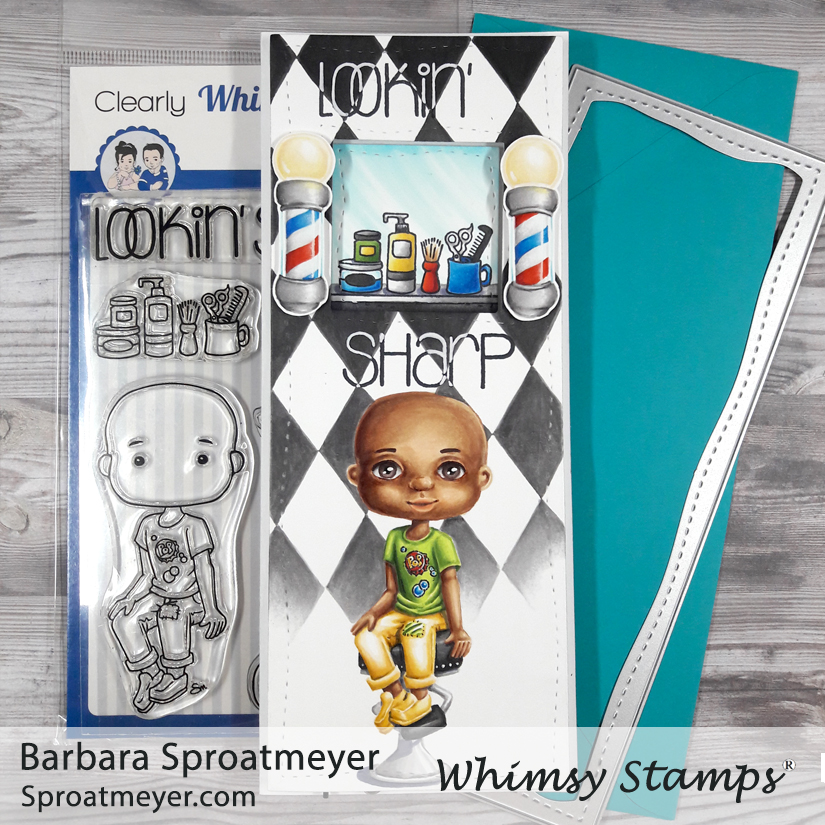
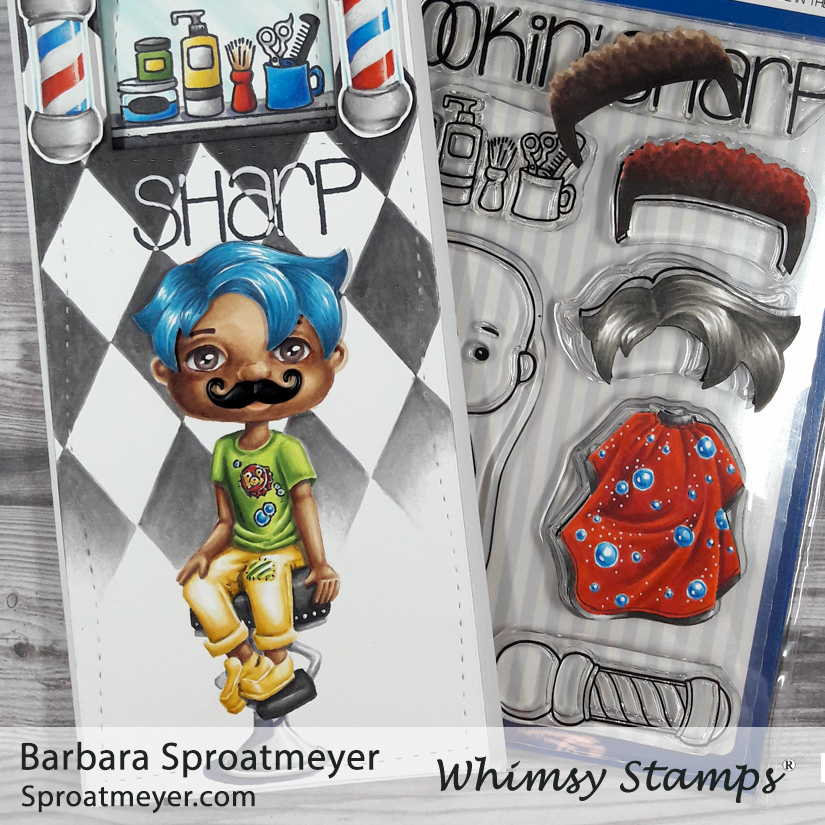
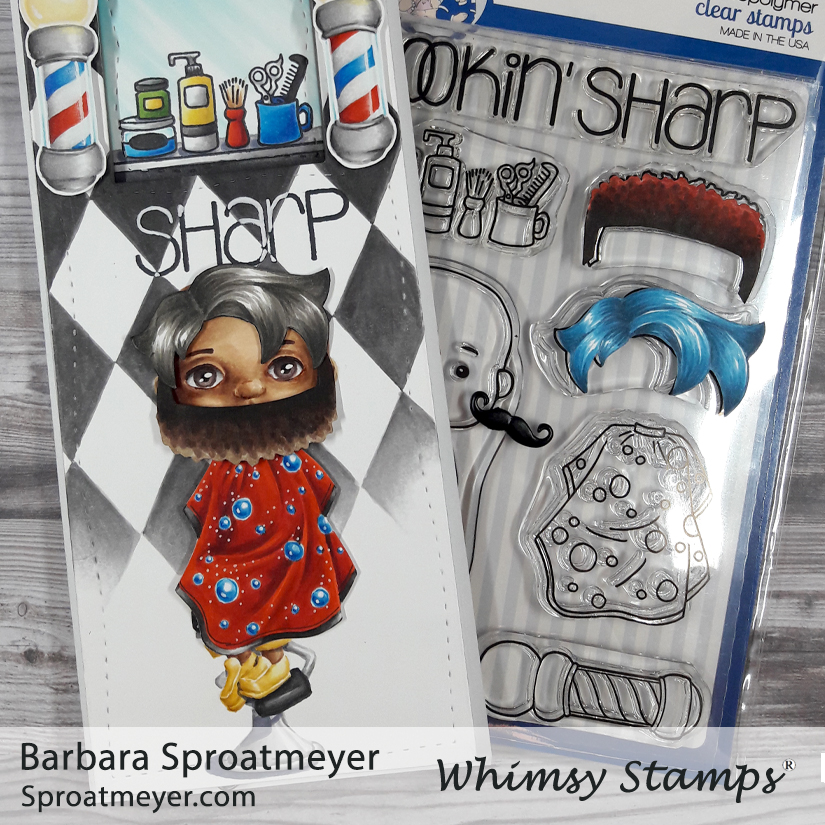
This is one of those projects that started out as a small idea yet kept expanding as it was created. I have lighting elements and interchangeable hair and accessories to dress this fellow up at the barber shop… plus it’s on a slimline card AND I made a video coloring the face. Wow! This is one interactive card (and post) that will keep you busy and I have loads of pictures too.
I mustache you… have you seen Leland? I have several little mustache brads and I couldn’t resist not putting on on this card. I made a magnet out of it by cutting off the brad part with little tin snips. Then I glued a tiny magnet inside which was cut from the magnet sheet. The metal of the brad helps it stay in place so the magnet inside didn’t have to be perfect.
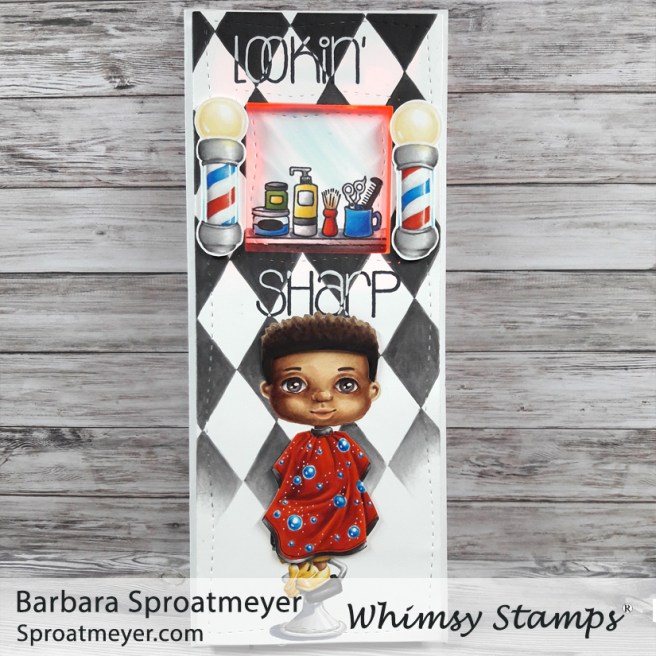
Lookin’ sharp buddy! Here he is with tight curly hair and the barber’s bib. The bib can be used on both Polka Dot Pals Leland here and also on the Polka Dot Pals Louisa. So on another project I could easily see a girls’ night out at the beauty salon.
On thing I like about this fellow is that he’s bald because the hair possibilities are limitless when using creative color placement. You can draw in any type of hair style, girl or boy, long or short, whatever. I love that!
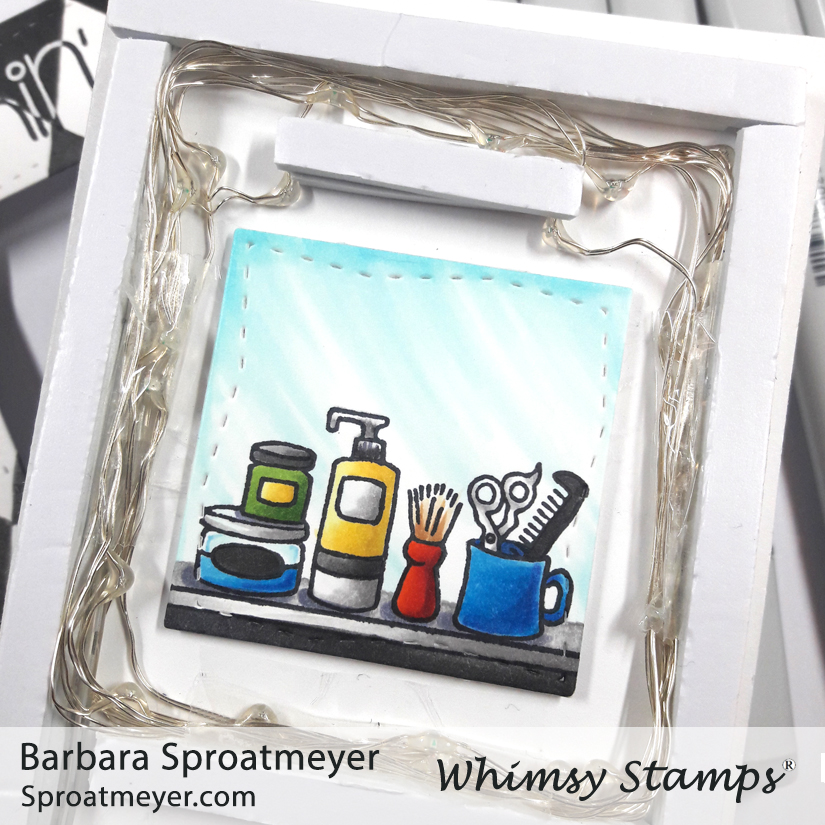
This is the inside of the card on the top part. The lights I used are fairy string lights. The string is long so I had to wrap it around several time and tape it against the sides of the foam tape. I think this fit around four or five times but the lights are far apart so this was necessary to give an even glow for the window.
For the fairy string lights, I chose the color red. They come in all sorts of colors but I thought red fit the theme I was going for.
This is the inside of the card where I added a magnetic strip to hold all the accessories. So far I have four hairstyles, one mustache and the barber’s bib. As my kids have shown me, the hair can also be used for beards and mustaches too. They had a lot of fun showing what Polka Dot Pals Leland looked like when he entered then exited the barber shop.
Here’s a close up of Polka Dot Pals Leland. I colored this face without using an add-on face stamp which I show in my video. It’s not perfectly mirrored or centered but that’s one of the qualities of building the face from scratch. We humans don’t have symmetrical faces either so I call it a “natural” look. LOL
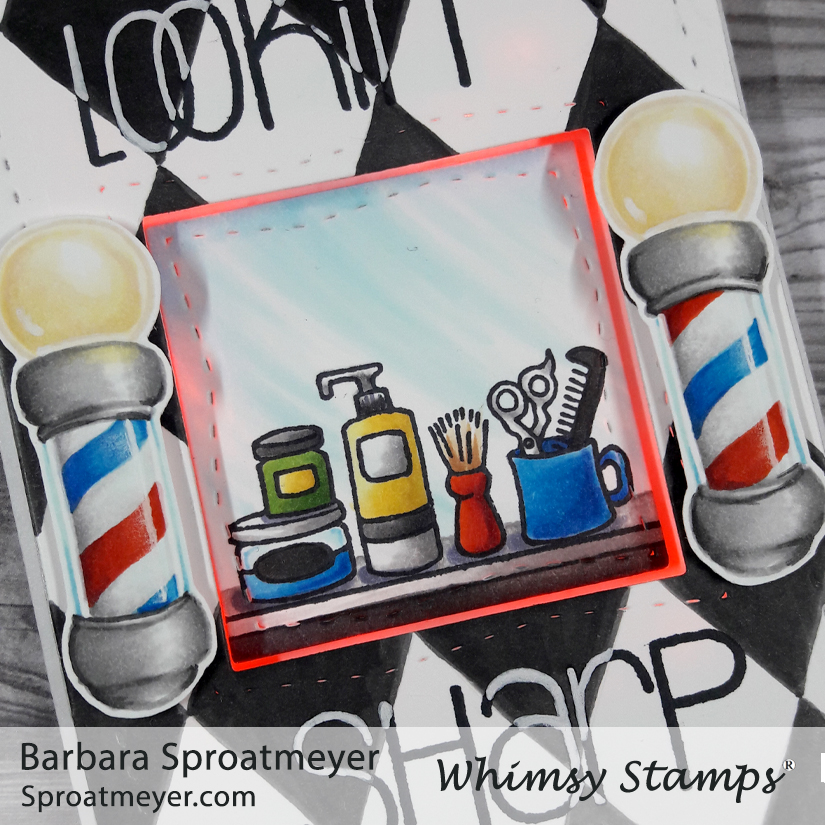
Here’s a close up of the barber shelf which was recessed in the card with a window. The square was placed on a thin layer of foam so the lights would shine behind and in front. I did this so the lights weren’t so bright and there was more of a soft look to them. It would have been fun to put yellow lights in the barber poles too but I ran out of space and it was too much of an afterthought to incorporate.
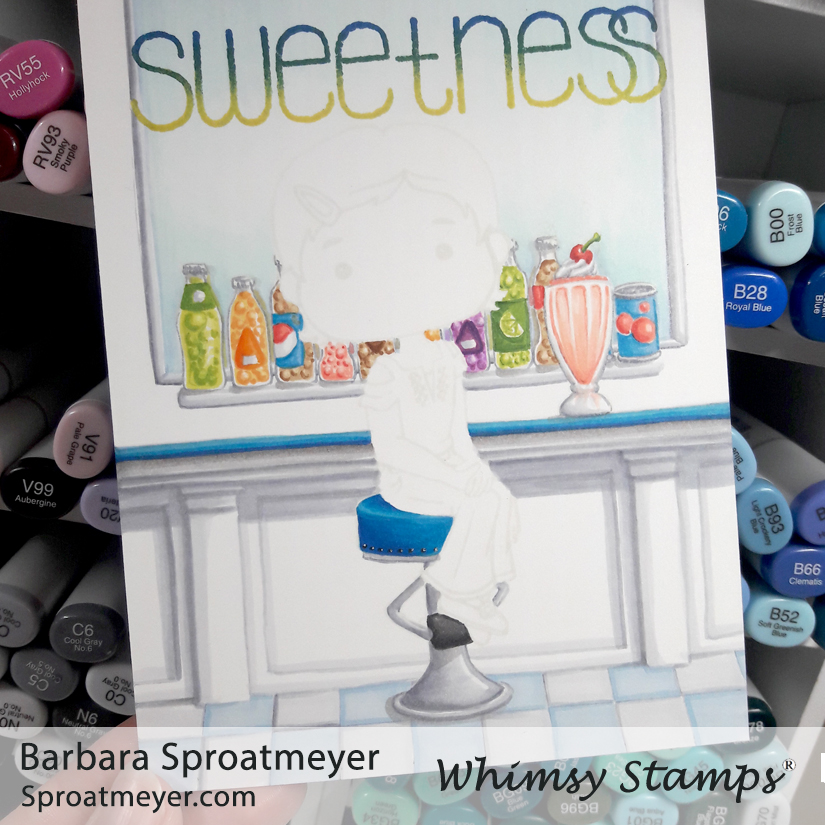
This is sweetness! At least for Louisa it is. For this project, I’ve used the stamp set Polka Dot Pals Louisa and the coordinating accessory stamps to create this scene. If you want to know about my errors, then don’t miss out on the YoutTube video where Amelia is all too eager to point them out. And read below to know a few of the details on how I created this scene.
The Polka Dot Pals Louisa set comes the sentiment and coordinating stamps that I used to create this scene. I stamped the character and milk shake first to mask them off then stamped the table, stool, soda and sentiment. I added the bottom portion of the table and the tile flooring using a ruler. Then I also added the mirror behind the soda bottles the same way. The face came from the Polka Dot Pals Mason set
I wasn’t sure how I wanted to color the character yet so I worked on the background first. I especially wanted to color the soda pop because the colors I used there would be important to my color choices for the girl.
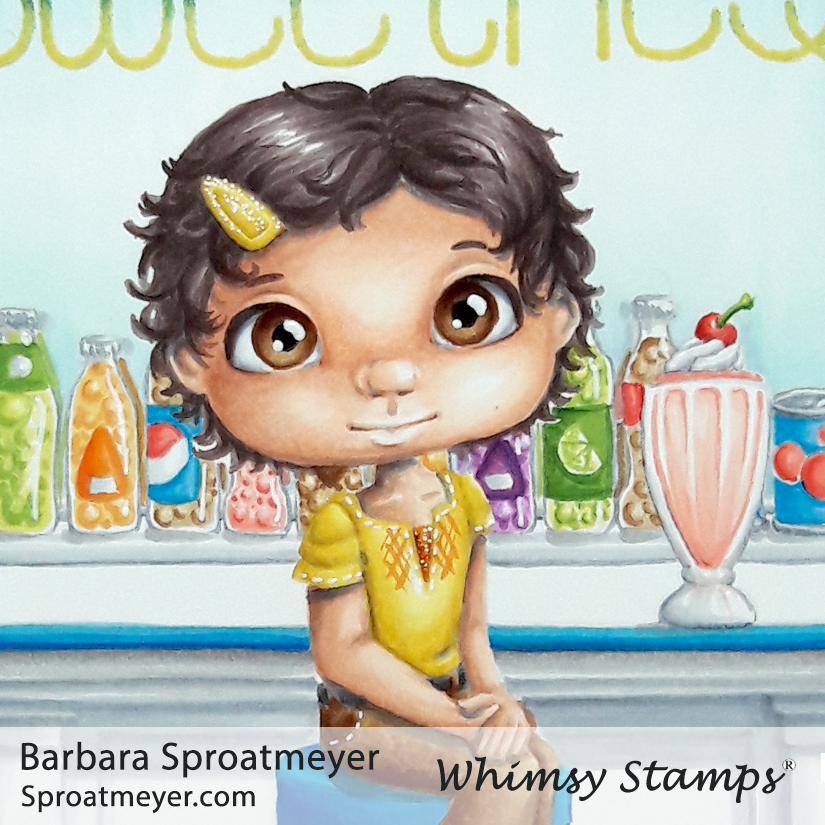
In the end, I chose yellow, brown and dark brown. The yellow was so that she would stand out more and tie in with the sentiment; the brown was to coordinate with the cola and root beer flavors, and the dark brown was to also help her stand out more. If I was to do it again, I would have saved the sentiment for last and also done that in a chocolate color. Perhaps a neon-light would have been a good challenge!
The card was finished by using the Card Builder Windows Die. I outside part was used with 1/8″ foam tape and I thought that made it feel like looking through a window. Then the inside was placed directly on the card base. Lastly, I reached for my white pen to add some highlights and sparkle.