Let’s go to the beach

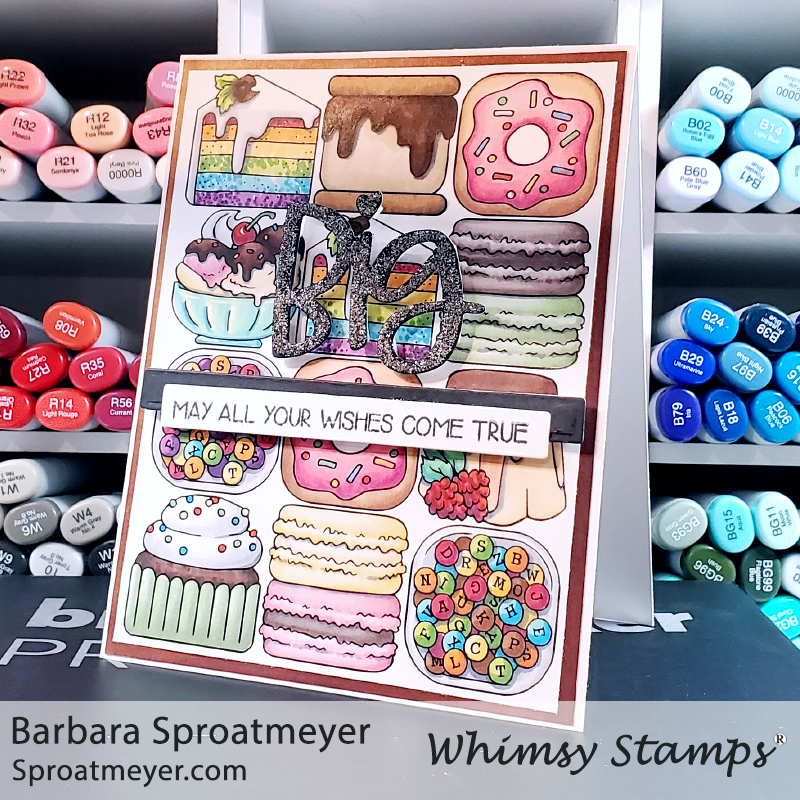
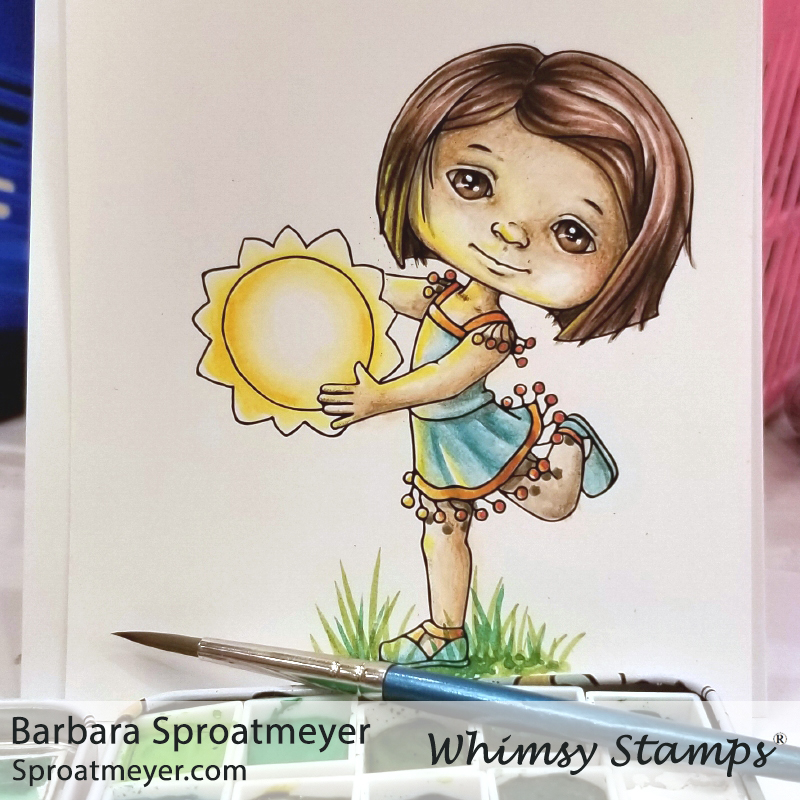
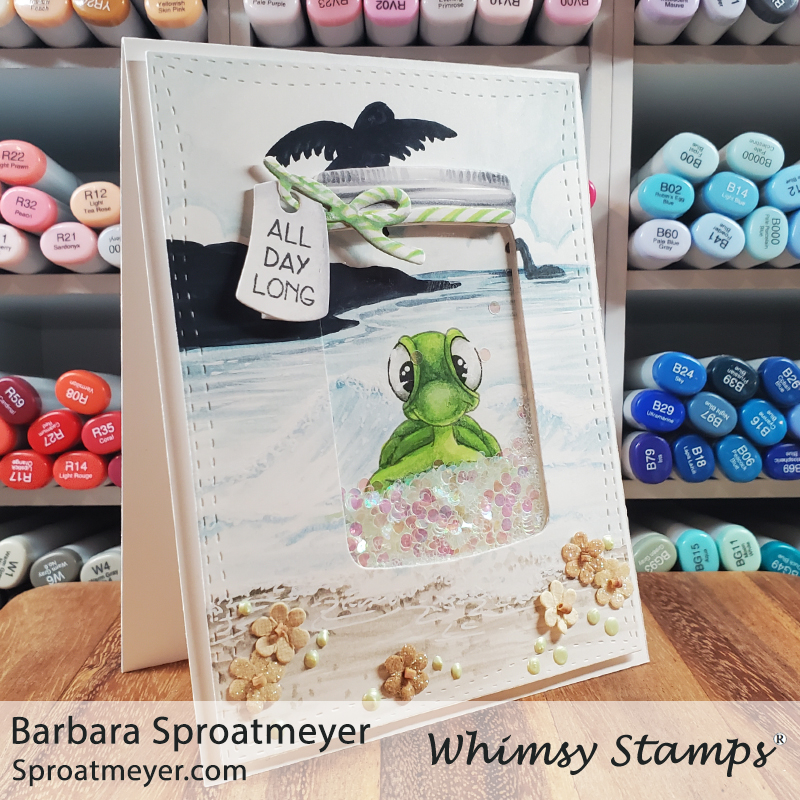
I colored this image using watercolors at Jennifer’s boot camp and we ended up coloring the whole sheet. However, because I wasn’t using watercolor paper, it was difficult to get the look that I was gong for. So when it came time to create the card, I wasn’t sure what I wanted to do – I like parts of the card but the other parts didn’t look the way I wanted them. Do I cut it up? I ended up using the Atlas Mason Jar die set and created a shaker card. I wasn’t sure how it was going to turn out but I think it turned out rather nice.

Here are the Whimsy Stamp products that I used:

Baby Sea Creatures stamp set
Atlas Mason Jar die set
Simple Sentiments Strips Clear Stamps
Shaker Maker Rectangle die set

Coloring medium:
watercolors on Hammermill Premium Color Copy 100# paper

I wish for BIG desserts!

I colored this card a while ago and had planned to cut it all up and make more than one card. Then I thought, wouldn’t it be fun to make a card like this but apply everything loosely then take it apart and make more than one card after that? Yea that was my good plan but it didn’t follow through very well especially when I started using the glue instead of small squares of sticky tape. Oops. However, I like how this one turned out and shows all the desserts from Sweet Tiles – Desserts stamp set.

Here are the Whimsy Stamps products that I used:

Sweet Tiles – Desserts clear stamp (drawn by me, of course)
Simple Sentiments Strips Dies
Simple Sentiments Strips Clear Stamps
Big Hugs Word die set

Medium:
Copic markers on on Hammermill Premium Color Copy 80# paper

You’re so awesome!

This colorful card features the cone flowers from Bees Knees and I chose to go with a rainbow theme for Cassandra. She had to leave Boot Camp early so I don’t remember if she saw it or not. I love these flowers done in any color but I think blues are my favorites. This was done with watercolors and this last week I created the card using a bunch of dies from Whimsy Stamps. Those were colored with Copics and Distressed Inks to come up with the final product. It was a lot of fun to create and I hope it brings a big smile to anyone who receives it.

Here are the Whimsy Stamps supplies that I used:

Bees Knees Clear Stamps
Awesome Large Word Die
Simple Sentiments Strips Dies
Simple Sentiments Strips Clear Stamps
Grass Frames Die Set

Coloring medium:
watercolors on Hammermill Premium Color Copy 100# paper

Copic Boot Camp with Watercolors

If you haven’t been yet, you should attend Jennifer Dove’s Boot Camp. It’s awesome and you learn so much! This last year I was blessed to attend but found myself without my Copic markers. Yikes! But never fear, my watercolors were near. So that’s what I took. I know it’s crazy, but what a great way to learn the medium in a different way. Check out what I did the first year HERE.

All of these images were colored on Hammermill Premium Color Copy paper with 30 year old student-grade watercolors. That’s right – these watercolors were so old and the caps so crusty that I had to cut the back ends off and squeeze the paint into trays so I could use them. But it was all good – I ended up getting five sets of watercolor trays so I shared them with my Mom and kiddos. Bonus! Anyway, without further ado, here’s what I colored at boot camp…

First off is the last image we colored which are the infamous Boots from Whimsy Stamps. Jennifer breaks this down into manageable steps and even though it looks difficult, she’s able to teach everyone in the class this shinny technique.
Next up are the images we started out with every morning. This four-square of the llama is from Fa La La Llama from Whimsy Stamps. My personal challenge was to do something completely different with each one. My favorite is the llama in space. What’s your favorite?
From this point, I don’t remember the order we colored everything so I’ll list the stamps and any notes I have for each. Here’s another set of four and again I challenged myself to make something different with each set of apples. This stamp is Back to School from Whimsy Stamps.
This cute mouse is from Deck the Halls from Whimsy Stamps and I was working on a shining light source – the star.
Speaking of shining light sources – here’s another one using Polka Dot Pals Atlas from Whimsy Stamps. With the sun being the brightest source, I colored it first and then colored the yellow glow on where I thought it would shine on the girl. Then when I colored the rest of the image, I tried to keep the yellow in that area without adding more colors.
Here’s the image completed – Polka Dot Pals Atlas from Whimsy Stamps.
This other image focuses on glass and glass reflection. This is the Atlas Jar clear stamp and Penguin Flies digital stamp, both from Whimsy Stamps. This photo shoes the original copy of the project we were doing plus the one I water colored on top of that one. I am surprised that I can’t see a lot of differences between the two mediums – they’re there but not from a glance. I think that’s pretty cool.
This stamp is Love Ewe from Whimsy Stamps.
Working on the fish scales and facial expressions, this is Mermaid Mona from La La Land Crafts.
I’ve colored this fun kitty before and converted the pumpkin into a watermelon so it was fun to color it again. This is Kitty and Watermelon from Whimsy Stamps.
Let’s move on from Halloween to some winter and Christmas stamps – this one is Rudolph from Whimsy Stamps and is available in both rubber and digital stamps.
Into the snow is Yeit Friends from Paper Nest Dolls. I think I had a hard time painting white with the water colors.
The last holiday stamp and is Gingerbread Man from Whimsy Stamps. Again, on the right you can see the one I watercolored and the one on the left is the original copy of our task.
On to some nature – this is Bee’s Knees from Whimsy Stamps and I decided to give them a rainbow color. This is one of the images I drew too and it comes with sentiments and little bees too. 😉
This little heifer friend is from Cow Friends from Whimsy Stamps.
Up into space we have UFWhoa from Whimsy Stamps. I loved coloring the alien and ship but the background was the bane of my watercoloring weekend. I couldn’t get a good blend on such a large area! That sore will pop up later on with another image too, unfortunately.
This cute image combination is from Pretty Little Things from Scrappy Boy Stamps.
Here it is – the other image I had a difficult time with because of the large open space that needed to be filled in. It would have been easier on different paper. Anyway, this little turtle is from Under the Sea Creatures from Whimsy Stamps.
This last one is Froggy Hoppy Day 2 digital stamp from Whimsy Stamps and we were working on the water droplets.
That leads us back to the Boots from Whimsy Stamps. It’s traditional to stick around Sunday afternoon and finish the other shoe – not everyone does this but apparently we made up the largest group this year. So exciting! I know that being my second year I should have colored it non-black for an extra challenge but I figured doing it in watercolor was all the extra challenge that I needed. Here’s to you Jenn – loved every minute of it! ❤

Jr. Hatter Jacie

For those who joined the Whimsy Stamps World Card Making Day weekend event on Facebook have seen this already but for those that missed it, here’s a second chance. For my project, I chose to used Jr. Hatter Jacie and colored her with a Christmas themed background.

I wasn’t sure how I was going to finish this up but started with what I knew – the background and then Jr. Hatter Jacie. Once that was done, I settled on a design I was thinking about which was the close up of the fur trees and the Christmas Lights in the foreground. It was a good challenge for me and I can already see areas that I can improve for the next time. However, I wouldn’t have gotten to that point if I hadn’t jumped in and tried it out.

The ABUNDANT sentiment was borrowed from the Fill a Harvest Truck set. This project is shown as a speed coloring video on my YouTube channel – you can watch it below…

List of Common Supplies

Whimsy Stamps:
Jr. Hatter Jacie
Fill a Harvest Truck (sentiment)

Copic Colors:
R01, 05, 21, 22
E0000, 04, 23, 30, 31, 41, 42, 43
BG11, 45, 49
BV23
YG23, BG96, 99, G29

Polka Dot Pals Kezia

This is a repost of my project I created for the 31 Night of Halloween at Whimsy Stamps. I shared this on Night 3 on the Whimsy blog where you can pick up and continue for the rest of the month. For this project, I used Polka Dot Pals Kezia and gave her a Halloween flair with cobwebs and spider friends.

For those who have been following me for a while might recognize some of the elements on this card. That’s because I revisited a challenge from long ago and you can see that card and details HERE.
Not having any decorative paper handy at the moment, I decided to color in the background to look like paper. Instead of using orange (from the project you can see HERE), I decided to go for green. Then the final touches were the cobwebs. I think that parts makes this card shine!

List of Common Supplies

Whimsy Stamps:
Polka Dot Pals Kezia

Copic Markers:
C3, N1, 2, 3, 4, 5, 7, 9
V09, 06, 17, BV11, 13, 20, 23
YG17, 21, 23, 25