Precious & Aidan

Today at Make it Colourful we have a fantastically fun challenge for you!! We want you to color a sunset with clouds!! Now, it’s really not that hard and there is plenty of inspiration provided from the Design Team … so you should give it a go! And um… in case you’re ready to throw something the shoe… is this when I mention it was my idea?

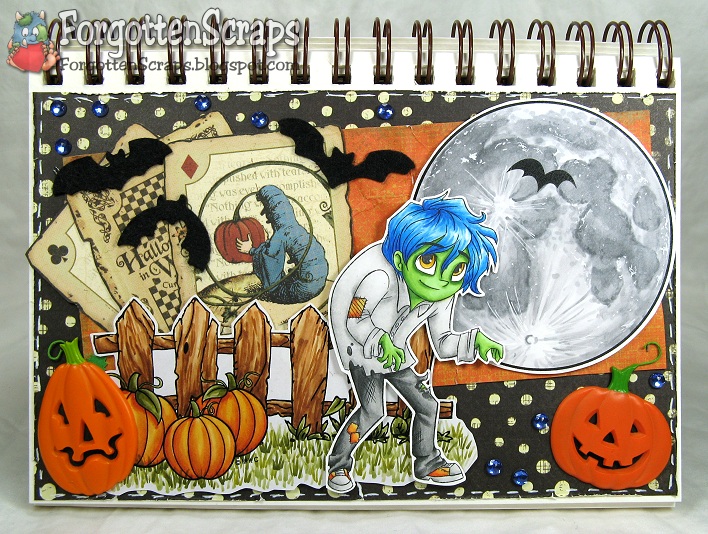
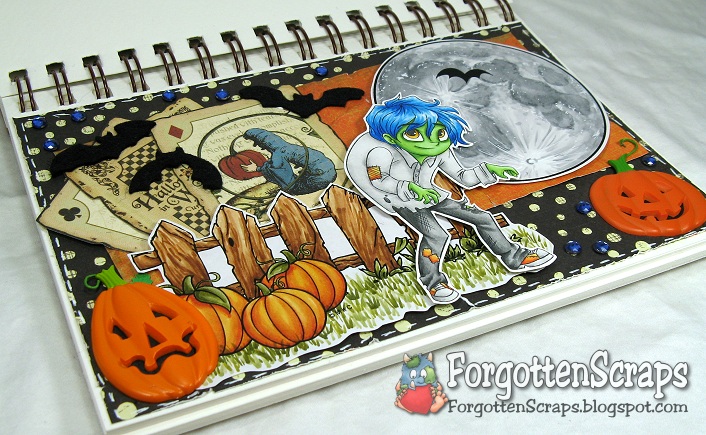
For my project I used the Big Steampunk Treehouse from Make it Crafty to set the mood. Then complemented it with two images from Tiddly Inks… Precious and Aidan to come up with my scene.

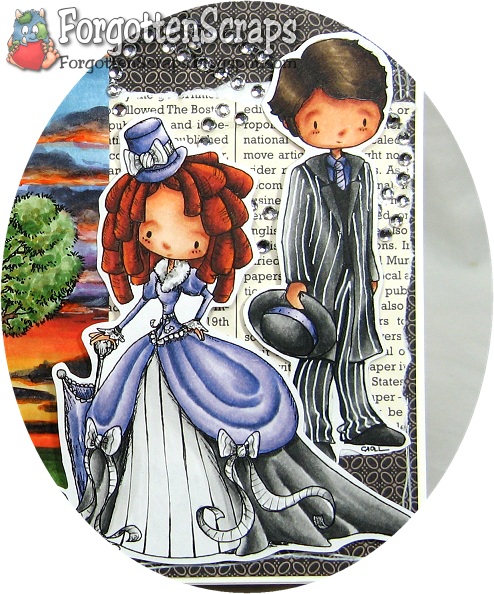
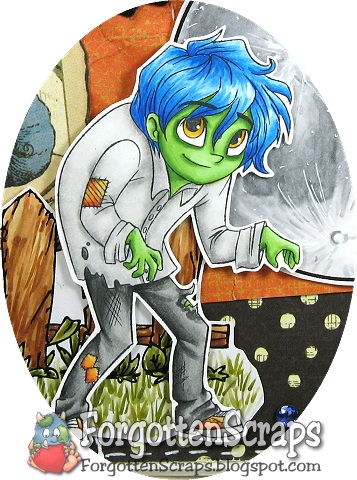
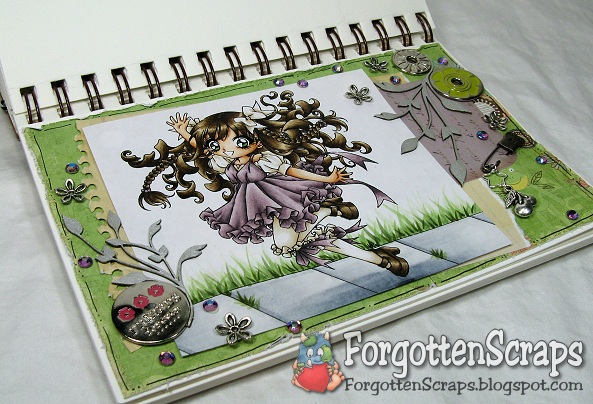
When I colored Precious… I coudn’t help but to use Annika‘s hair color combination for red. ;D It’s been one of my favorites lately! I gave Aidan a pinstriped suit to help brighten up all that black. I would have liked to have a fine-tipped white gel pen but the idea has come across. Then to compliment each other, I gave Precious white stripped elements to match.

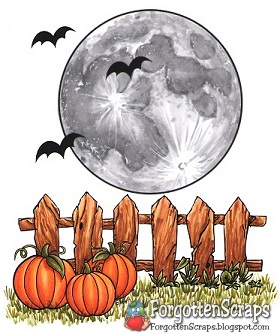
The sunset was an interesting experience… and one that I had to use lots of photo inspiration from Google. I narrowed one down and started at the bottom with the yellows the gradually worked my way up to the blues. Between the two I added some purple for the transition. Once that part was done I went back in with a deep purple color and added the clouds. At that point it looked a little flat so I added some white acrylic paint to the clouds then went back in and colored in some oranges and yellows.

I honestly didn’t know if it was going to turn out and even amazed myself. I really liked how it turned out and hopefully will be brave enough to try it again! 😀 The colors I used are: BV23, BV25, BV29, V20, V25, V06, B000, B60, B63, B91, B93, B95, Y32, YR02, YR07, YR09, YR21, YR30 plus the white acrylic paint. Hope you like it and hope you’ll come play along with us this week!

Igor Miller

Anyone up for some Halloween projects yet? Our local craft stores already have a heavy supply of Halloween and Christmas decorations up so I might as well add a few pages to my journal. ;D This one is for the Simply Betty Challenges “Anything Halloween” theme.


I used the new Igor Miller stamp from Simply Betty Stamps and Eerie Scene from Make it Crafty to create this scene. And for those of you keeping track… this is my LAST “Green Skin” experiment from the Make it Crafty team – maybe I went a little too overboard on the green?! LOL (You can read about my green face coloring HERE.)


This project uses a lot of the Halloween items I won from Betty’s 12 Days of Halloween challenge from last year, specifically the Igor stamp and bat metal dies. Thanks Betty! My final project for that challenges was the Cauldron Box and the papers I used on this project were left over scraps from that project. Yeah… I kept them!


The moon was a fun experiment that I wasn’t sure if I could pull off or not. The image is just an empty circle and to create the texture of the surface I started with C3 and gradually worked up to C00. Then as some final touches I went in with a white gel pen and added a few splotches and defined the craters a little more. I love how it turned out and I’m glad I persevered.


Some of the things I buy end up being a challenge to use and there are two of them on this one! The Jack-o-lanterns are the one element and the Alice in Wonderland Halloween paper was the other (the playing cards). Both I thought would be easy and used up quickly… and both were purchased last year!! But a new year and new ideas, I suppose. ;D

Zoe All Excited

Our challenge for this week at Make it Colourful is “Coloring Grounds” and for my image I created and colored a sidewalk with grass. In other words, adding a ground to an image that does have one. There is some fabulous inspiration at the challenge blog that you don’t want to miss too! ;D

On my journal page I used Zoe All Excited from Make it Crafty and thought it would be fun to have her skipping down the sidewalk! I embellished the page with bits and pieces including gems, metal bits and brads, and leaf chippies from Butterfly Leaves.

Here’s a close up of the image with the sidewalk. First I drew the lines of the sidewalk with a fine tipped marker then colored it like a normal image. I added grass on the one side then a few strands in the cracks of the sidewalk… because I always have a few strands in mine. ;D

The grass was created by flicking the brush tip of the marker from the sidewalk as the starting point up and away into the air. I used four different shades of colors and varied the length of the stroke to give it a more random look. Hope this gives you some ideas and don’t forget to check out the Make it Colourful challenge for more ideas!

Queens Cutie

I have another Urban Scene to show of today for the Whimsy Stamps & Make it Crafty joint release blog hop! After all, another journal page is so much better to land upon than a colorless paper test. LOL This one was also inspired by many of those on the blog hop and I had to try out some of the new ideas I saw along the way!

The basic inspiration for my project came from Vicky as I was totally intrigued by the way she used the chain link fence and the city skyline sentiment – I loved that and such a brilliant idea! I merged the images together using layers and used gradation to go from the black sentiment down to the white ground. (Which by the way, I discovered the chain link fence can be merged so tightly together which is so smooth!) I figured merging the image might save me from coloring behind the fence… however, I ended up doing that for the sky anyway. C’est la vie!

For my project I used Kenny K’s Queens Cutie, Cityscape Saying from Whimsy Stamps and elements from the Urban Street Collection from Make it Crafty. When I color a Kenny K image the first thing I do is Google Annika‘s blog to look for inspiration and I’m so glad she had this one colored too. I love the brown colors she used but felt in the mood to use other colors – after all, I can’t copy her 100% all the time, right?

I colored the bench with inspiration from Zoe and Marlene‘s projects and I liked how they made it look like a wood bench instead of concrete… and because most city things are green (don’t know why) I chose to color a green city bench. ;D Unfortunately by time I got to the boom box I was plum tuckered and just wanted to get it finished – maybe later on I’ll color up another one and dimensional it on top of this one to cover it up. That’s my tip for the week! ;D

Strong Island

Welcome to the joint release blog hop!! Whimsy Stamps & Make it Crafty have come together to create a fun Urban Themed digi collection!

We have broken it in to TWO HOPS – HOP A Starts HERE & HOP B Starts HERE! You are currently on HOP A and should have arrived from the incredible DEBBIE!

Ann Vento has whipped up her magic and designed an incredible collection of funky wall sayings, city landscapes and of course a range of super cool street signs. Check out the Sentiments collection HERE!

Make it Crafty is trying something new offering all the different elements for you to build your own urban backdrop. Check out the Urban Street Collection HERE!

Then of course, what better characters to incorporate into such a scene than the fabulous KennyK rubber stamps available from Whimsy Stamps!

For my project I used Kenny K’s Strong Island image and used Annika’s project for my coloring guide and also used one of her hair colors too! Then after I had seen how Carole had colored her Urban background I had to copy the windows too. ;D Mine were blue before but I loved the black and had to change it.

I feel that this project is was isspired and put together completely by my friends … I even had Zoe merged the Urban wall background for me. All I did was just the coloring. LOL Well I can’t think of anything else to say … so I hope you enjoy the project and both hops!

Our incredibly talented Design Teams have had a blast playing with all the different elements to bring you LOTS of inspiration so I hope you get a chance to see them all! Your next stop on HOP A is the fabulous MARLEY, but before you go make sure you leave a comment below!

You have until August 21st 8PM Australian QLD time to make your way through the hops!

Kai in the Rain

Are you ready for another challenging challenge? This week at Make it Colourful we want to you experiment coloring something that looks wet! It’s actually not as hard as that sounds and there are many wonderful examples on the challenge blog that you don’t want to miss out on.


On my project I used “Kai in the Rain” from Mo Manning and Pebblestone Patch from Make it Crafty. I also used one of my new dies to make the clouds and because it was raining I took the opportunity to use my gray felt too! 😀


The water on the coat was actually simple and I found it much more difficult to make the raincoat shinny – after all, that requires me to leave a part of the paper uncolored! Gasp! But after I colored the raincoat then I went in with a white gel pen and colored in the water droplets. Then I used a darker shadow of the yellow to give the water droplets a shadow – easy peasy!


I even tried to color the water splashing in the pool of water in front of the cobblestones but gave up after four tries… so if you look closely you can spot those around the bottom of the image. ;D The rest of the journal page was decorated with the usual regiment – brads, chippies, and a metal frame journal tag. Hope you enjoyed and good luck with your water project this week!