Who’s Out There Ali

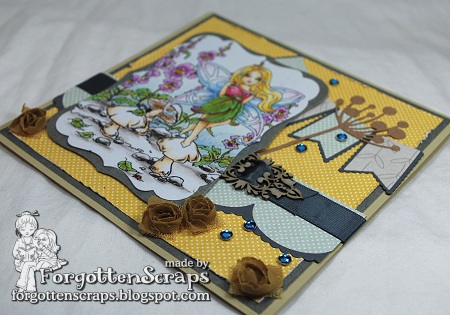
Here’s a project I have for the Simply Challenge Challenges this week, which is a little on the late side, but better late than never.  LOL  Anyway, the challenge theme is “Let’s Go Camping” and I found the perfect combination to work with.  Check out the SCC Blog for more inspiration too.

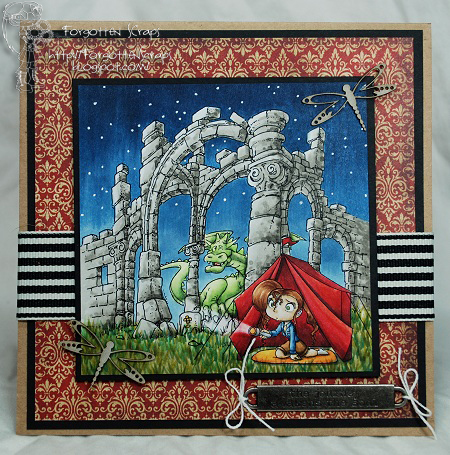
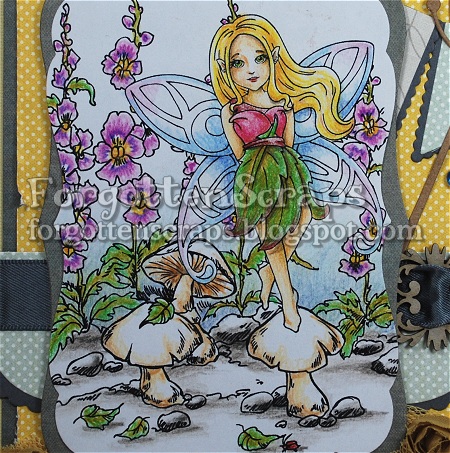
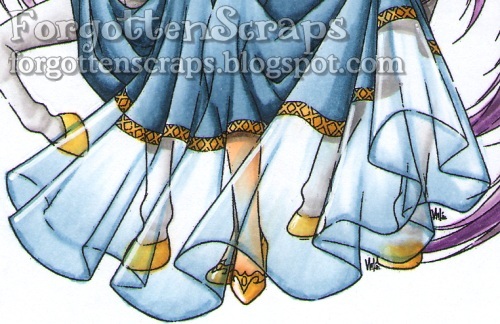
For my project I started with Who’s Out There Ali, from Simply B Stamps, and I really wanted to focus on the flashlight.  So for that I thought it would be best to color the whole image in so it could really shine.  However, each time I got a color out, I had forgotten about my plans and ended up coloring the spot that should have been left white!  Eeek!  Lucky for me, the Blender pen came to my rescue and was able to fix my mistake.  LOL 

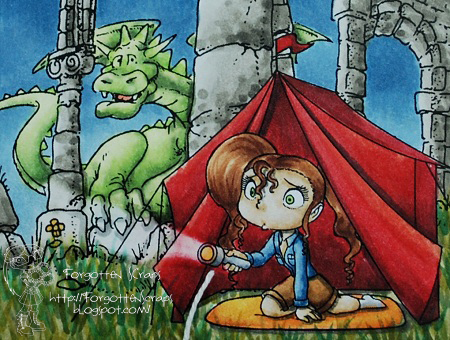
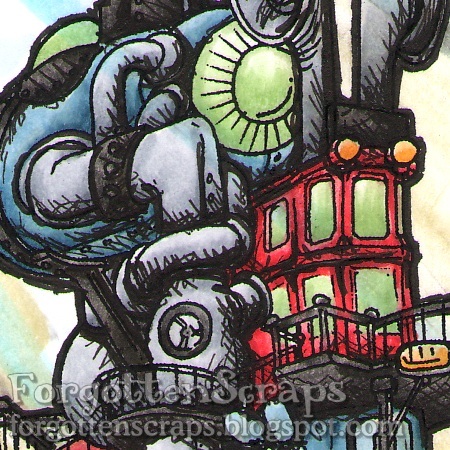
For the background, I stumbled across Dragon Ruins from Make it Crafty and knew it would be perfect!  I wasn’t sure how it was going to turn out but after adding the blue sky and stars it really completed the scene.  The stars were added with a white gel pen.

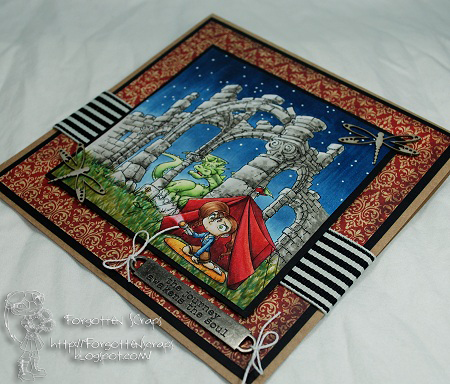
The sentiment I found was from Tim Holtz (I think) and makes me cuckle when I put all the emlements together.  It says “The journey awakens the soul” and  completes the scene.  😀  I hope you enjoyed my project and thanks for coming by today!  Have a great Monday!

Elven Hestia

It’s my day to post some inspiration at the Make it Crafty store blog and I wanted to share with you the image I colored this week while trying to mimic Distress Inks.  First of all I had to figure out what coloring with Distress Inks looks like and settled on the pastel colors, deep shadows around the edges and how light the image looks.  At least, that’s how I see it.  So trying to keep a light hand with the Copic markers, this is what I came up with using Elven Hestia from Make it Crafty…

So how did I manage?  I think I did okay with the green dress but totally forgot what I was doing when it came to the black accents!  LOL  I do have one secret and fortunately it still worked out.  On the green dress I was on my final step and blending in with the Blender pen… or so I though!  Somehow I had picked up C0 and didn’t notice the gray until I was fished.  However, I think it helped tone down the greens I was using.

And on a side note, you should be surprised, because I even wrote down the Copic markers that I used!!  Now that doesn’t happen very often.  🙂  But here they are…
Hair: E50, E51, E53, E42, Y23
Skin: E31, E30, E000, E0000, R11
Dress: G82, G12, G40, C0, 0
Wings/Eyes: BG07, BG32, BG11, BG10, BG70
Boots: T8, T6, T4, T2, C4, C3, C2, C1, C0

That’s about all for today and I hope this inspires you a bit.  Thanks for coming by and have a great week!

Cadrian

It’s time for another challenge over at Little Miss Muffet Challenges and this one is all about Scallops!!  So we want to see your project encircled with scallops or lots of scallops in between.  😀   Be sure to head on over to the LMM Blog for all the design team inspiration because they’ve really outdone themselves with this one!!

For my project I used Cadrian from Little Miss Muffet Stamps and I backed her up with the Snap Dragon Garden from Make it Crafty.  For my scallops, I used a bunch of diecuts to create the scalloped border in the background (adorned with ribbon and a chippie) and the banners in the background.  If I was thinking ahead on this one I would have done a scalloped card border but that was more of an after thought.  LOL

If you might have noticed already, I actually colored this one with colored pencils!!  Yes, that’s right – it’s another attempt at using those pencils of mine and so far I think this one has turned out better than the rest.  My techniques are always so different betwix the pencils and the Copic markers that it’s still hard to change.  However, I might have some opportunity to use them on my vacation this weekend so I’m taking them along.  The pencils are always more managable in terms of storage so they’ll fit nicely hidden under my seat.

Thanks for stopping by and checking out my project.  For those who are wondering… I got my final grade for my class this evening and it looks like I can progress to the next semester!!  Whohoo!  At the end of each sememster I have a final test and teacher interview to discuss my progress, which was this evening, and she suggestion that I should continue on!!  Phew – just knowing is a releif!  However, next semester is three times more time consuming so we’ll see how I feel once it starts.  Ack!

Enchanted & Exquisite

It’s my day to post on the Make it Crafty blog and I’m sharing a few scans of the latest MiC images I’ve colored.  I merged Enchanted Princess with Enchanted Unicorn and Exquisite Princess with Exquisite Unicorn.  The first one I’ve colored with Prismacolor colored pencils (except the grass on that one) and the second one I colored with Copic markers.

 
I’ve had my Prismacolor pencils for almost 20 years now and still haven’t managed to get the hang of it. However, with the help of the other MIC gals, I’ve been able to do a little better each time I work with them.  This time I colored on normal paper and should have picked something with more of a tooth to it (i.e. more texture).  However, I found a blender marker for pencils at the store and gave that a try after it was colored.  For me, it worked out better than a rubbing nib so I’m anxious to try it on better paper next time.

One thing that I do differently with the pencils from the Copic markers is grabbing colors without looking at a color chart.  i think this helps me get more depth and variation in the colors but sometimes it also gets me into trouble.  For example, I like how the blue and purples worked on the unicorn but the added orange in the dress isn’t my favorite.  None-the-less, it was a fun image to color and experiment with.

This second image was just to help me feel better and get something colored that I enjoyed.  LOL  So I whipped out my Copic markers and enjoyed the light smooth feel to the brush versus the pressure with the colored pencils.  I think that is why this one turned out better than the first. 

For some areas on this image, mainly the dress and shoes, I used a white gel pen to add highlights back in.  I was hoping this would give the sheer fabric a little reflective shine to it and set it apart from the other fabrics in the dress.  I added highlights to the unicorn’s horn and hoofs as well as the golden shoes of the princess.

 
That’s about all for today and I hope this inspires you a bit. Thanks for coming by and have a great week!

Images used by Make it Crafty 

Maritime Abode

It’s my day at Make it Crafty Blog to share a project and I wanted to try out a new technique today however I’m not sure how it turned out.  None the less I wanted to share what I did and hopefully give you some idea.  I saw a drawing the other day in a magazine that was colored etching, I think.  At least it reminded me of those black papers that you can scratch off and draw in reverse – so instead of adding black to the canvas you’d be taking black away.  I started with the image Maritime Abode from Make it Crafty which I had previously colored…

Then using a black art pen (use size 0.1 or something fine tipped) I started with the darker areas and add scratches into the shadows.  I also went over all the lines with a medium art pen (use size 2.5 or similar) to darken them up. As you can see the lines are sketchy and not precise so I was able to go over the image quickly.  I wasn’t sure if it was going to work but I was attempting to get it to look like the edges weren’t completely scratched off.  I think I could have used the same technique around the outside of the abode but for that area I only added a darker line.

Here’s what the complete image looks like below.  I added streaks of blue and green for water as if this submarine had sank into the deep ocean.  I should have done the background first before using the art pens because as you can see in some areas the pen smeared when I dragged a Copic marker over it.  It was an interesting experiment and I think it looks better from afar than close up.  Does it looks like etching?  I’m not sure but it certainly changes the image a bit and gives it more of an edge.Thanks for dropping by and maybe you’ll be brave enough to give this a whirl!!

Make it Crafty – Maritime Abode
Copic Markers (E41, E42, E43, E44, YG91, YG93, T4, T6, T8, C1, C3, C5,YG61, G40, Y32, Y35, R32, R37, R39, E50, B91, B93, B95, B97, YG91, YB93, B60, B12, B00)
Graphic Art Pens (0.1 and 2.5)

Sweet Devilina

It’s my day to feature a project on the Make it Crafty Blog and today I’m showing a little on how I add Sharp Shadows to my images.  This is something I just started doing myself however it’s simple to do once you can be brave enough to try it out.  For this project I’ve used Sweet Devilina from Make it Crafty and colored her completely just as I would have normally colored.

Now it’s time to get the darker colors out and add some shadows.  Scared you say?  Well, yes, I was at first but adding one or two shadows here or there has helped me over come that and now I don’t mind going all crazy with them.  Sometimes a little too much too!  LOL

For my shadows this time I used the Copic T3 for all the shadows but it’s ok to experiment and use different shades or colors as the technique would be the same.  Anyway, I started adding shadows for areas that I know for sure like under the bracelets, skirt and behind her boot.

Then I went for more obscured shadows or the difficult ones like from her hair, on her ear, on the wings and on her face.  Sometimes it’s hard to add the shadow because it’s changes that area – for example, her arm behind the wing would probably be mostly in shadow from her wings.  However, I didn’t want to have a gray arm sticking out behind her so for these areas I shorted the shadow depth a little and hoped the eye would “forgive” the difference.

That’s about all for today and I hope you can be brave enough to try it out on your next project!  😀