Enchanted & Exquisit

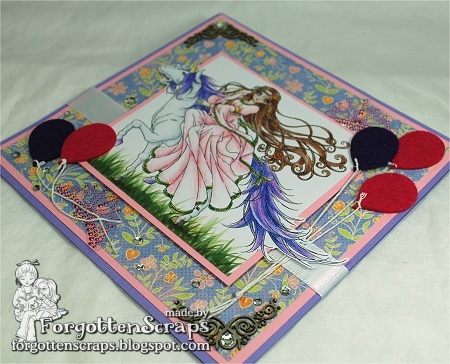
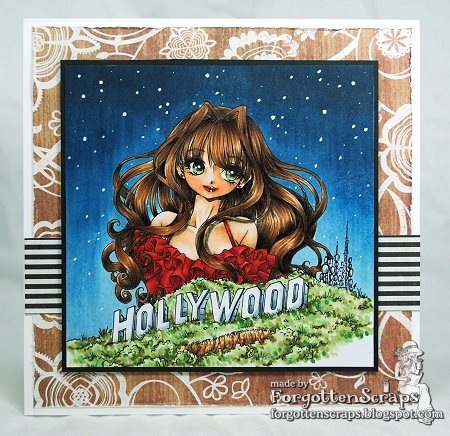
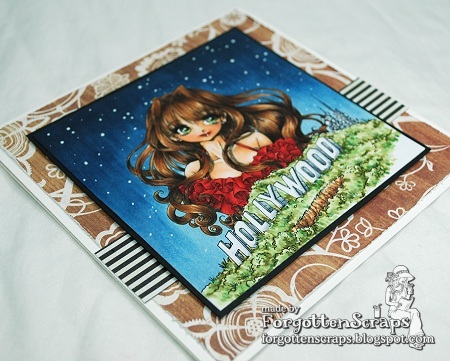
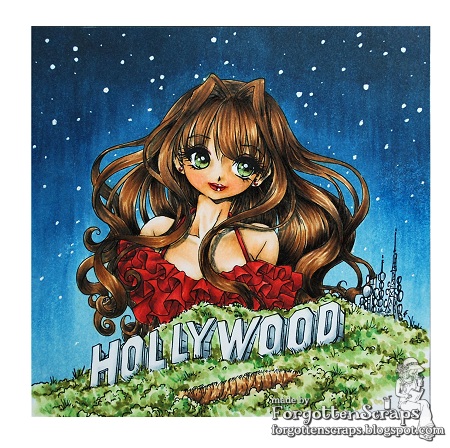
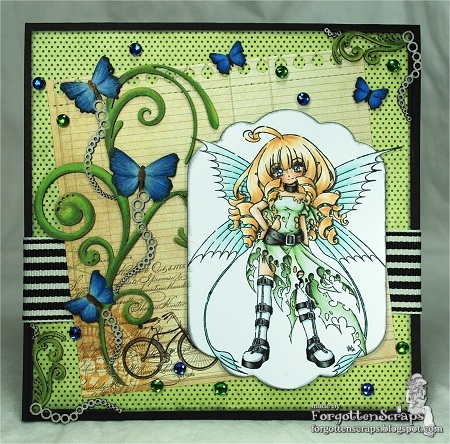
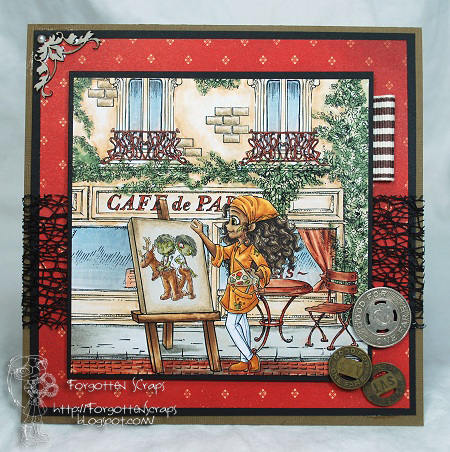
Does that title sound a little familiar?  He he he.  Well it should as I haven’t done any coloring this round but have taken a few of my previous projects and made them into cards.  Today is my day to feature a project at the Make it Crafty Store blog and and I wanted to show you what I’ve done with the Exquisite Princess, Exquisite Unicorn, Enchanted Princess & Enchanted Unicorn merges I had colored a while ago.

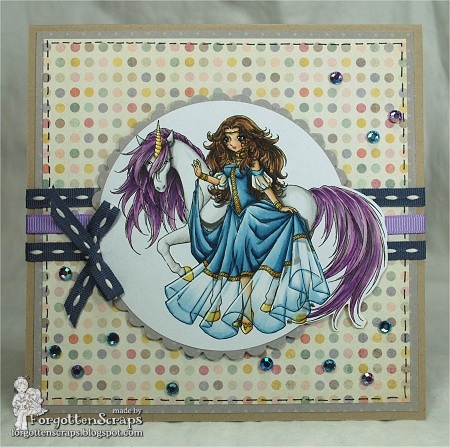
As a refresher, I had colored the Enchanted merged images with Copic markers and the Exquisite merged images with Prismacolored Pencils.  You can click HERE to see the previous post I’m referring to.  This first project merges Exquisite Princess and Exquisite Unicorn image from Make it Crafty.

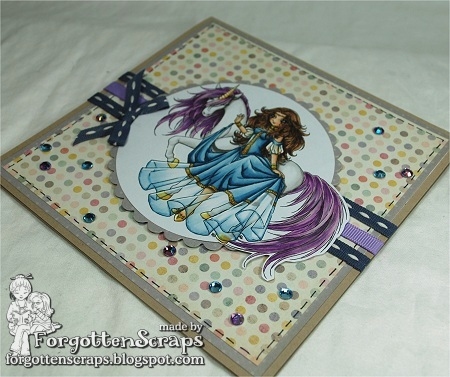
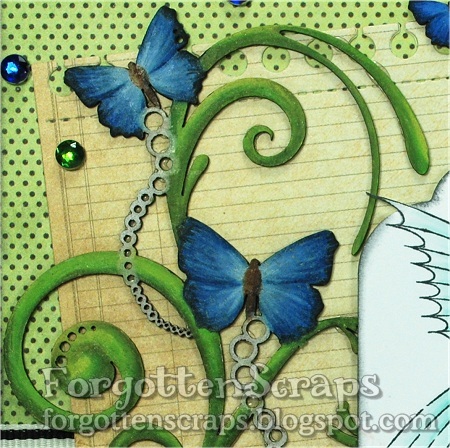
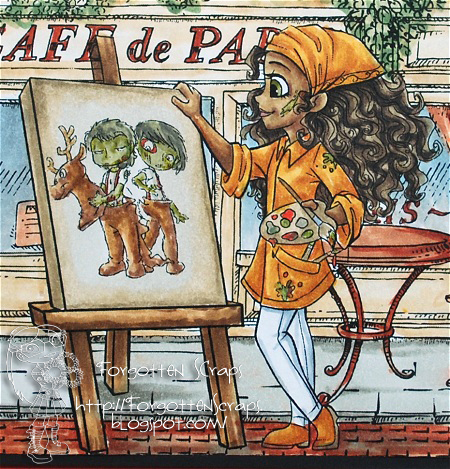
Each of the projects takes the image and pairs it with coordinating colors of decorative paper then I assembled them with a basic layout, featuring the image in the center.  Because the images were larger than I wanted for the center portion, I had cut around the image where it would be extending outside of my shape.

In the first one above, I used a diecut circle so I had to be careful to layer the image just so before putting it through the dicutter.  However, the one below I’m just using my paper cutter so I just lifted the bade when it was over the image part then cut around that portion with scissors.  It adds a little interest to the project, I think, and allows for more of the decorative paper to show.

This second project uses Enchanted Princess & Enchanted Unicorn images merged together from Make it Crafty.  Now that’s two colored images created into something, and who knows how many more to go!  Maybe 20? 30 more?  I’ve lost count and I too embarrassed to count again.  LOL  Anyway, hope you like these two and thanks for coming by today.  😀

Hollywood

I have another tutorial posted over at Make it Crafty Blog today and this one was in request by Alyce who wanted to see how I had colored my last night time sky.  I’ve merged Ashlyn and Hollywood Sign together from Make it Crafty and came up with a little scene to work on.

All sorts of crazy ideas were going through my demented mind as I was coloring this image and trying to think of the true meaning behind it.  I was originally going for a glamorous model with the Hollywood Signwhich would represent movies and fame but after reading about the history of the sign, I couldn’t keep my mind from wandering.  LOL 

I could have colored the hair blond then I could have made some reference to Holli Would from Cool World.  Maybe it’s a tribute to Hugh Hefner, founder of Playboy magazine, since he donate over $127,700 dollars to preserve the sign.  Perhaps if I had drawn a little body underneath the ‘H’ then it could be a tribute to the Broadway actress Peg Entwistle who committed suicide – morbid, I know.  Oh, I know – maybe this is a later version of “SUSAN” from Monsters vs Aliens after she grows her hair out for a photo shoot!  He he he

Anyway, I hope you get a chance to see the tutorial over on the MiC blog and that it helps a little.  Both images are a fun to color and an odd combination, I know.  Thanks for coming by!

Aussie Outback Sheila

Hope everyone is having a great weekend so far!  My area has finally had a little bit of weather change – yesterday we had record highs with the heat index all the way up to 108 degrees – yikes!!  So it was refreshing to wake up this morning to a nice cool breeze which felt like autumn kicking in.  😀  I love autumn and spring – they’re my favorites.  😀

This is a project I’ve actually had sitting on my desk accumulating supplies for a couple months – it all started back with Zoe was releasing the Australian elements!  Oh my, wasn’t that back in February or March!!  Anyway, I had the bird all colored then a month a later I found the Australian diecut at the scrapbook store.  Then after that I set aside my last few scraps of this paper because it matched and so on… each month something was added but I just couldn’t figure out how to put it all together.

The images I used are all from Make it Crafty and include: Aussie Outback Sheila, Enchidna and Kookaburra.  I also used some chippies in the mix too.   So I’m not sure how it turned out – maybe a bit too busy.  But it’s finished!!  That’s the main point.  😀   Hope you like something about it.  He he he

Underwater Scenes

I have finally taken the three underwater scenes I colors and made them into cards.  The card itself isn’t anything impressive but the whole underwater scene made into a card is rather nice!  Each of the scenes are from Make it Crafty and were all experiments as I tried to capture sun rays shining through the water.

For closer shots and details on each, you can visit my older posts: Underwater Castle, Underwater Mermaid Scene and Underwater Shipwreck.  These were simply layered on white then a coordinating blue cardstock – simple and less than ten minutes to cut and assemble all of them.  So why didn’t I do it before?  Well, that IS the question, now isn’t it! 

Lastly I have a card to show off that my daughter made with other Make it Crafty images, she used Flower Swing, Sitting Annalise and even the Thanks tag too.  She told me once what the saying was, but I’ve since forgotten and should have written it down.  But as you can see she has definitely used some of her favorite things… punches, yard/ribbon, and tape!  Some day, just maybe some day, she’ll figure out how to use the glue.  😀

Elven Hestia

I don’t know how I do it but I always seem to be late for my Make it Craft post.  Oh, well, better late than  never, right?  On the MiC Store Blog, remember last time I had colored Elvin Hestia?  Well this time I thought I would create a card from it and to give it a little extra zing, I decided to color the chipboard too.  I selected the largest one I had and brought out my Prismacolored Pencils for the task.  The credit for this fantastic idea actually goes to Zoe when she shared a similar project a while back.

The chipboard on this project is Butterfly Swirls Chipboard from Make it crafty.  As many know, I don’t like to color with my pencils, however, coloring on the chipboard is a completely different story.  I was able to layer the colors and blend them in with no problem at all.  The coloring went quickly – partly because it was a small area and I didn’t have to worry about the lines.  I did, however, try to keep my coloring strokes in the same direction especially on the butterfly wings where it would be noticeable.

I basically used greens and yellows for the stems, silvers and ivory for the bubbles, brown for the butterfly body, and lastly lots of blues for the wings from light blue-cream to almost a black-blue.  I had so much fun on the main chippie that I decided to keep at it and colored the other two smaller butterflies and two corners.

If you have a moment you should visit the MiC Store Blog for all sorts of tips and coloring inspiration – it’s amazing what the rest of the design team has made and I they always inspire me.  Thanks for coming by and have a great weekend!

Christmas Zombies Caleb & Levi

We’re opening another challenge at Simply Challenged Challenges and this time it’s Anything Goes!!  The design team is using the Christmas Zombies and I merged them together with some other images and created this fun scene… 

Are you ready for all the images?  First there are three images from Simply B Stamps in the foreground which are Rudolph Head Caleb, Rudolph Tail Levi and Artist London.  Then the background are Paris Elements in a pre-merged scene from Make it Crafty named Cafe de Paris Scene.  I loved using the canvas on Artist London and the ideas are limitless.  😀

I’ve colored Caleb and Levi once before and de-zombiefied them which also turned out cute – these two are great either way!  LOL  The card I made with this can be seen HERE but you can see the colored image below as they figure out how rudolph works.  But that’s not all, I have them HERE and HERE in their full zombi glory on a couple of journal pages I created!!  😀

I hope you get a change to also visit the Simply Challenged Challenges blog to see what the oter girls have made for this challenge – they’re awesome!  Thanks for coming by and I hope you have started out your week with none of those Monday Blues!  This is my (and my kids’) last week of summer which I’m pretty bumbed about.  😦  If only I had another month.  But o’well, school must go on!!