Cheery Santa

One thing I love about the rubber stamps is their diversity and easy of use on the paper.  I’ve never had success printing digital images on kraft paper so you’ll always see me default to a rubber stamp for this technique.  For this project, I used Cheery Santa and colored him using my Prismacolor Pencils.  This is a love-hate technique for me so I don’t do it very often, but when I do, I always enjoy the bright whites and solid colors.

I think even with the Prismacolor pencils, I tend to color from dark to light.  However, on this project, I had many trouble areas – you might night think so, but that’s because I’ve fussed over it enough to make it passable.  My last and final resort was to use a blending stub with various types of oils until I found one that worked.  Unfortunately, I’ll have to repeat the process as I didn’t make any notes and can’t remember what worked best.  But fortunately for you, that means I’ll be coloring on kraft again!  LOL

Make it Crafty Images:

Batty Baxter

It’s been an interesting couple of days but I’ve finally received my test scores for my grade and I’m excited to report that I’ve passed all my classes this semester!!  It was a relief for me that the passing point was much lower than I ever expected but I’m not going to argue with that!  LOL   So after I figure out a few things and organize myself, that means I can finally set back into a routine.  Ahhh, that will feel nice!

Anyway, I wanted to quickly share a project I made a while back using Batty Baxter from Make it Crafty plus the Ornate Corners chipboard which I’ve colored black.  I colored and created this last fall so I’m not sure what all my motivation was.  I think I was experimenting with black and red blending on the wings but that’s about all I can remember.  Hope you like it anyway and thanks for dropping by today.  Have a great Monday!!  😀

Annie & Sitting Flowers

I wanted to share a project I colored this week using the new adorable images from Make it Crafty… specifically the little girl Annie!    These new little girls are great color and you can go simple or complex and they’ll turn out great either way!  I went for complex and tried out a few things on this one.  First of all, I merged it with the Sitting Flowers background which matches the detailed style of this image perfectly – not too detailed, not too simple.  At my house we’ve been watching the film Arrietty repeatedly so that was my inspiration for the sizing of the images.  But hay, it’s better than watching a Disney musical over and over and over and …. so I’m not really complaining.   LOL

For part of the clothes I tried to go for a pin striping look but as you can see my hands were a little shaky and heavy so the stripes are a little more bold than I had originally planned.  However, they match the paper I was using so it all works out.  The other section I had fun with was her hair! It’s been a long while since I’ve colored bright hair so that was a lot of fun.  😀  Then I added white streaks just for good measure.

The card was simple to put together and I was even able to use a paper pad that was almost all gone – it always feels good to use up ALL the paper!  I only have 2 sheets left so we’ll see if I make it all the way.  Corner chipboard was added in the colors and I liked the raw looks so I didn’t need to do anything there.  Then I had these spectacles rub-on sheets on my desk so I decided to use that too.  And it also helps with the illusion that this girl is a little person so that was a bonus.

Thanks for dropping by today and I hope you’ve enjoyed this bit of inspiration today!  Maybe it will inspire you to try out a button nose, crazy bright hair or perhaps it got you in a mood to eat your apple today – as long as it inspired you to do something that was my intentions.  LOL  Have a great weekend!

Here’s the stuff on this project that you’ll want to get from Make it Crafty!
If you have subscribed to view this via email, click HERE to view post on the MiC blog.

Sweet Devilina

Do you remember a loooonnnngg long time ago, I had shown some coloring inspiration using Sweet Devilina from Make it Crafty?  We’ll she finally made it onto a finished project!  I had described a little about how to create sharp shadows (HERE) and this gal was my example.  😀  Check it out…
 

For this project I’ve used Sweet Devilina from Make it Crafty plus the sentiment stamp Just Wanted to Say also from Make it Crafty, which I layered with some web-like ribbon.  I haven’t the faintest idea what that ribbon is called but it’s been fun to use and works great with Halloween projects too!  Anyway, aside from some stitching, self-stick pearls and ribbon, there isn’t much to this project – I think it’s the colors that really sets it off.  You can click HERE to see more pictures of Sweet Devilina in details.

Tilda with Anchor

I had a little time to play around this week… well, actually, I rebelled and skipped out on my homework!  LOL  But that aside, I had fun with this project and it took me the whole night too.  Of course, I might have been able to get it done faster if I hadn’t stopped to clean the craft room or just to turn off the TV would hae helped.  But it was rewarding!

My project was inspired by Chris who does amazing work with her scenes and I’m always in awe how they turn out.  Plus she was the first one that I spotted who used a regular and mini Magnolia image on the same project!  So I took inspiration from two of her cards which you can see HERE and HERE.

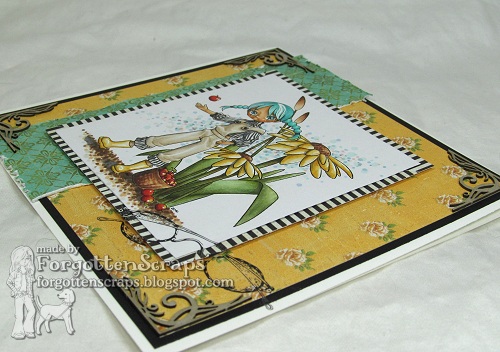
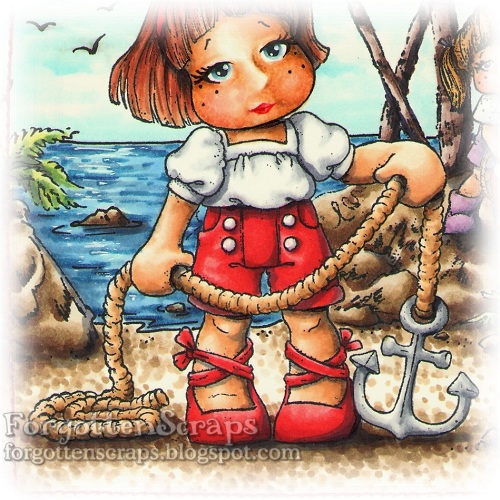
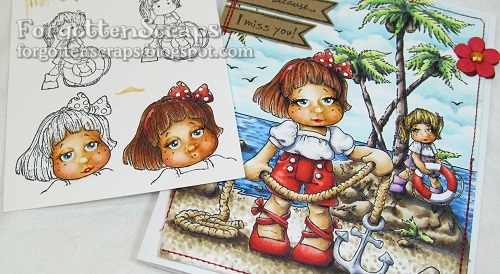
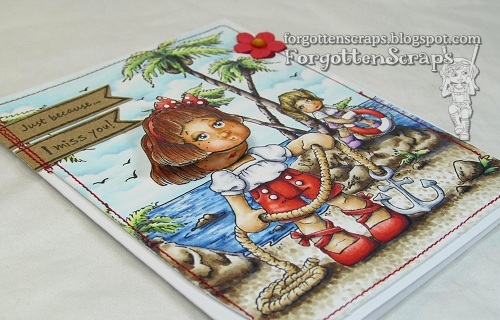
The images I used on this project were all rubber stamps and I masked areas to create the scene.  the characters are Tilda with Anchor and Ahoy Tilda from the 2012 Summer Memories collection, Magnolia Stamps.  (I think!)  The background and sentiment stamps are from Make ti Crafty and include the Palm Trees and Just Wanted to Say.  The rest of the scene was filled by me.

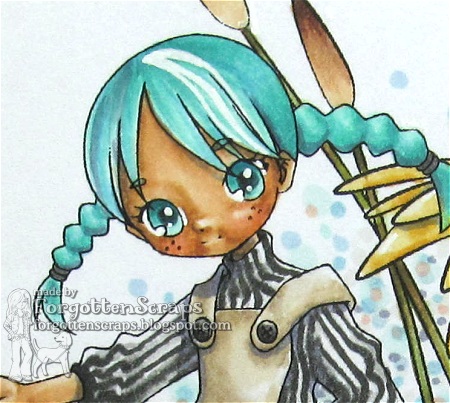
I experimented a little with the face and ended up coloring her four different times!  The main problem was my paper was giving out and wasn’t able to blend after a while.  This was Nenah paper and though it did fine with everything else on the page, the layers on the face was just a little beyond it capability.  I already knew this so why I didn’t think ahead before choosing my paper is unbeknownst to me.  (You can click HERE on what I’ve discovered about the papers I have.)  Anyway, I finally gave up and went a different route… Wobbles!

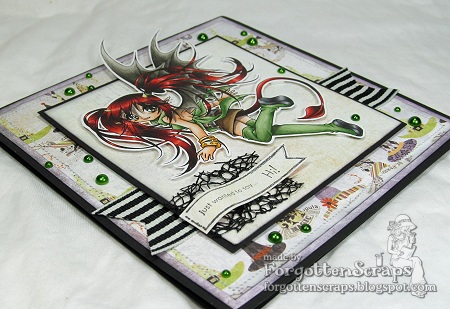
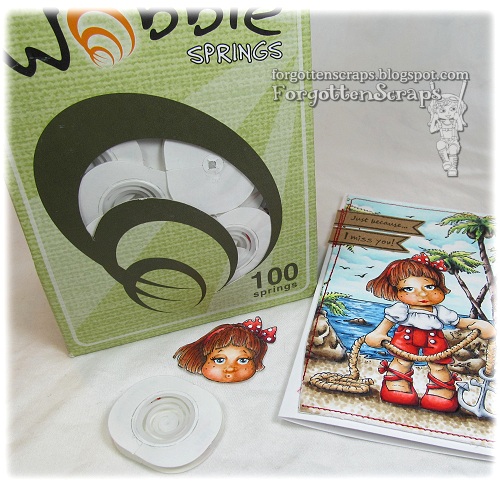
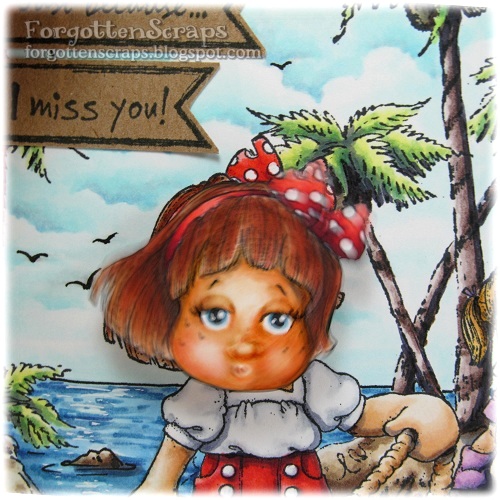
 I discovered these fun gizmos just recently and lucky for me the shipment arrived just the day before – so you know what that means!  It was on my desk just staring at me begging to be used!  LOL  I decided to take the surprised Tilda face and give it some ‘action.’  These Wobble springs are sticky on both sides with a plastic spring between the two layers.  Once it’s attached to your project, you can spring it and the image will shake/rotate back and forth.  Here’s a picture of the actual springing… so as you can imagine how much fun this might be! 

The clouds were used as part of the tutorial that I posted earlier this week.  So if you’re interested in how to make these clouds you can click HERE for some ideas.

Thanks for dropping by today and I hope you’re having a great weekend!   Ciao, a presto!

Claudia’s Butterflies

Little Miss Muffet Stamps is sponsoring the Forever Friends Blog Challenge today and I wanted to join in on the fun!  The challenge is to use lots of flowers and you can check out all the details HERE.  But before you leave, check out what I made for inspiration…

My project uses Claudia’s Butterflies from Little Miss Muffet Stamps, drawn by Pollycraft, and also the sentiment from Make it Crafty called Just Wanted to Say Sentiment.  I colored Claudia by first dotting the darker brown and worked my way up to the lighter colors using dots.  With so many dots, by time I get to the lightest color everything before that tends to blend in and creates this fuzzy texture in the coloring.  For this bear, I used my Copic marker range E40 through E49.

For coloring, since Claudia was going to be done in browns I wanted to do something different with the wood log.  So I tried to color a birch type tree.  I remember these from my hometown area and would love to go back there someday to see them again.  They’re such a unique tree compared to the forestry around me now.

So whether you project has lots of flowers on the image or added to your card, or both, you can head on over to the Forever Friends Challenge Blog and show it off!  Plus you’ll have a chance to win some LMMS digital stamps!  😀  Thanks for dropping by and I hope you had a wonderful weekend -cheers.  😀