Phoebe and Ginger

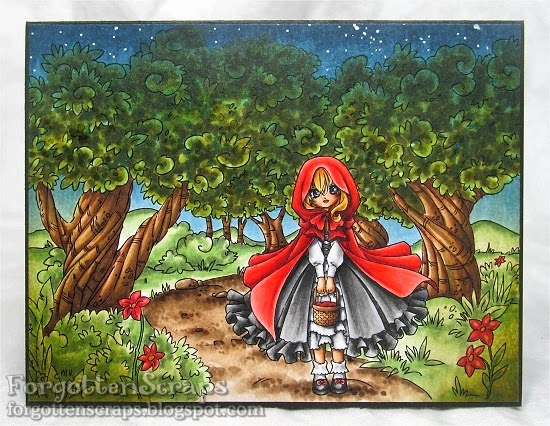
It’s time for another challenge at Make it Colourful and get ready for a fun one!  Zoe has create a two level (actually three level for this month!) challenge and there is even a $15.00 gift voucher both categories – plus with the new close up portrait images, this challenge is hard to resist!  LOL

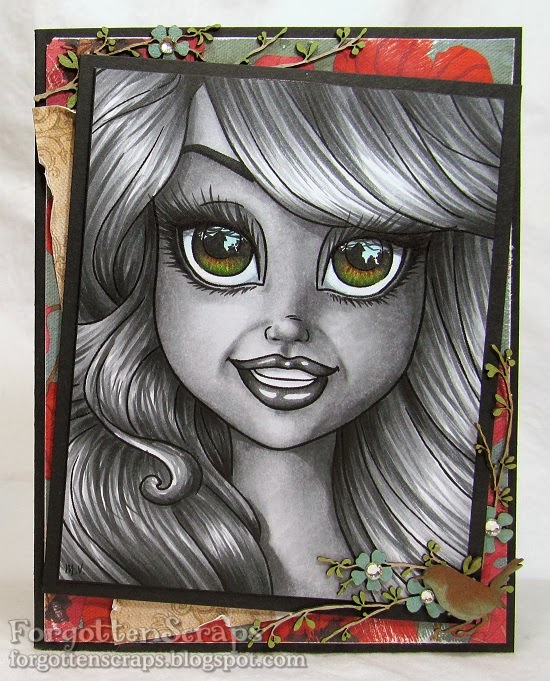
This image is Phoebe and I used the closed cropped version that comes with the combo.  I colored her using neutral tones then added all the colors in her eyes with browns, blues and greens.  This one is for the harder challenge.

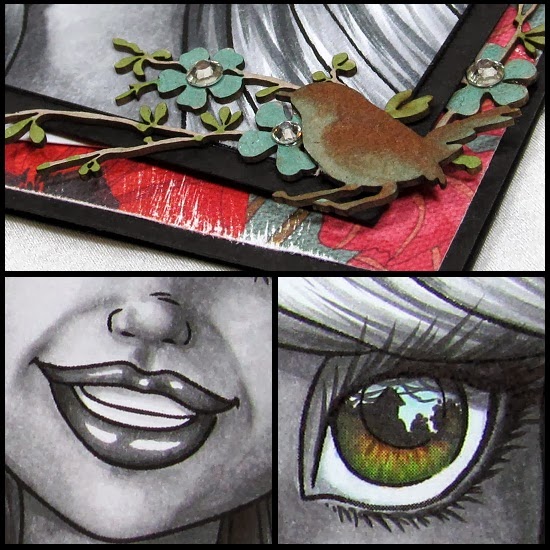
The reflection in the eye is suppose to be a farm silhouette scene but many of the details, such as the horse, turned out to be bushes/trees instead.  LOL  Then I wanted to add a lot of blue in the “sky” portion so I could add reflections from the eye lashes too.

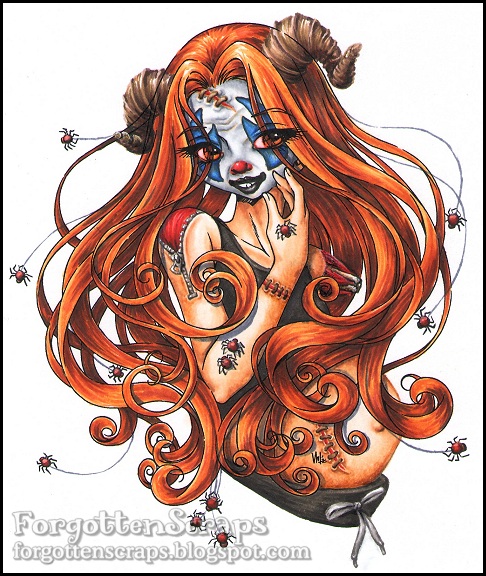
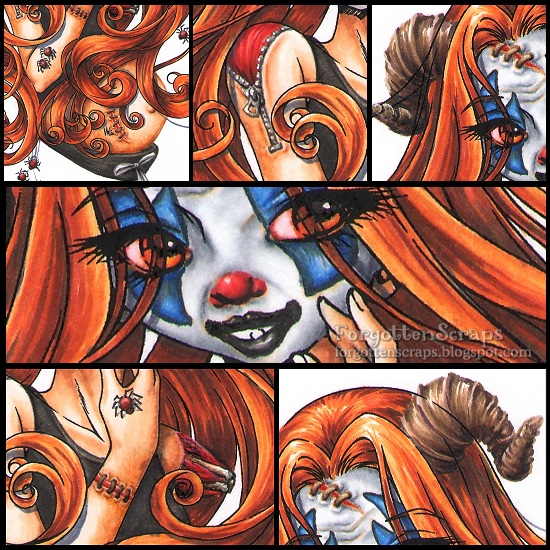
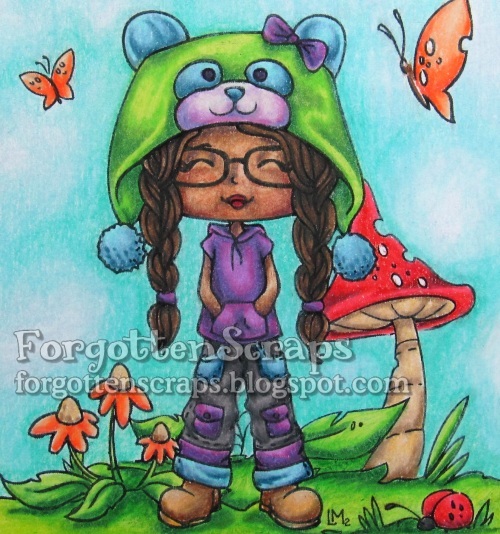
This second project is for the easier challenge to add basic reflections in the eyes.  The image I used is Ginger…  – what?  Did I get something stuck in my teeth?!  LOL  I know, I’m terrible, but what else could she possibly be pointing at?!  I’ve been hanging around my kiddos too long – there just starting to realize the humor in the subtitles and this is probably something I would do to them.  He he he

Anyway, the basic challenge doesn’t have to be just a dot so I kicked it up a little notch.  Bam!  I added the reflection you’d see if you were in my kitchen – the large rectangular light plus a light above the kitchen sink and another light in the hallway would show too.  It’s not a “perfect” reflection of what you’d see but it’s a rough guesstimate and it was fun to experiment with.  😀

Miss Hood in the Woods

I was experimenting with night time skies and decided to color up this merged image which includes Miss Hood and In the Woods from Make it Crafty – two images that were born to go together.  Of course, there are other possibilities with these images too! 

My experiment was to color a sky that looked like dawn or twilight without having it actually look like a sunset or sunrise.  So I stuck with the blues and made it dark at the top and light on the horizon.  I darkened the trees with blue as well then from the bottom corners I darkened the image with a little green.  I’m not sure if that’s what the woods would look like at dawn but I think I’m getting the general point across.  What do you think?

The card itself is extremely simple.  I had printed out the image 5.5″ by 4.25″ so I trimmed a bit off the edges and mounted it on black card stock.  Finished!  LOL

Urban Graffiti Whateva

I wanted to share the project I made with the new Graffiti Party images that were released yesterday – a combined release between Make it Crafty and Little Miss Muffet Stamps!  You can check out all the details on the Graffiti Party blog – there’s freebies, challenges, coloring, inspiration, prizes, discounts and so much more!  Seriously… it’s one that you don’t want to miss!  😀

On this project I’ve used the following images.  
There’s even a tutorial you can find in the LMMS FB Group or on the MiC Blog too!
Make it Crafty Stamps:
Little Miss Muffet Stamps:

Combined Graffiti Party

‘Sup fans? Make it Crafty and Little Miss Muffet Stamps is teaming up once again to bring you a combined release with groovy coordinating images that you’ll love to play with!

Introducing… the Graffiti Party Release!!

There’s LOTS to take in and we’ve created a special blog just to hold all the details!
Click on GraffitiParty.blogspot.com and come participate in …
FREEBIES
CHALLENGES
DISCOUNTS
COLORING
PRIZES
INSPIRATION
and FUN!
 Grab the badge below and hop on over to join the party!

Adele – Demon Clown Mommy

I have an incredibly different project to share today which is more suited for Halloween than for September but I think you’ll appreciate it nonetheless.  Just remember, I said “appreciate” not necessary “like!”  It was spurred on as a little challenge with Jennifer Dove, who also, is just as guilty as I am, thank you very much!  Her project is awesome and so much more twisted – fantastic job and it will sure to impress you!!  (Again, I said “impress” not “love!”  LOL)

If you can remember way back, I took one of Zoe’s images and did the Good, the Bad and the Ugly version of Ardelia which showed how creative you can get with your coloring.  Now, I’ve done an Evil version!  Muah ha ha ha!!  Meet… the Demonic Clown Mommy!  …who also happens to be a Pied Piper of spiders!)

The image is Adele from Make it Crafty and you’ll have to check out the Make it Crafty store to see what her uncolored version looks like.  Zoe has this gorgeous image available in Adele Digital, Adele Rubber and as part of the A Portrait Digi Stamp Collection!  Even though you’re probably not going to color her the same way I did, you should still drop one into your cart and add it to your collection.  ;D 

Check out these details and then I’ll explain what I colored differently…

First is her face, which I colored with as a clown – that means giving her a big red nose too!  I tried to go for a scary, mad, frightening clown by adding wrinkles, Frankenstein stitching, bloodshot eyes and the works.  However, in the end I think she’d only partially “mad” in the clown regards.  After the face I moved on to the rest of her skin.  As you can see, she has a black tank top on – a modest addition – but she also became pregnant and is sporting her comfy sweat pants around!  No doubt she’s barefoot too.  LOL  After that was taken care of, I started adding other Frankenstein/Zombie details, like a zipper (idea from a tattoo), stitching and a partially missing arm.  Yuck!  My next step was to tackle the hair… and what other feature could I add except horns?  Every demon *has* to have horns!!  I colored her hair a fiery orange and used more colors there then anywhere else!  The combination is Copics YR31, YR14, YR27, E07, E18 and E49.  Last but not least are all her little spider friends… there’s 13 of them for good measures!

Unfortunately, I hadn’t thought to take progress pictures while I was coloring – it was just too intense!  But here’s a little mini tutorial on how to add Frankenstein stitching to your own projects… I first started by adding the stitches (using Copic E42, E44 and E49).  The second step is to add the gap of skin under the stitches which I did with R59 and E14.  The third and fourth step show how the darker skin colors were added then blended in.  What really makes it pop is the highlighted areas so be careful around the stitching and skin gap because you’ll want it to be light.

Thanks for coming by today and remember to visit Jennifer’s Evil Creation as well!

Jr Hatter Michelle

I wasn’t able to make anything for the Super Saturday post today for Little Miss Muffet Stamps but I also didn’t want you to miss out on the specials and inspiration for today either!  So instead of having something with Wilma Kay Hatter or Snail Crawling, I’m showing an older project I colored with my Prismacolor Pencils….

I’ve used a couple images on this project and combined them to make a scene.  Then assembled the card with a simple layout which leaves all the focus on the image and bright colors in the center.  Here’s the images from Little Miss Muffet Stamps and Make it Crafty that I combined together:

To color this image I used Prismacolor Pencils and lots of layering!  My technique consisted of using the darkest color and working my way up to the light; and gradually increasing the pressure as well.  Then by time I was on the lightest color, I was pressing the hardest and also blending all around.  This was how I was able to get the smoothest coloring as possible.

There are a few white specks that weren’t able to get blended in with the colors but I think that’s because the texture of my paper was a little too much.  Next time I’ll have to try a smoother paper and see if it works better.  🙂  Thanks for coming by today and make sure you visit the LMMS Blog to see all the gorgeous inspiration from the DT gals!!