Iris May Hatter

I’ve got a great project planned for today as today I’m featured as a Little Miss Muffet Stamp guest at Oozak’s Blog!!   The challenge theme is “Anything Goes with Pink and Bling” which fits right up my alley.  😀  Since this was also my first project of the new year I thought I’d go all out and pile it high!  Check it out…

The image I chose to use is Iris May Hatter and also in the background I used the Party Banner diecut.  You can find them both at Little Miss Muffet Stamps AND in the Oozak Store!!

Pink is one of my favorite colors so I really had fun making this card.  I was going for a chabby chic look but that’s always been more of a term and something I can’t really define so hopefully I got it.  But none-the-less it gave me a good excuse to pull out of the Valentine papers and start focusing on those projects.  (If I don’t put them away then everything turns out pink!  LOL)

I want to thank Ruby for all the wonderful items she sent me for the holiday including the large flowers, leaves and heart hat pins! (Thank You!) Another new thing I did on this card was get out the sewing machine!!   See the stitching around the card and also the layered part in the center?  Yep, that was done on my ol’ Singer Featherweight machine which brings back a lot of memories.  Sigh

Finally here’s a close up of Iris May Hatter.  I used sparkling gel on her shoes and hat then used a whte gel pen to draw in the hearts on her dress.  My own little princess would be envious.  😀

Hope you’ve enjoyed this little bit of inspiration.  Thanks for coming by and be sure to check out all the Little Miss Muffet products in the Oozak store and the other projects at the Oozak Blog!

Saffron

This image is Saffron and I had colored a long time ago using Prismacolor Pencils on kraft paper.  I saw someone do a winter scene with the combination and loved it so I thought I’d give it a go.  Not sure about the results but at least I was able to get it on a card!!  LOL

The image is Saffron from Little Miss Muffet Stamps and I also used the Party Banner Diecut from Little Miss Mufffet Stamps in the background.  I love how versitale the diecut has been and the different looks I’ve been able to get out of it… I can happily say this is one design that turned out better than I expected!

For the colors, I wanted a Christmas holiday feel so I went with the green.  I really don’t know if I had used a certain paper for inspiration when I colored it but I certainly didn’t have anything to match when I assembled it. So I was hoping the little bit of red in the decorative paper would help tie in with the colors I used.  I think it works… if I squint.  He he he

Irene

Happy New Year!  Thirteen happens to be my favorite number so hopefully 2013 will be a lucky year for me.  😀  I wanted to jump on quickly and share a project – I was hoping to have a New Year card to show off but this will be second best.  The images I used is Irene and Angel Wings from Little Miss Muffet Stamps; and the sentiment is from Stampin’ Up.  (The Angel Wings are on sale right now but you better hurry as I’ll be setting them back to regular price later this week!)

If you can beleive it, I found the large white flower in the clearance bin at the craft store – there were six in the package for only 50 cents!  I wish I could have found more because even though the package said Christmas, they can be used year around – and I love the little sparkle and beads on the petals!!

I hope everyone is resting up and having a safe New Year’s Day!  I have plans to quilt at Grandma’s house with my daughters so hopefully we’ll get something done in that department too.  😀  Happy New Year!!

Nanuk

This is so exciting – I’ve managed to take eight of my colored images and create cards with them!!  Of course I was a little distracted by the movies I was watching but I’ve managed to create a nice little pile of cards to use next year!  So this blog is going to be quite busy as I share them here.  😀

The image on this one is Nanuk from Little Miss Muffet Stamps.  It’s the same image I colored for the store except I went back in and added some light shadows with BV20 and BV23.  Then the ground was colored with C0, C1, and C3 and the sky was B000 and B01.

You would think that Christmas paper would be universal but I have the hardest time matching those papers with my images!  Seriously, I have about dozen different color pads and none of them do magic for me.  But I’ve decided to use as much as possible then after this season give the left overs away.  He he he.  It will be nice to start fresh next year!

Prince Charming and Girl With Glass Slipper

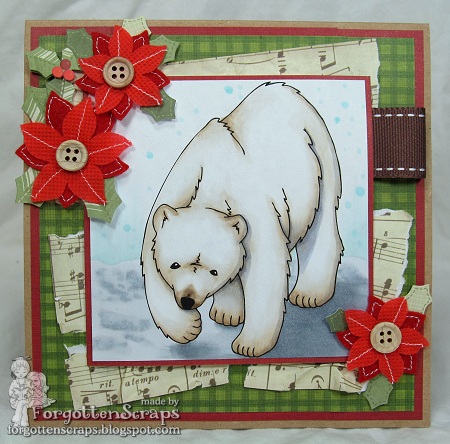
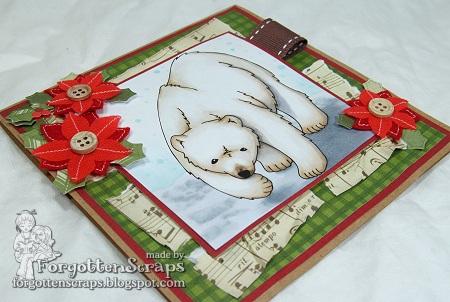
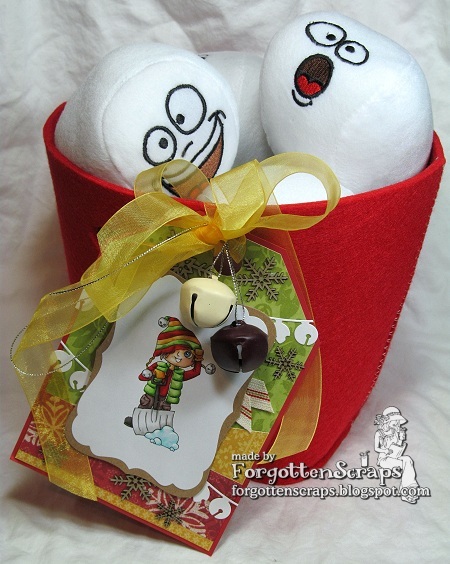
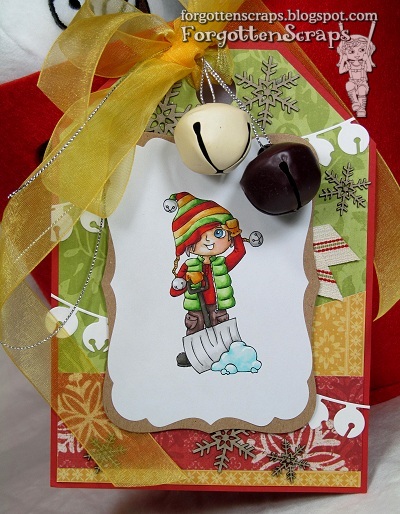
Today is going to be a long post as I show you all the pictures and details of the project I made with the images I colored for the MiC Advent Calendar.  I did a little more coloring on the basic images too so watch you for those details.  Sit back and relax and do my best to ramble on.  😀

Hmmm, where to start? Where to start!  I suppose I’ll start in the beginning … with the colored images and the details there then I’ll work my way through the steps I took in creating this project. This is just the finished project of what was started there. 😀 Enjoy!

NOTE: For Day 7 click HERE

If you’re looking for the original Make it Crafty Advent Calendar post for Day Seven then CLICK HERE.  Comments are welcome on this post, of course, but to be eligible for a chance to win the Advent Calendar Prizes, you must leave your comments on the other post, HERE

I had the wool pulled over my eyes today as my nephew said “Did you know that is Christmas Adam? Yeah, today is Christmas Adam, tomorrow is Christmas Eve and the next day is Christmas!”  Just as I was about to pull out my laptop and check it out (of course by this time I was thinking that every day in December might have an “official” name) but I was saved the troubled when the joke was revealed.  You see, I should have remembered that Adam came before Eve!!  😀

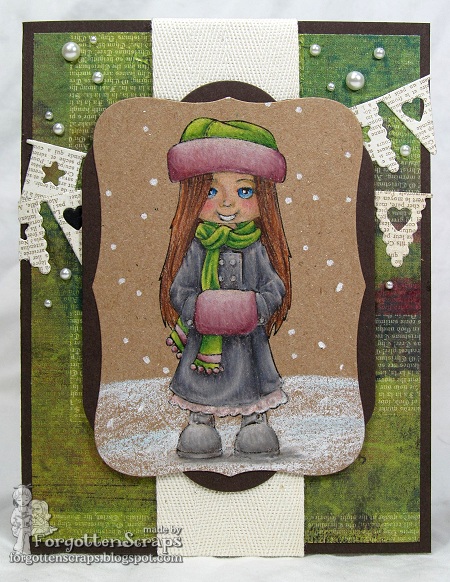
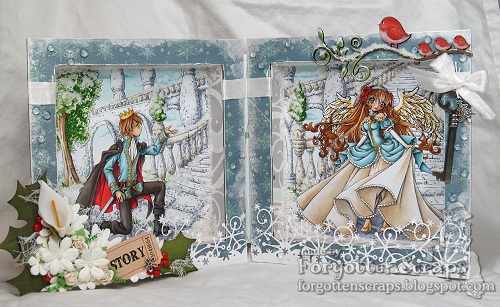
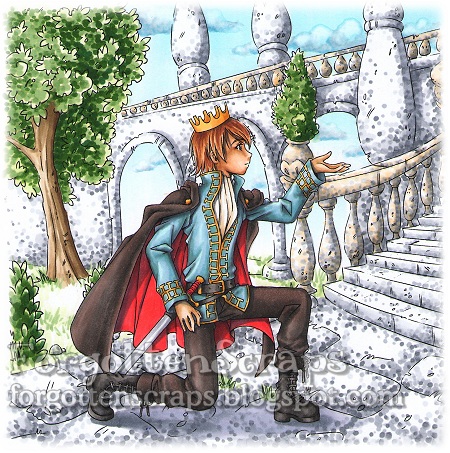
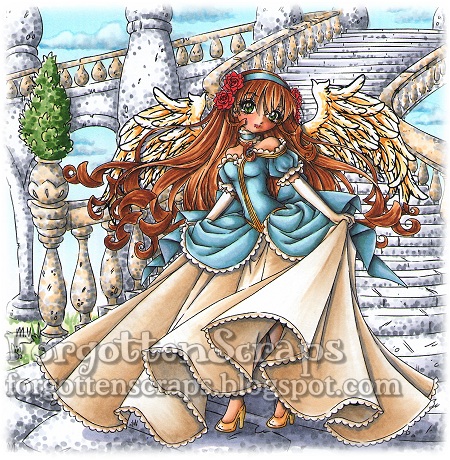
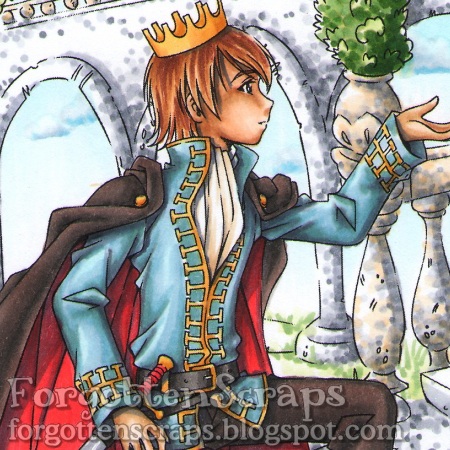
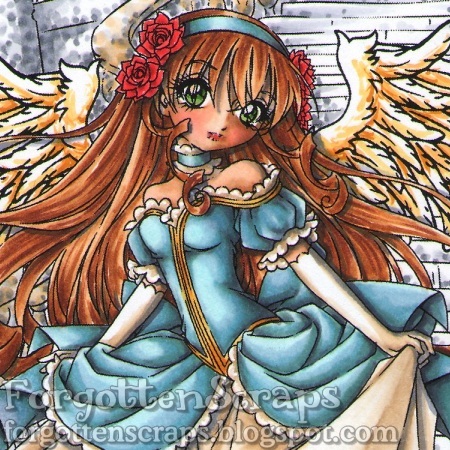
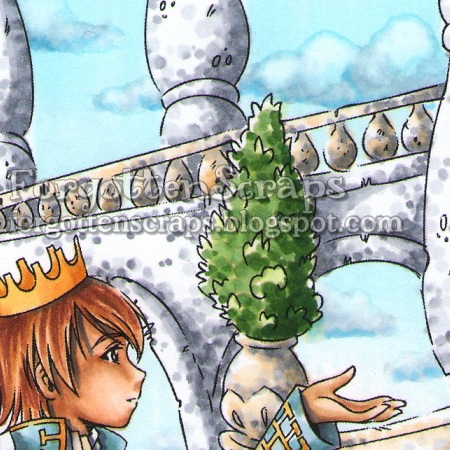
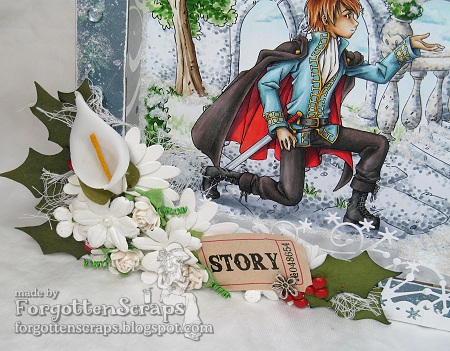
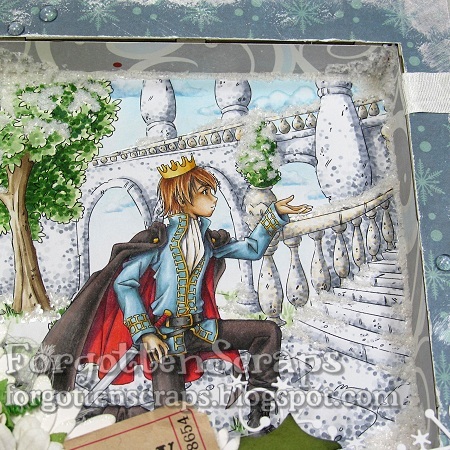
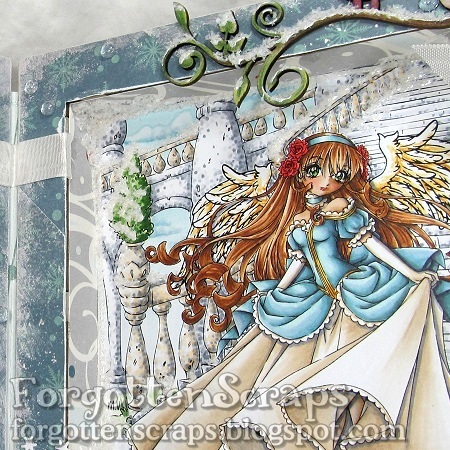
Ok, so on to some details.  To start with, I colored a little more on each of the images.  On the prince I added more shadows in his clock and under the prince too.  Then took a darker color to the trees and added more more shadows here and there.  I did the same thing with the princess side too and even remembered to add a shadow on the ground this time. 

As many of you know I like to experiment and try new things… on this project I wanted to challenge myself and change this summer courtyard scene into a winter one.  However, sometimes I’m not always that brave so I had to scan in the iamge before continuing on.  He he he

So my plan of action was to add snow all around the courtyard and the bushes.  Then pile it up on the ground and around the edges of the project.  That’s a lot of messing around with and I wasn’t sure how it would turn out.  Sometimes a mistake turns out well and that’s what I was hoping for.  He he he.  Here are some closeup pictures of the prince and princess before I started.

How about some colors! That’s a bit unusual of me but I remembered to save them this time and wanted to share them.  Especially the blue colors since they aren’t a normal progression.

Grass: YG67, G24, G21, G20
Stones: C5, C3, C1, E53, E51, E50
Tree: E47, E44, E43, E42, E41
Clouds/Sky: B12, B91, B000, B0000, C1, 0
Reds: R59, R37, R35, R14
Browns/Greys: E74, T7, T6, T5, T4, T3, T1
Hair: E29, E37, E35, E21
Skin: E34, E31, E00, E000, E0000
Blues: C5, BG72, B52, B91, B0000
Shadows: C4, C3, BV25, BV23, BV20

I also tried a new technique for the clouds.  Because it turned out well I can call it a “technique” but in reality it started out as an “Oops, I just used the wrong color!”  But I continued on – I built up the cloud shape as if it was a solid object by coloring the whole thing in and shading the bottom part with darker colors.  Then I used the Blender marker and pushed out all the color in the center.  The paper I used is regular printer paper so it was thin enough that the colors were pushed through the paper and this white fluffy part is the effect.  I like how the colors are all blended together and the white part looks textured so I’ll probably do it like this again.

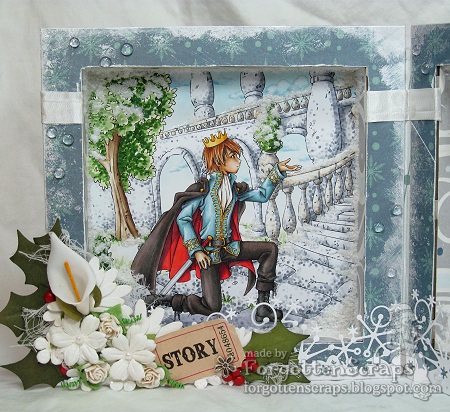
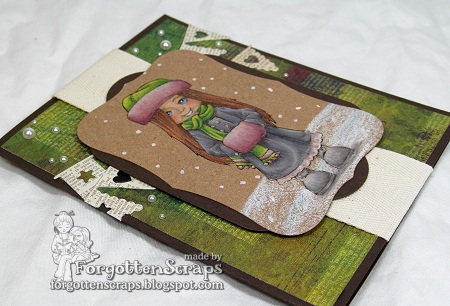
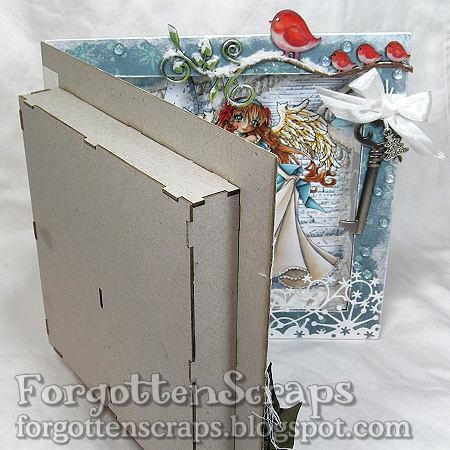
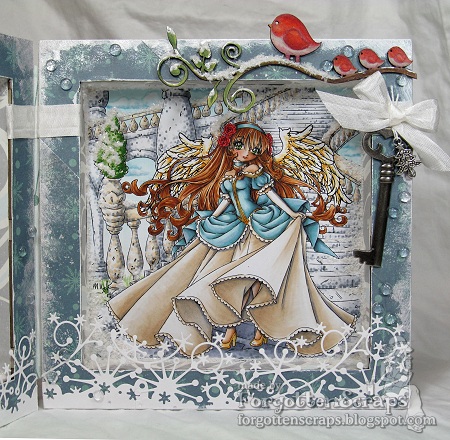
The main project consists of two shadow boxes that are hinged together.  Before all the extras were added the two sides were able to close like a book and I thought about adding a clasp but luckily I save that idea for the end and realized it would fit.  So I’ll stash that away in my mind and maybe use it on another project.  The shadow boxes were both covered with decorative paper and the edges sanded before I assembled it.  Then around the edges I sponged on some more white and give it a distressed look.

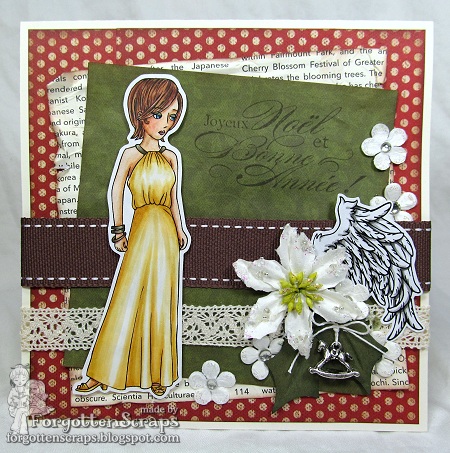
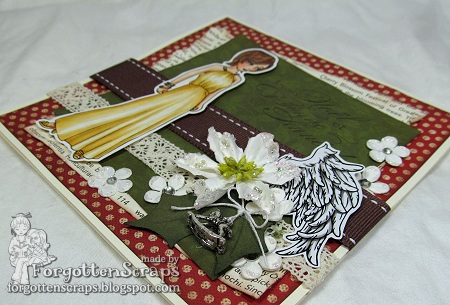
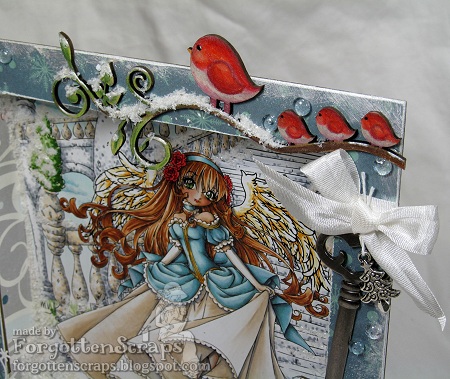
This was one of those projects where I had an thought but no idea how I was going to get there.  I worked on it little by little and finally decided that I had to stop!  So after I assembled the shadow boxes I added the show flake flurry diecuts on the bottom.  Then the ribbon happened and the cluster of flowers on the other side. I thought I would have them all white but then I glanced at the holly leaves I had and thought that would be perfect!  Especially the little bit of red tied in well with the colors I used on the image.

On the other side I balanced it out with some metal hardware and found the bird chipboard long forgotten on the corner of my desk.  I like to use chipboard naked but the idea came to me to color the birds red to go along with the other side of the panel.  Especially since the princess side didn’t have any red this would be a great way to pull it over to this side.  I used Prismacolor pencils which work really nice on the chipboard and had a little fun giving it some detail.  Don’t they look perfect on the top there?!  Then I added snow to the branch.

To get the snow, I used White Opal Liquid Pearls and daubed it on the images where I thought snow would gather.  I also added a bunch of it around the inside of he shadow box and especially in the corners.  And when I say a bunch… I mean I practically used up the whole bottle of Liquid Pearls!  Then while it was still wet I sprinkled on the snow flakes which are little tiny flakes of white plastic.  They might be from Flower Soft but I don’t have the original packaging anymore.  The snowflakes have just enough shine and dimension on them that they really looks like freshly fallen (and fluffy) snow.

The images I used for this project are mainly from Make it Craftybut the wings added to the princess are from Little Miss Muffet Stamps.  The shadow boxes are also from Make it Crafty.

Well, I think that about wraps it up!  See I told you this was a L-O-N-G post!  Muah ha ha.  But hopefully the details were interesting enough and maybe you’ll even try something similar.  😀  Thanks for stopping by and I wish you all a very “Merry Christmas Adam!”  LOL

Bandit Boy Gavin in Winter

Are you ready for some winter snowball fun?  I remember romping around the neighborhood with all my school buddies making snow-forts and having hour long snowball fight!  There would be times my brothers and I would spend the whole day in our front yard building up a fortified snow wall and stocking up the inside with snowballs – of course, we’d get creative too… a pile of snowballs for accuracy, another for total coverage when they hit, then a narrow window there to look out from and lower the wall here so throw them out from, etc.  It was all very scientific when we were little!  LOL

Now that I have kids of my own, I wanted to give them a chance to have a snowball fight too.  Unfortunately living in a warmer climate, that means the snow-forts are now couches or swing sets and snowballs are a little softer and will last year round.  😀  Anyway, I saw this idea in a magazine and had to duplicate it for a few family gifts this year.  The red felt bucket I found at Target and the snowballs were found at OrientalTrading online. 

Then I created a bunch of tags and that’s what I’ve been sharing with ya’ll this week – so here’s another tag!  This image is new to Little Miss Muffet Stamps and is called Bandit Boy Gavin in Winter.  He looks like he’s clearing out the snow off the sidewalks but I’m sure he’ll use that to build the snow fort with!  Thanks for dropping by and I’m off to The Pink Room to gather supplies for the next blog candy.  😀