Audrey

It’s another release week at Little Miss Muffet Stamps and we have some rubber and digis this week!  There are new rubber stamps with my images on them and several new digi stamps from Pollycraft.  Plus you don’t want to miss out on all the fabulous inspiration from the DT … so when you’re finished hop on over to the LMMS Blog to see all that.
 

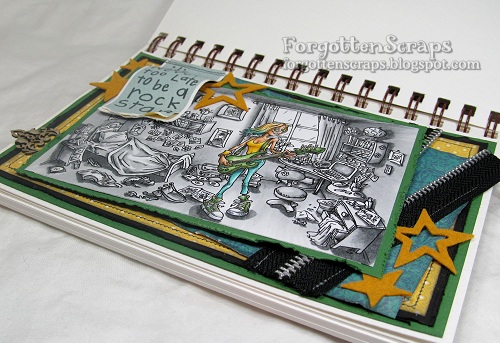
 I’ve had fun with my project and used all the rubber stamps to create a scene – plus a few extras too.  ;D  With all the stamps – that is pretty much everything to my project too.  The edges of the decorative paper were distressed then the rest was coloring.  That’s the fun party!  Here’s what I used…

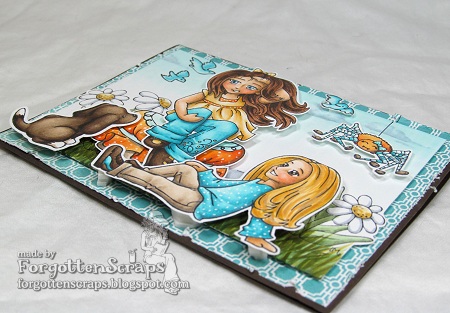
I stamped the Daisy Rock twice in the background and masked half the page for each time.  I basically wanted the flowers on each side and the masking helped so they were not double stamped.  I also stamped the birds on the background too.

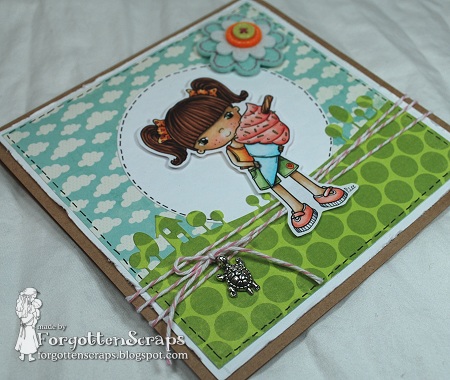
The rest of the characters were stamps, colored and cut out independently then added to the project with foam dimensional dots  I used multiple layers – so the spider and tuffet are on the first layer; then Audrey and the puppy on a second layer and Chloe pops out on three layers.

Thanks for coming by and enjoy the new releases this week!

Clouds Tutorial

This is my week at the Make it Crafty store blog to share a tutorial and I chose to do clouds – it’s a quick and easy tutorial on how to color two different kinds of clouds.  For these samples I used Copic markers and the numbers are listed in the graphics next to each step.  There are many different types of clouds but I’ve taken these two styles and broke it down into four easy steps.

For the shape of cloud, I’ve used the B00 marker to outline the general shape of the clouds.  I like to draw in all my clouds in the sky on the first step then I can go back and blend in the colors one at a time.  This helps me to know how far I can blend each color before I should fade to white.  In this example I started with the darker colors and worked up to the lightest.  Depending on what paper you use, you might want to go back and reuse some of those colors to get a good smooth blending.  However, with these lighter colors, most of the papers will do fine.

This other example takes a different approach and is helpful when you only want a few clouds in the sky.  You can also take your time and color in the background of the sky first – that will be helpful especially if you wanted a gradual color change such as a sunset.  The background can also be left blank (such as the image above with the hat).  For this technique you also want to make sure you have refilled your Blender marker which will make the last step easier than if you were working with a dry marker tip.

In this example, I also start with the darker colors and work my way up to the lighter ones.  You can also add other colors like purple to make it more colorful.  Once I have the shape of the cloud all colored in, then I used the Blender marker to push out the colors in the center.  This creates a nice fluffy white cloud and you can go back with the Blender marker multiple times until you get it white.  However, make sure to let the paper dry in between applications which will help keep your cloud shapes in tact.

 The nice thing about clouds is almost every project can use them …
so grab your current project, a few colors and give it a try!  😀 
I hope this tutorial helps you with your next project and thanks for coming by today! 

Claudia’s Butterflies

Little Miss Muffet Stamps is sponsoring the Forever Friends Blog Challenge today and I wanted to join in on the fun!  The challenge is to use lots of flowers and you can check out all the details HERE.  But before you leave, check out what I made for inspiration…

My project uses Claudia’s Butterflies from Little Miss Muffet Stamps, drawn by Pollycraft, and also the sentiment from Make it Crafty called Just Wanted to Say Sentiment.  I colored Claudia by first dotting the darker brown and worked my way up to the lighter colors using dots.  With so many dots, by time I get to the lightest color everything before that tends to blend in and creates this fuzzy texture in the coloring.  For this bear, I used my Copic marker range E40 through E49.

For coloring, since Claudia was going to be done in browns I wanted to do something different with the wood log.  So I tried to color a birch type tree.  I remember these from my hometown area and would love to go back there someday to see them again.  They’re such a unique tree compared to the forestry around me now.

So whether you project has lots of flowers on the image or added to your card, or both, you can head on over to the Forever Friends Challenge Blog and show it off!  Plus you’ll have a chance to win some LMMS digital stamps!  😀  Thanks for dropping by and I hope you had a wonderful weekend -cheers.  😀

Rocker Chick

Let us Entertain You!!
It’s SHOWTIME at Make it Crafty!
We’re a tapping our heels together with a tap a tap tap,
Clanging the symbols and beating the drums with a bang a bang bang,
Pulling rabbits from hats and lifting our legs – oooooohhh ahhhhhhh,
Singing our hearts out and jamming to the beat –  doo do do daaaaa…
You should have arrived here from the amazing JENNY!
(If you’re lost you can start at the beginning with ZOË.)

It’s time to be entertained at Make it Crafty with the
new Entertainers Collection of digi and rubber stamps!
You’ll find all the new digital stamps here and you can now pre-order the rubber stamps here!
You can’t have a GRAND SHOW without a DOORPRIZE!
Hop on through to be inspired and leave comments along the way for your chance to
win hidden prizes and be in the draw to win one of the grand door prizes!
One person will win the full collection of digi stamps
and another will win the full collection of rubber stamps!
ENJOY THE SHOW!!

I’ve been wanting to color the Messy Room for a while and when I saw this Rocker Chick, I thought it would be the perfect combination!  Plus I’ve had the sentiment on the shelf just screaming to be used!  LOL  The official names of the products used from Make it Crafty are Rocker Chick (which is part of the Paper Rock Scissors Band – very humorous and a perfect band name), Girl’s Messy Bedroom and the Fancy Ribbon Sliders chipboard.  I think the quote is Inkadinkado Rockstar.

So is anyone a guitar player?  If you are, you can probably figure out the chord she’s strumming!  My fingers are all thumbs when it comes to music but that doesn’t mean I don’t try!  LOL  Now if I can only get more than my dog to sing along with me.  He he he

You’re next stop in the hop is the talented ÅSA!

Thanks for coming by and we hope you’ve enjoyed the show!!

S&S Ice Cream

Food, Glorious, Food!!”  That is our challenge theme at Little Miss Muffet Stamps for the next fortnight (2 weeks).  At first I was baffled at what image I should use but then soon realized there are LOTS of stamps with food in them!!  I was able to choose anything from lemonade, cupcakes, ice cream, bubblegum, lollipops, apples, carrots, eggs, hotdogs, cooking batter, marshmallows and the list goes on and on… no trouble picking anymore!  Plus with the recent Tea Party Release the options have multiplied exponentially and the combinations are endless… I could have added cookies, sandwiches, crackers, tarts and many other things. Ok, ok… so what did I pick?   Ice Cream!!

The image on this project is Swings ‘n Slides Ice Cream from Little Miss Muffet Stamps and was drawn by Pollycraft.  I thought she was perfect for the warm spring months that I’m experiencing and ice cream is my favorite.  😀

I tried to make the card look inviting and summerie without it looking hot and miserable!  LOL  To do this I stayed away from the warm colors (yellow, orange, red) as much as possible.  However, I always enjoy using complimentary colors so that’s why I used a little orange and pink.
Thanks for coming by today and be sure to head on over to the Little Miss Muffet Challenge blog and check out all the other fabulous creations!

Kaydance

Good morning.. er, um afternoon by now!  LOL  I’m mentally exhausted from filing the taxes this year but so proud I didn’t go for another extension!  That usually means I put it off until the next deadline so this year it will be nice that it won’t be looming in the back of my mind.  (Deep sigh!)  However, I still have about 4 more weeks of school until I can really breath.  Just keep swimming!

The image I used on this project is Kaydance from Whimsy Stamps.  This little girl was drawn by Elisabeth Bell and is always a favorite style since I have three girls of my own.  I thought this one was perfect to use since we live in Texas!  However, next time I color it, instead of grass I want to color a cactus like Chris did HERE.

Well, I guess it’s time for me to get back to studying – my break time is over.  Hope you’ve enjoyed this little bit of inspiration and have a great mid-week!