Polka Dot Pals Harley is a hardcore character and also one that has many faces, literally! This is a challenge I did with Jennifer Dove to color a Muppets character using Polka Dot Pals Harley clear stamp. She went with Animal and I chose the Swedish Chef. This is considered extreme creative color placement.
Visit Jennifer’s Animal post HERE. (and a hug thank you to her for the inspiration, wood grain paper, and much more!)
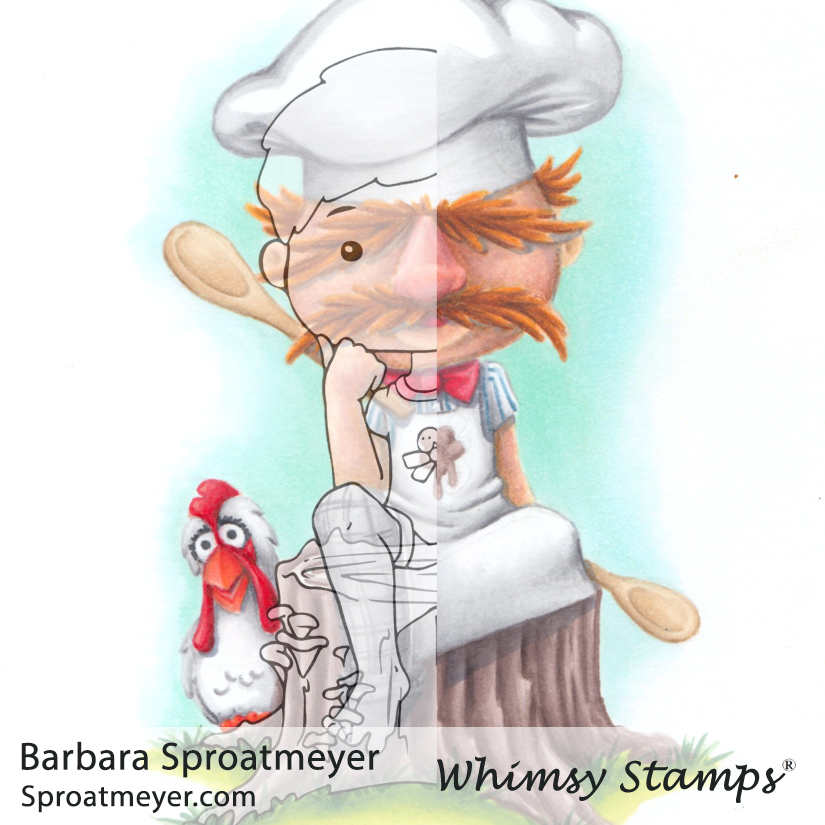
This is always a fun thing to see – the original image layered over the colored image. You can see how much was changed from his head to his toes. Below is what the actual clear stamp looks like:
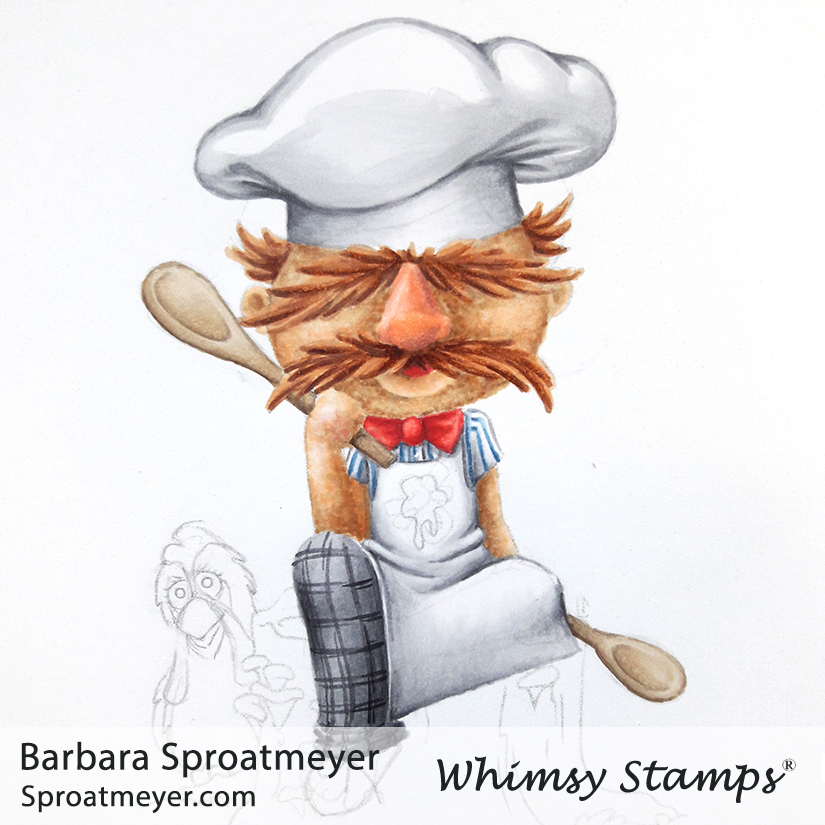
I first started with a lightly stamped image and sketched in my details. The face would be the important part and the eye placement worked well for my character. The hat, however, was a challenge to think through. I decided to taper the head and have the hair be hidden within the hat. You’ll notice the shadow I have is actually the top of the hair outline. I also pulled down the chin so there wasn’t a neck anymore.
Next was all about the coloring. I tried to get some texture in the face to match the Muppet but half way through my markers got all gummy so I had to stop. I would fix that later with colored pencils but for now, the face and hair will have to stand out badly.
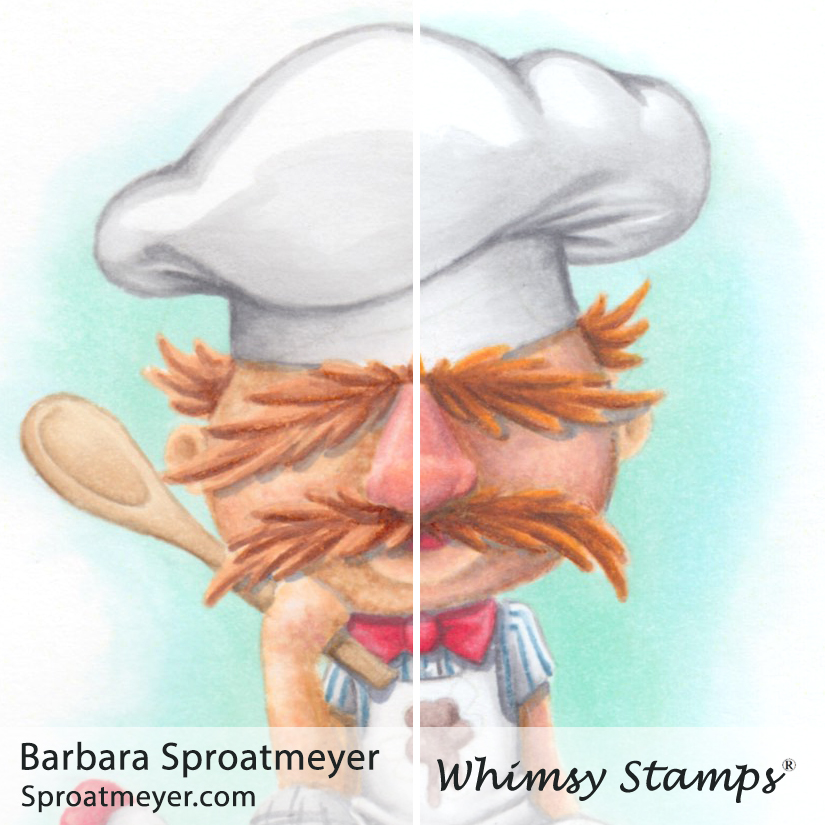
After the image was colored (you’ll see the finished one below), I came back in to fix the face and hair with the colored pencils. As you can see, on the right is Copic only and you can see how gummy it got. The right side is smoothed out with the colored pencils on top.
Here’s the finished one – “Börk börk börk.” When I colored the stump, I decided to ignore the mushroom details since I already had plenty of details in the image itself.
Finally a challenge wouldn’t be as fun if there wasn’t an accomplice! Pop on over to Jennifer‘s site to see details on Animal. “I want to eat drums!”
This was another coloring session with my 2nd daughter and she decided to make a bookmark with this Elisabeth Bell stamp, Beary Big Hugs. Mine is on the left and hers is on the right. She was working on blending with the Copic markers and I think she did an awesome job!
These are the Copic colors I used: BV23, N0, 2, 3, 5 E30, 31, 35, 37 BG11, 72, C5 E40, 41 E000, 30, 31, R12 YR30, 31, 23, 24, Y21 RV11, R32, 43
Stamp: Belles ‘n Whistles E. Bell Beary Big Hugs
Papers: Hammermill Premium Color Copy 100lb WeR Memory Keepers Harvest
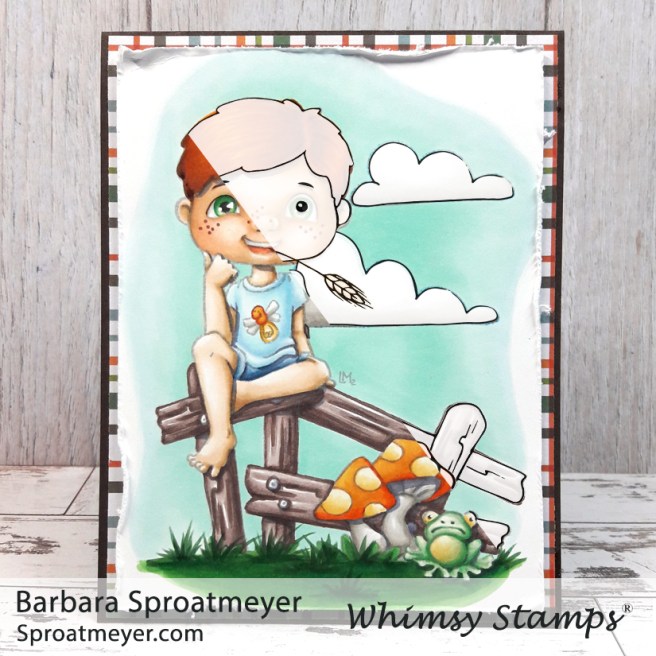
New releases are at Whimsy Stamps for the month of March and this is one of them – Polka Dot Pals Harley. I created this scene using a few of the other Polka Dot Pals sets as well: Polka Dot Pals Fern, Polka Dot Pals Imogen and Polka Dot Pals Syeda. It’s just so fun to mix and match these sets and I often have them all out on the coloring desk for me to use.
So which sets did all the elements come from? Polka Dot Pals Harley and the frog are the main characters. Then I used the fence from Polka Dot Pals Fern and nestled Harley in-between the two fence posts. From Polka Dot Pals Imogen, I used the mushroom stamp. Then the clouds and hay straw are from Polka Dot Pals Syeda. For this scene, I colored my own face and then added the freckles from Polka Dot Pals Fern.
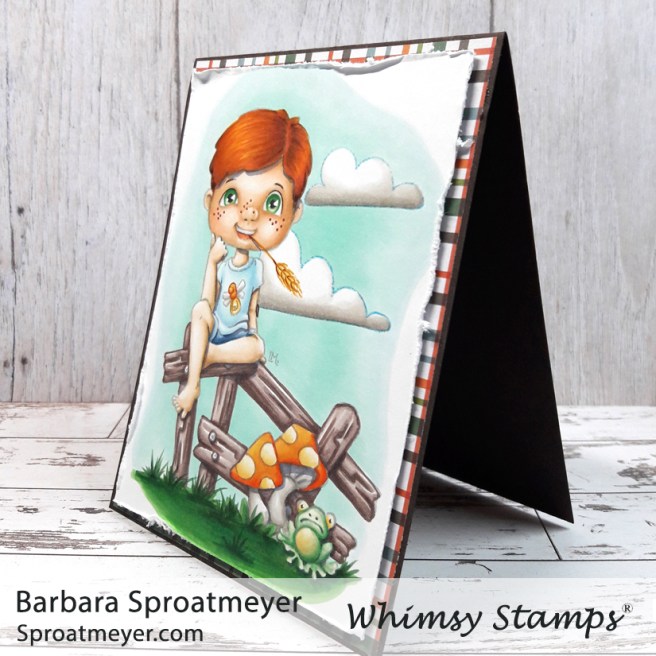
This scene was actually created by my youngest daughter who wanted to color along with me. This is her coloring and I think she did a great job. But most importantly, we had fun together.
I like to show the before and after coloring, especially of the faces, to show how much character can be added. Harley started out with two dots for eyes and a strand of straw.
Here’s a close up of his face. I wanted to go for a crooked smirk so it looked like he was smiling but also chomping down on that strand of straw so it wouldn’t slip out of his mouth.
These are the supplies that I used on my project:
Paper: Make it Crafty Blending Cardstock Park Lane Paperie Woodland
March is an awesome month but it’s also awesome because there is a new release at Whimsy Stamps featuring two new Polka Dot Pal boy characters! For my sample today, I used Polka Dot Pals Raden, with a few elements from Polka Dot Pals Imogen, and Path in The Woods for the background.
I first colored the Path in the Woods so I could see how much green I could use on the rest of the image and not be too washed out. I settled for adding just a little green on the shirt to help harmonize the two images together.
The Path in the Woods by Dustin Pike is going to be an awesome stamp to use for many themes. Even though it took a while to color it with the dots method, I can’t wait to use it again.
I had tried to add Nivo Crystal Drops to the glasses but was a bit shy about how much I added so it didn’t go on as smooth as I had liked. Then I tried to speed up the drying time with the heat gun – and well, let’s say you don’t want to do that either unless you want a bubbled look. I smoothed it out as much as possible and that was that. Lesson learned.
Here you can see a side by side of the coloring on Polka Dot Pals Raden before and after. I added the glasses from the Polka Dot Pals Fern stamp. Then I colored in my own face without using an Add-on Face from another set.
The fallen tree log in this set has four different options for how you want the end of the stump to look like. I chose to go with the eyes and make the log hollowed out – who know what critters are lurking in there but I think Polka Dot Pals Raden is about to find out.
I found a few patterns from Amigurumi Today to crochet and picked up some yarn at my local yarn store West 7th Wool in Fort Worth. The first one is the Easter Bunny Amigurumi.
I don’t know what yarn this was – it was soft and a fun variegated color. I think it’s suppose to be for socks or a shawl? But not for amigurumi and not for me. It was too stretchy but I finished the bunny anyway. I have all this yarn left on the skein but I think I’ll be donating it to Goodwill.
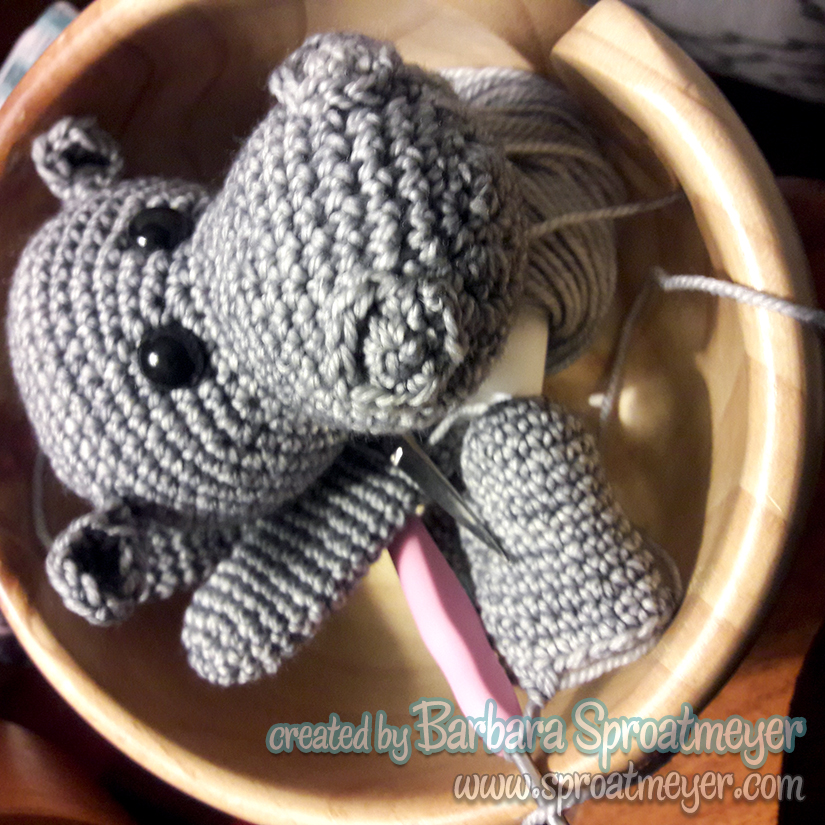
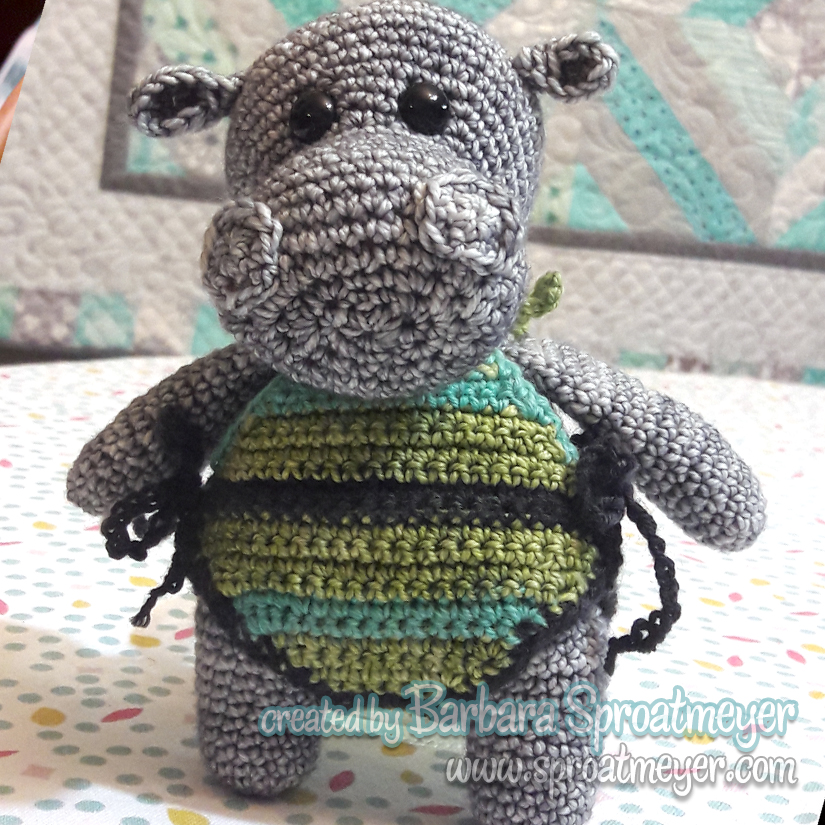
For this next one, I switched yarns and started on the Hippo in Swimsuit pattern. The yarn is Anzula Squishy 25g and with that 10% Cashmere included it’s a dream to work with.
Hippo was the gray color yarn and Pesto is the color I used for the swimming suit. I also had some miscellaneous nuggets of black and teal that I added some stripe details.
Here’s the finished hippo. I changed the muzzle and worked in a round/oval instead of starting with a chain. My chains tend to be too loose and I didn’t want stuffing to show through. I also added the nostrils.
The Art of Creative Watercolor by Danielle Donaldson is a book I’ve been working through and have enjoyed her whimsical style. Here are some more of her “Littles” and also followed up by one that I created on my own.
These were some of my favorite characters in the book. I did all the pencil work up front because I had a hard #2 pencil only at the time and it didn’t work to go back in after the watercolor was applied.
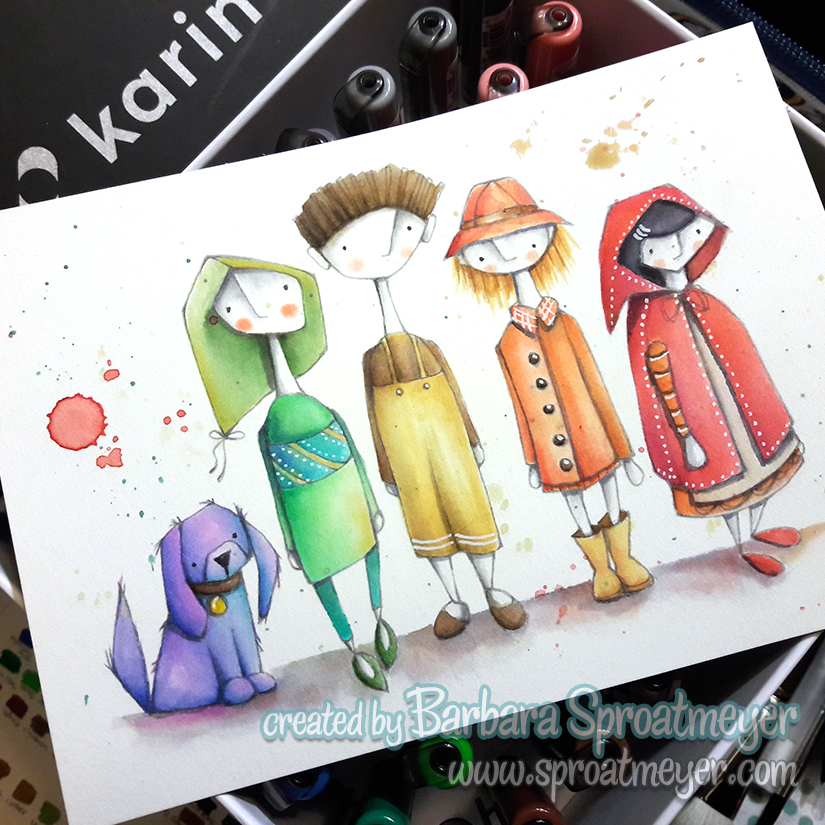
This last one was done from my imagination using the inspiration I had picked up from the book. It was colored on Arteza cold press 140# paper. The background was done with Winsor & Newton half pan travel watercolors and the characters and foliage was colored with Korin brush markers. I wasn’t able to control the color and water as easily on this paper but was able to play with some cold press techniques of mixing colors. The cat and mermaid tails were done in the metallic Korin brush markers.