GIVEAWAY ALERT – Details are at the bottom of this post! This giveaway is closed and the lucky winner is “Hege” – congratulations!
It’s release day at Whimsy Stamps and oh my, you’re going to love all the New Stuff! There are so many fun products but I chose to show off Polka Dot Pals Delia on my project with a few elements from Polka Dot Pals Eileen. The two Polka Dot Pals clear sets released this month are school themed and I’m sure everyone is ready for that to start… well, almost everyone. LOL
Polka Dot Pals Delia is all set for school and has her backpack in hand. I thought it would be a fun scene to make with books all over and the globe in the background. So I created a shelf, which turned into a cabinet. I used a ruler to sketch that out then stamped the items sitting on the counter.
The globe is from the Polka Dot Pals Eileen set and the face that I stamped on is from Polka Dot Pals Syeda set. I had to use the turtle on this one as it looked like the perfect class pet. I loved coloring this scene and the bright colors make it a cheery card. Lastly, I used the Card Builder Windows die and framed it with black cardstock to layer this card.
This giveaway is closed. Thank you everyone who participated! Sign up to received inspiration in your inbox by following this blog and get notified of future giveaways too.
Now it’s time for the giveaway details – become a follower of this blog plus leave a comment on this post and tell me what time of day you like to be inspired. When do you like to see inspiration in your inbox – is it (1) Mornings, (2) Afternoons, (3) Evenings or (4) (fill in the blank)? Comment between now and Tuesday night, August 4 for a chance to win this loot: A card I made using Polka Dot Pals Zara Fairy Dreams and the clear stamp featuring Polka Dot Pals Khadija with some glasses. The random winner will be announced on Friday, August 6. Good luck!
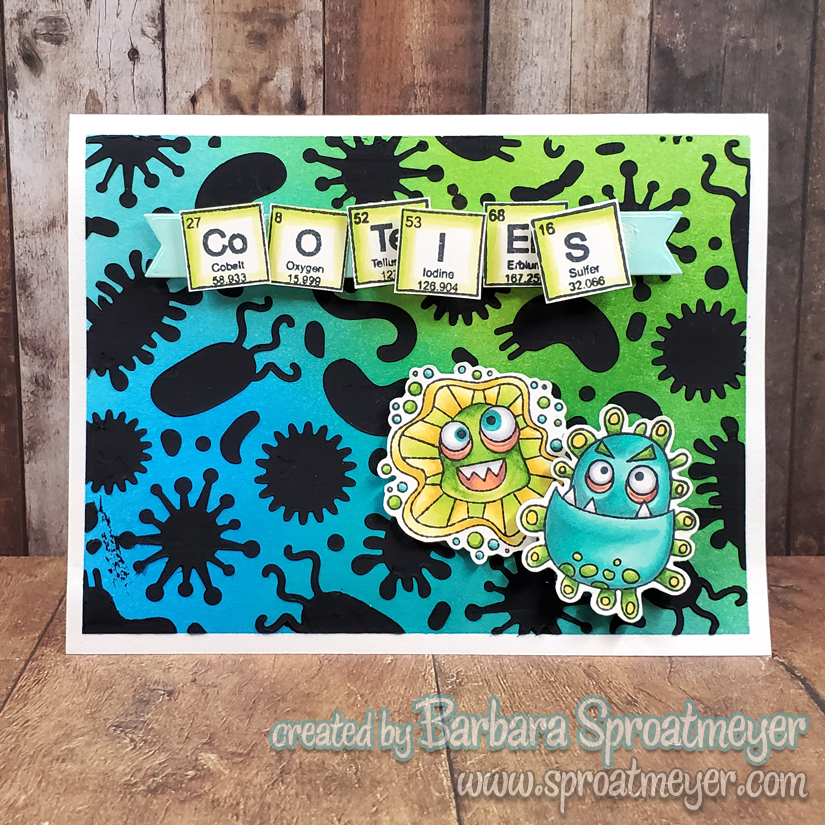
I picked up some Crafter’s Workshop Black Modeling Paste and have been wanting to try it out. Combined with the Germ Stencil and Cooties stamp from Jaded Blossom seemed to be the perfect start. I’m sure these would make great Covid-19 cards but I went with a generic theme for mine.
I started by coloring the background with Distressed Inks and blender brushes. The colors I chose were blues and green and later I would bring in some yellow. Otherwise, I planned to keep the card simple. After the background was done, I placed my stencil and applied the modeling paste. The black is a nice solid mat black which makes it stand out and look crisp.
I actually have two periodic words stamp sets from two different companies. It seems that no matter what I want to make, it’s not enough. I wish I had the whole chart of elements to work with! But for this card, I fudged it by covering up the letters that I didn’t need to spell out “Cooties.”
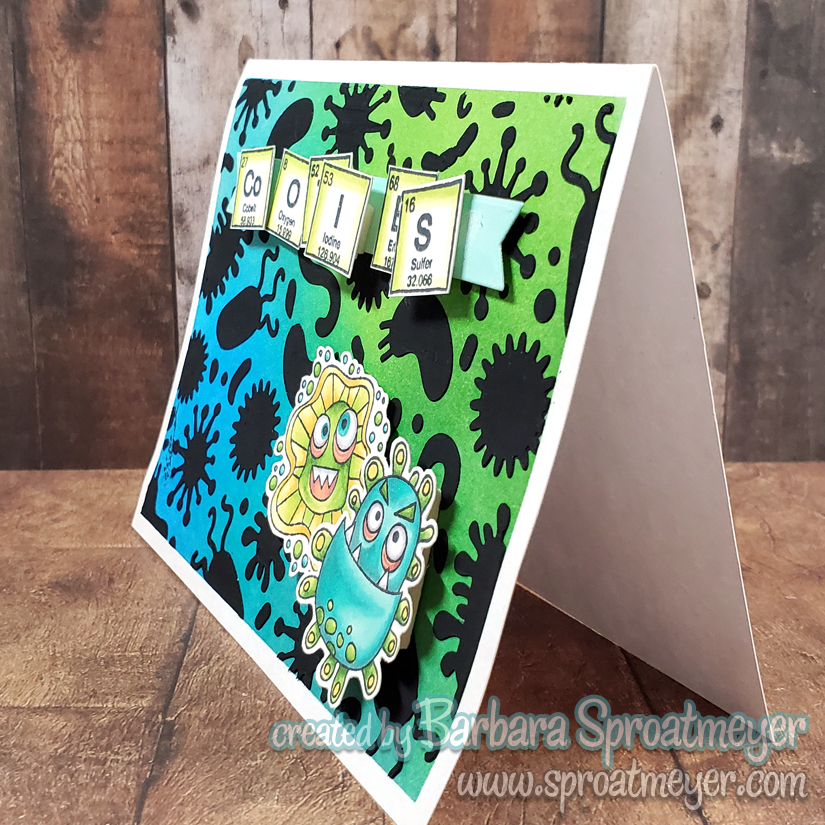
The little Cooties! characters were simple and quick to color. I kept with the color scheme of green and blues but then added yellow to brighten it up a little. Below you can see how the modeling paste looks like. It’s also thick and opaque so I was able to get a nice layer applied to the paper.
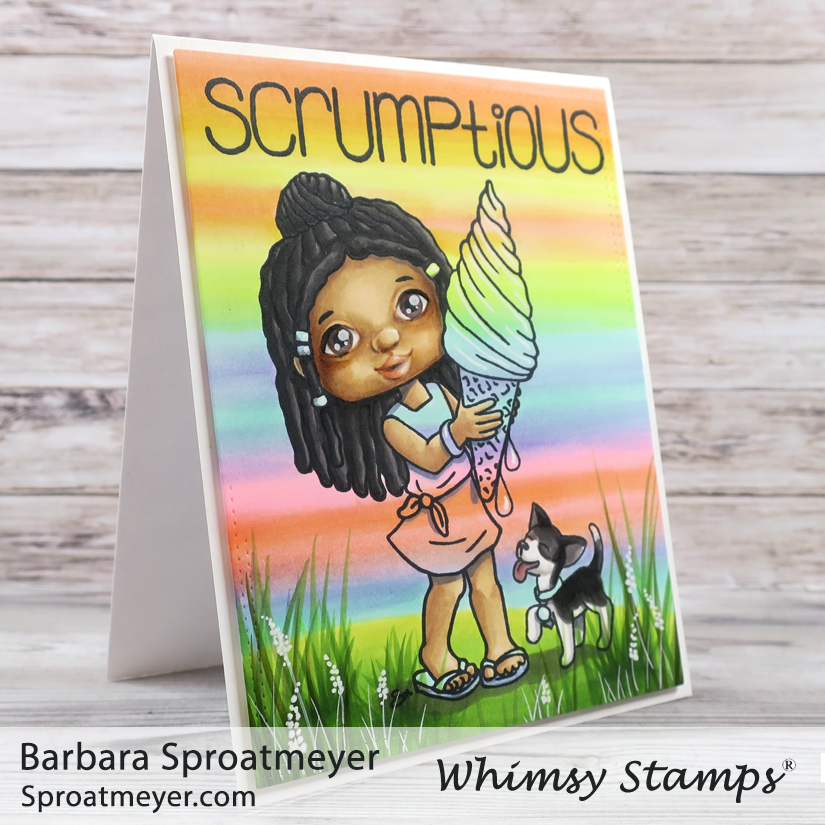
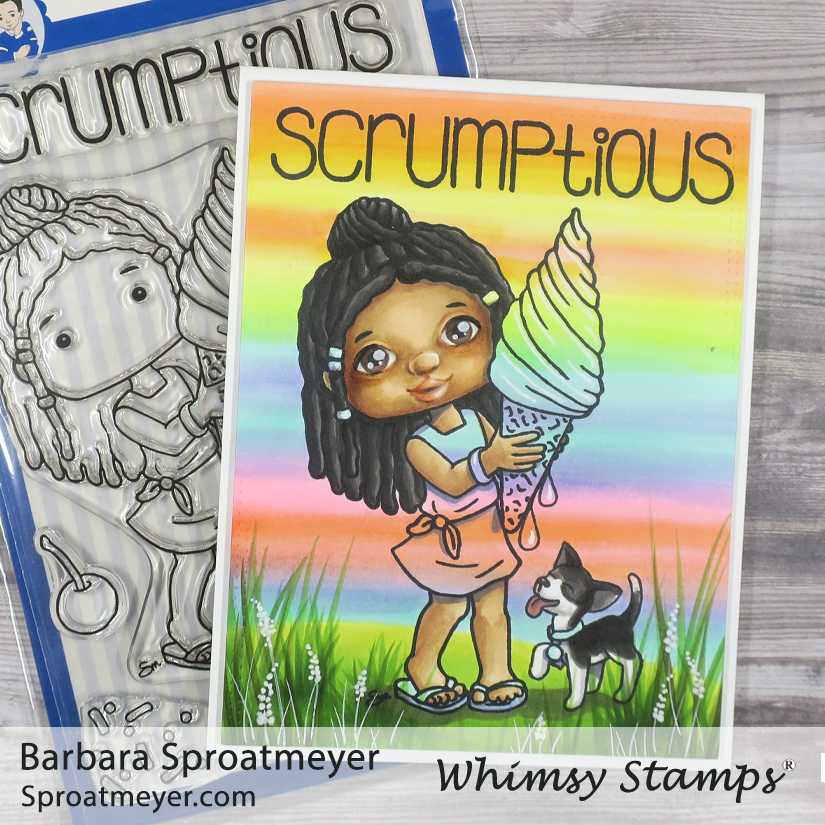
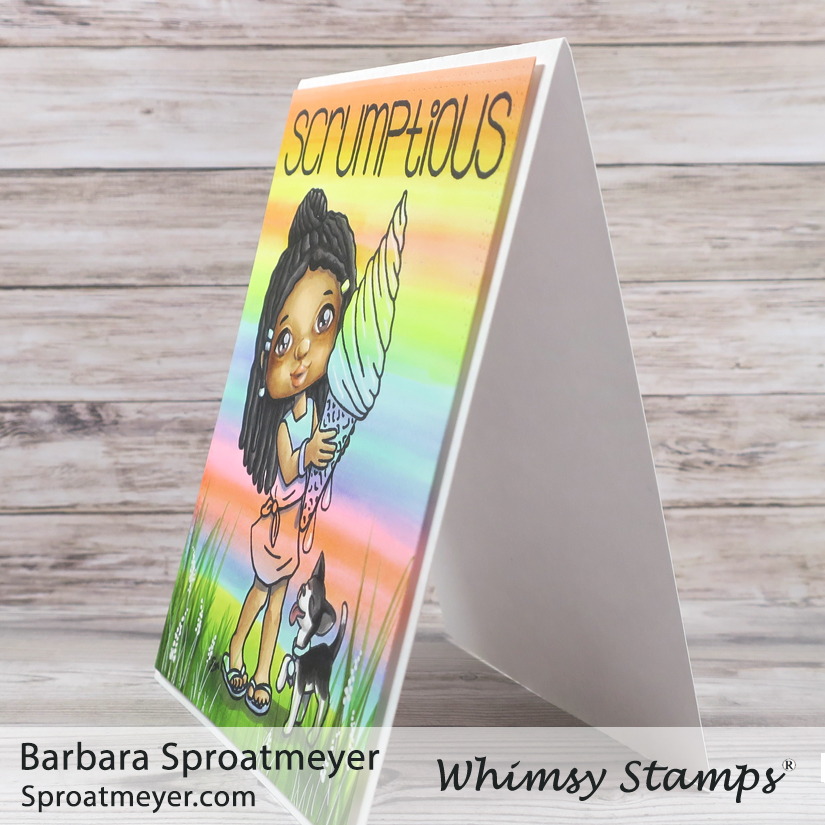
This card is one scrumptious sherbert-tastic card! I took an idea from my daughter who had colored an image as a rainbow through everything except for the head. I thought that was an intriguing idea and gave it a try with this gal, Polka Dot Pals Kezia and her little puppy.
The image my daughter used was a winter image so there wasn’t as much skin showing so I don’t think the effect worked as well on my image as it did hers. However, having the ice cream in the picture helps show the idea.
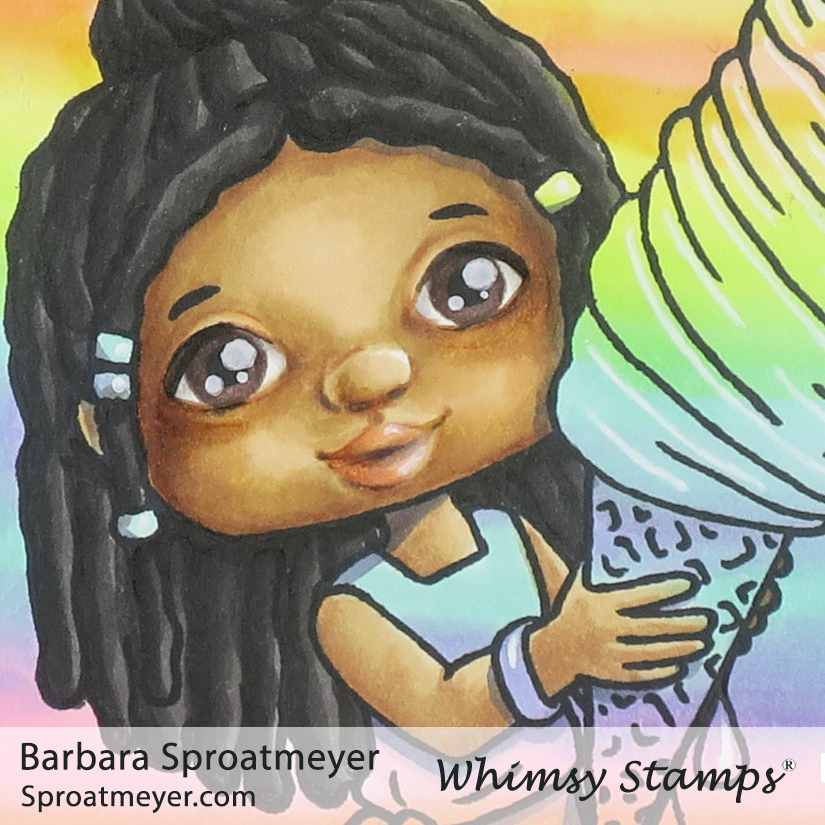
For the face of Polka Dot Pals Kezia, I decided to color in my own and not use one of the add-on faces. I’ve been trying to adjust the way I color the eyelids by giving a highlight above the eye and a lighter one below the eye. Then I’m also trying out new eyelashes and just making a thick line instead of individual lashes. How do you think it’s working out?
This was one hard card to photograph. I had lots of problems with my camera but I think the psychedelic colors in the background threw it for a loop. I had to pull out my trusty handheld camera for this one. LOL But I love the bright colors and know it will cheer up someone’s day.
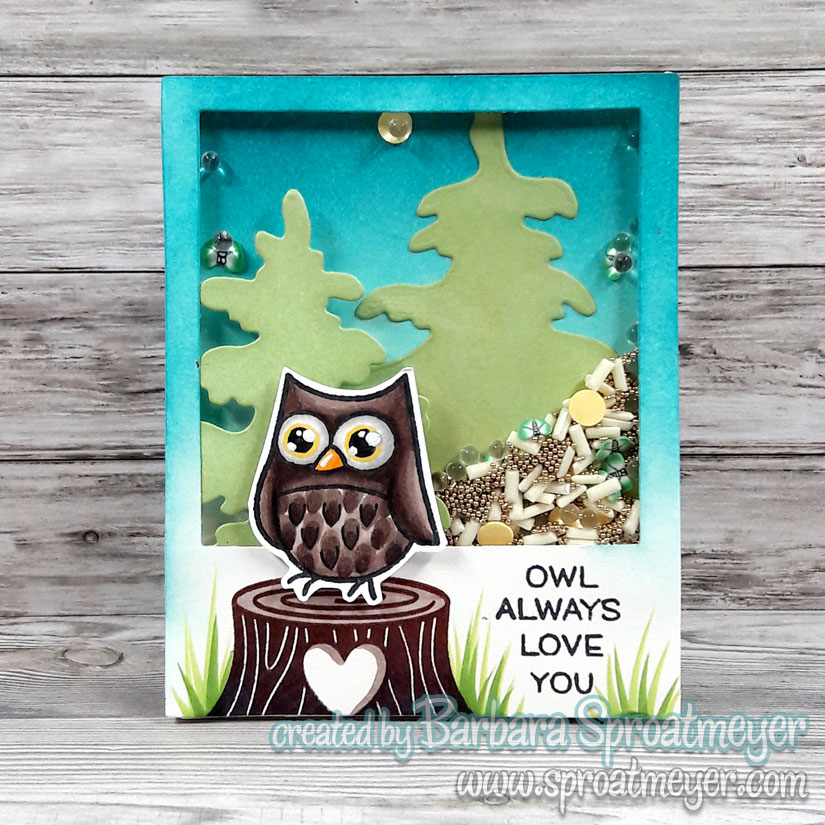
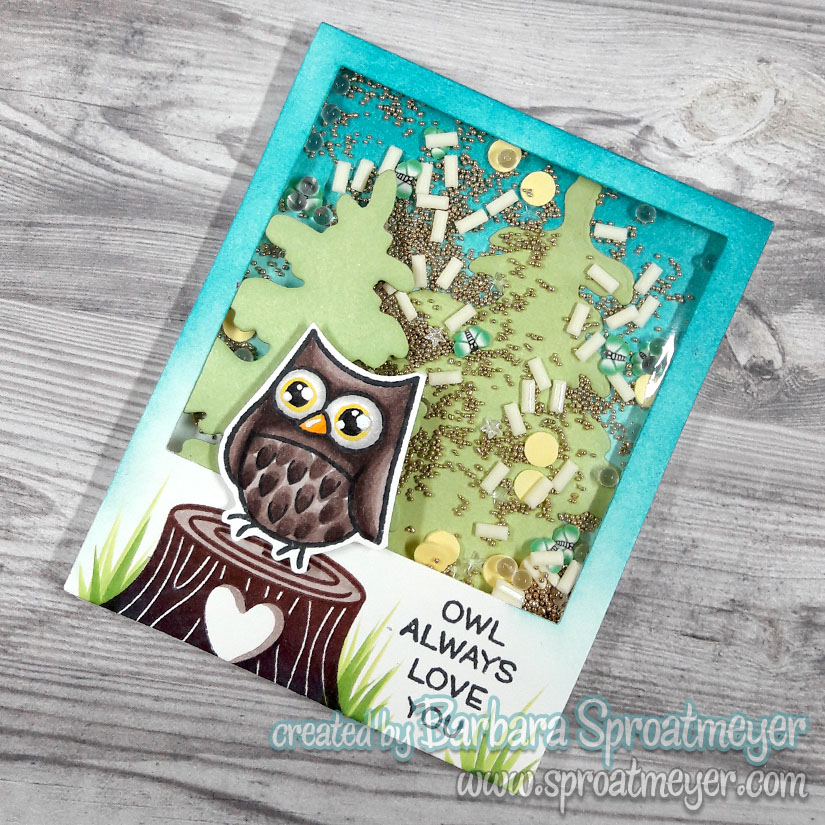
Here’s a quick little shaker card note that I created using some fun dies and stamps. The inside of the shaker card is filled with yellows, golds and some green butterflies to go for a twilight theme. Sometimes cards don’t need to say a lot – this is one of them and a simple note to say I love you.
The main component is the Polaroid die and Snowy trees which I blended with ink to color them. I stamped the tree stump in brown and added a little shading but kept it simple. Then I only had to spend some time coloring the details of the owl.
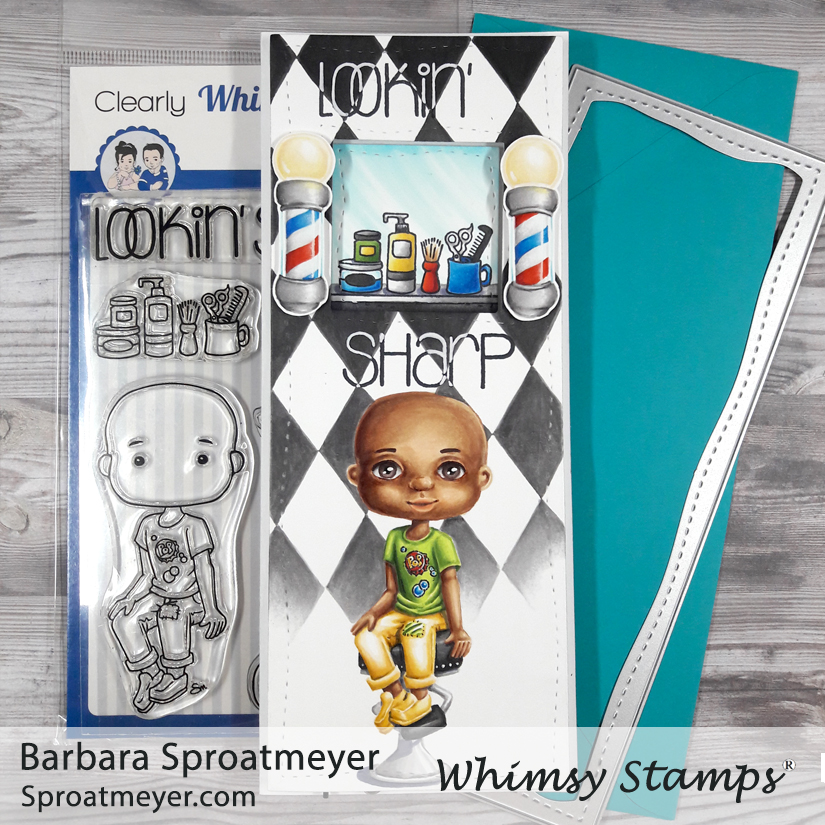
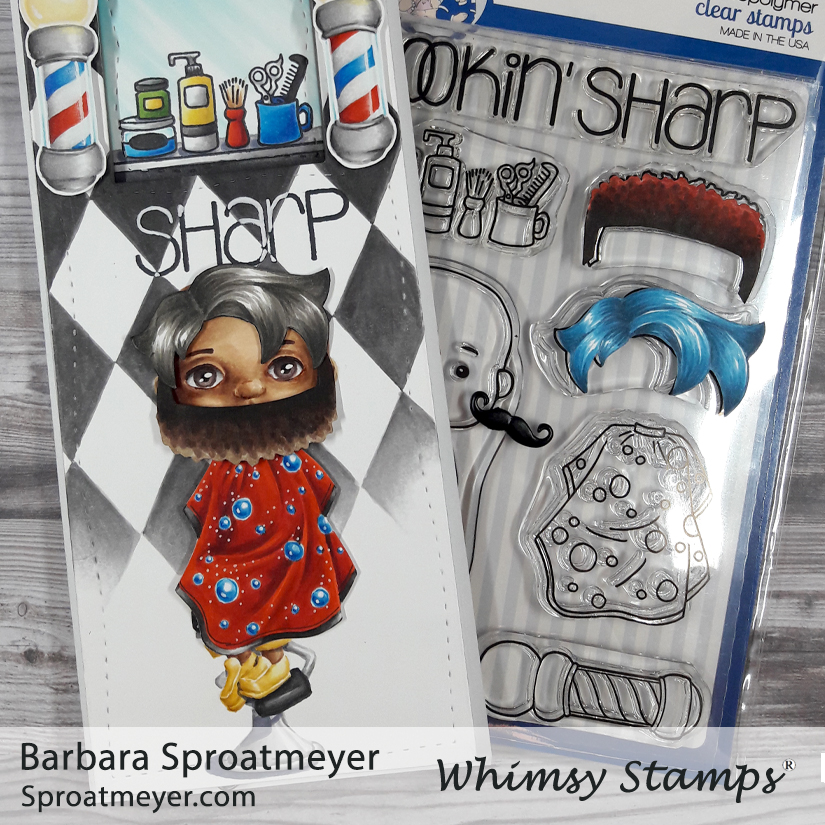
This is one of those projects that started out as a small idea yet kept expanding as it was created. I have lighting elements and interchangeable hair and accessories to dress this fellow up at the barber shop… plus it’s on a slimline card AND I made a video coloring the face. Wow! This is one interactive card (and post) that will keep you busy and I have loads of pictures too.
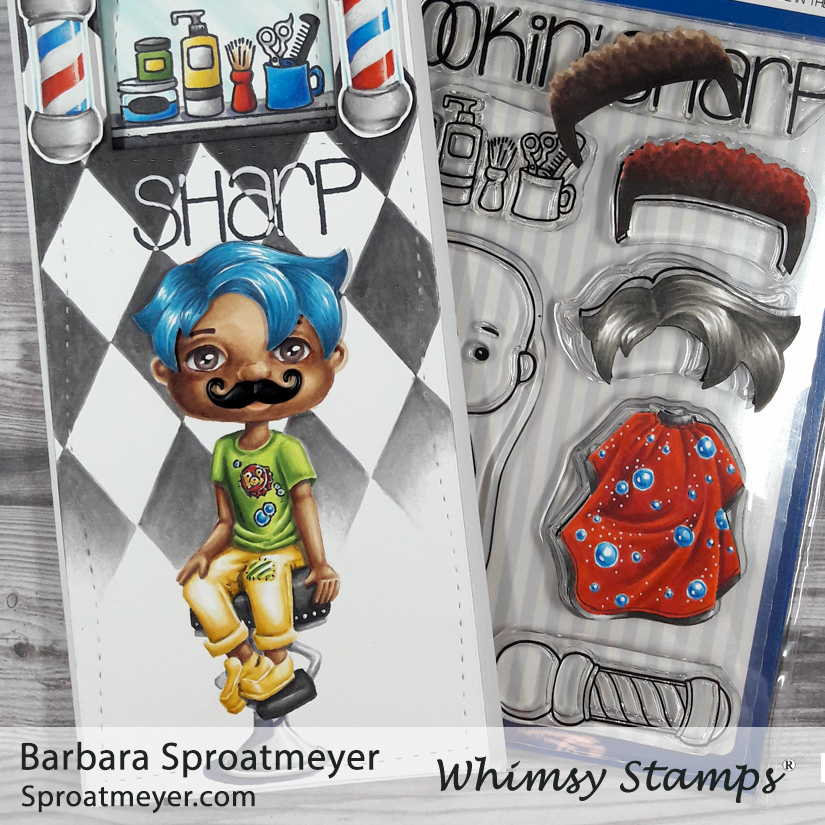
I mustache you… have you seen Leland? I have several little mustache brads and I couldn’t resist not putting on on this card. I made a magnet out of it by cutting off the brad part with little tin snips. Then I glued a tiny magnet inside which was cut from the magnet sheet. The metal of the brad helps it stay in place so the magnet inside didn’t have to be perfect.
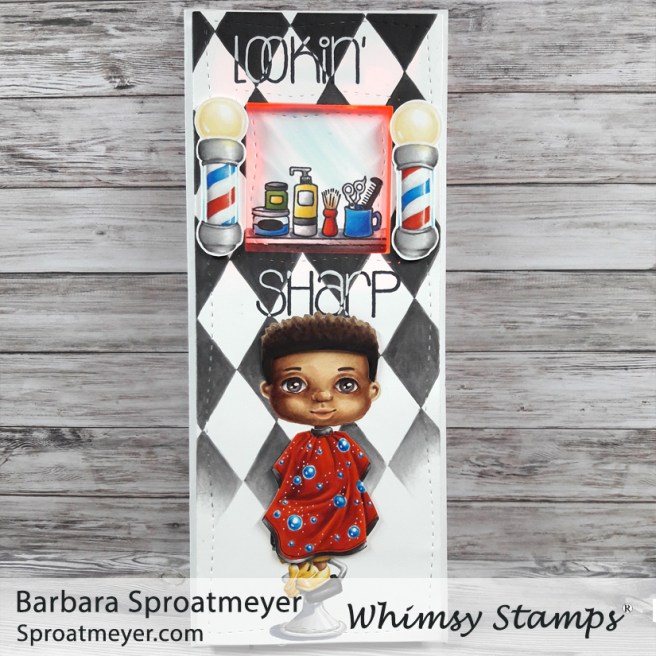
Lookin’ sharp buddy! Here he is with tight curly hair and the barber’s bib. The bib can be used on both Polka Dot Pals Leland here and also on the Polka Dot Pals Louisa. So on another project I could easily see a girls’ night out at the beauty salon.
On thing I like about this fellow is that he’s bald because the hair possibilities are limitless when using creative color placement. You can draw in any type of hair style, girl or boy, long or short, whatever. I love that!
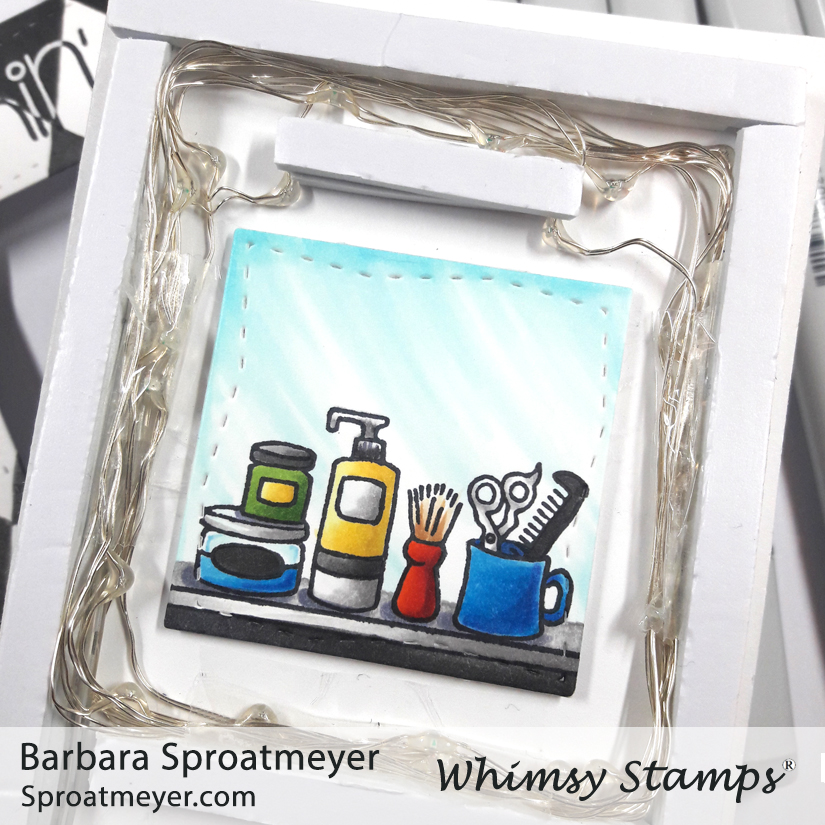
This is the inside of the card on the top part. The lights I used are fairy string lights. The string is long so I had to wrap it around several time and tape it against the sides of the foam tape. I think this fit around four or five times but the lights are far apart so this was necessary to give an even glow for the window.
For the fairy string lights, I chose the color red. They come in all sorts of colors but I thought red fit the theme I was going for.
This is the inside of the card where I added a magnetic strip to hold all the accessories. So far I have four hairstyles, one mustache and the barber’s bib. As my kids have shown me, the hair can also be used for beards and mustaches too. They had a lot of fun showing what Polka Dot Pals Leland looked like when he entered then exited the barber shop.
Here’s a close up of Polka Dot Pals Leland. I colored this face without using an add-on face stamp which I show in my video. It’s not perfectly mirrored or centered but that’s one of the qualities of building the face from scratch. We humans don’t have symmetrical faces either so I call it a “natural” look. LOL
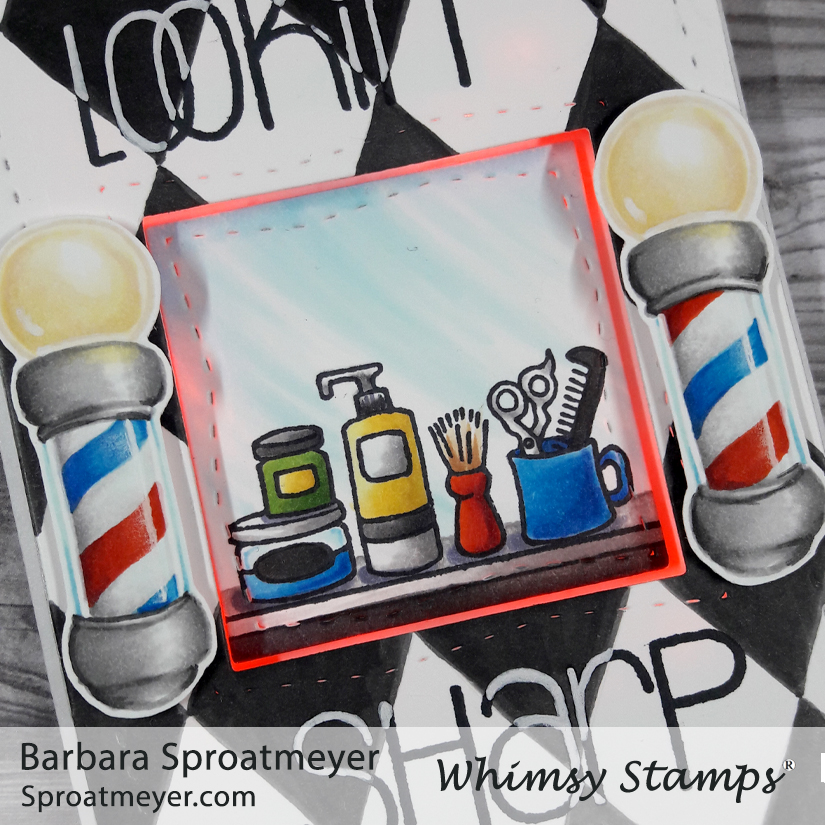
Here’s a close up of the barber shelf which was recessed in the card with a window. The square was placed on a thin layer of foam so the lights would shine behind and in front. I did this so the lights weren’t so bright and there was more of a soft look to them. It would have been fun to put yellow lights in the barber poles too but I ran out of space and it was too much of an afterthought to incorporate.
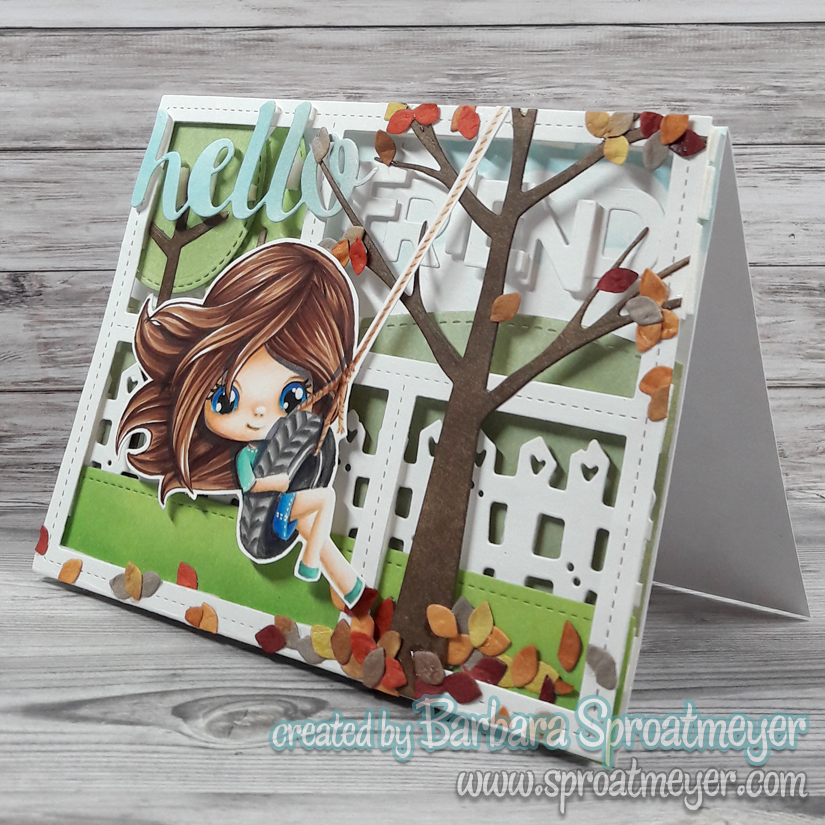
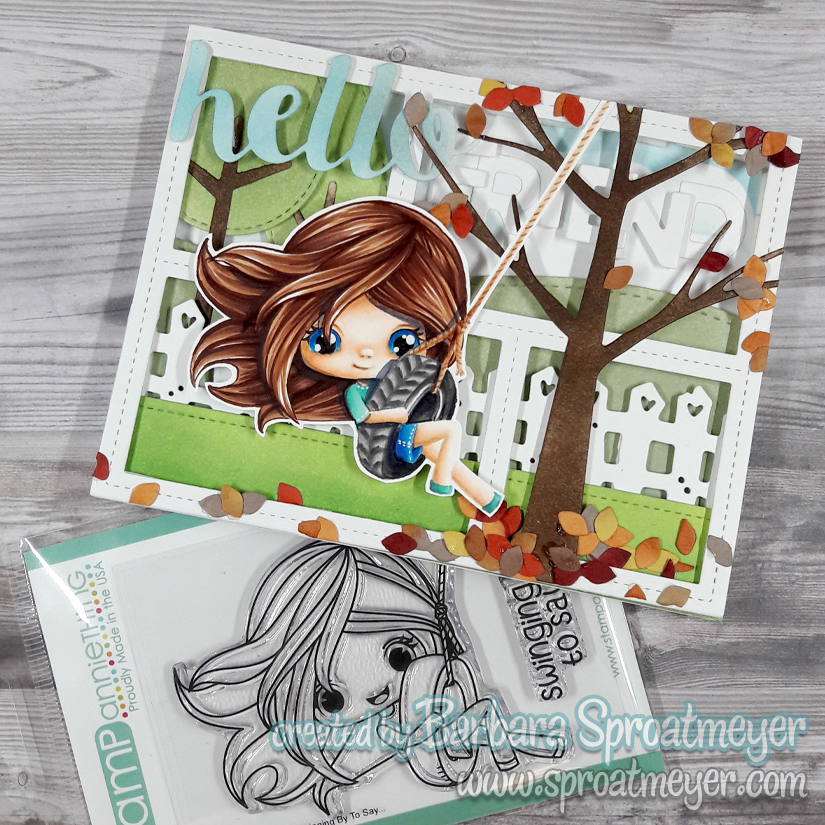
Hello friend! For this project I pulled out my stash of dies to create the scenery and then colored up Audrina Swinging By Tire Swing to enjoy it. It’s been so hot this summer that I’m ready for cooler temperatures and for those autumn colors to emerge. Sigh. It will be a while for that to happen. But in the mean time, I hope you enjoy this project.
I started this project by building from the background forward. I knew I was going to use the Peekaboo Backdrop Die so I kept that in mind when I was placing the other elements. The top-left window features trees and the word “Hello” on top. The top-right window features stenciled clouds and the word “FRIEND” in the sky.
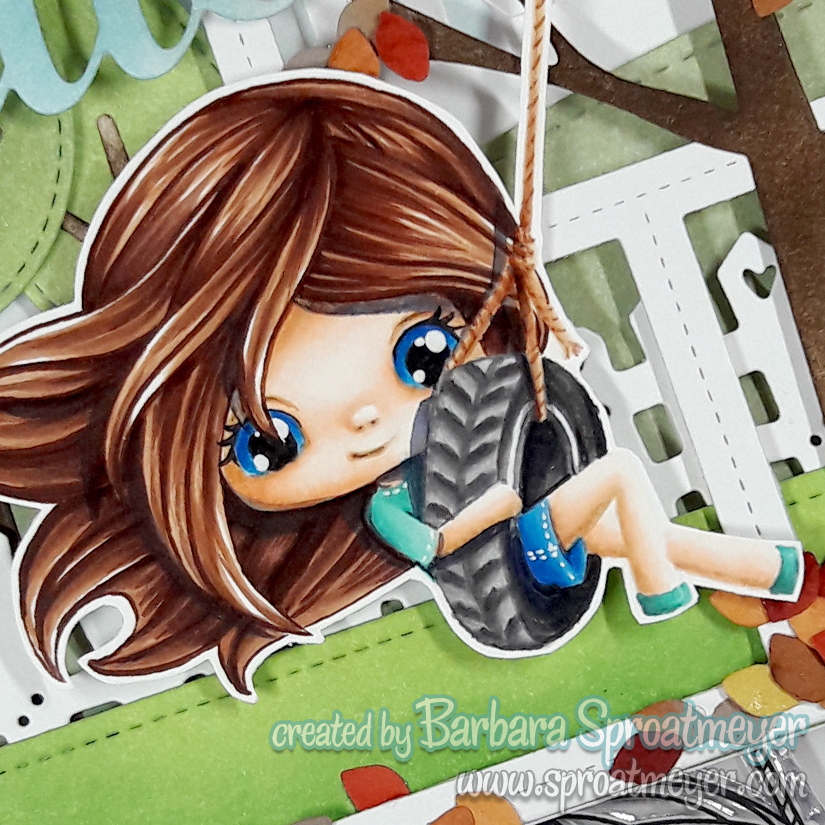
I colored Audrina Swinging By Tire Swing with the no-lines technique which means I stamped her in a light color. This allowed me to add a few more details such as more rope, add a nose and change her mouth. I colored her eyes the same way I did last time which seams to work out well with this style. I’ll have to try green eyes next time. 😉
The leaves were cut from mulberry paper that was already died in the autumn colors. That was so I didn’t have to worry about coloring them and they also have a bit of texture to them that is reminiscent of leaves. I chose autumn leave colors so that the tree and foreground would stand out more than the background and to keep the focal point moving around the card.