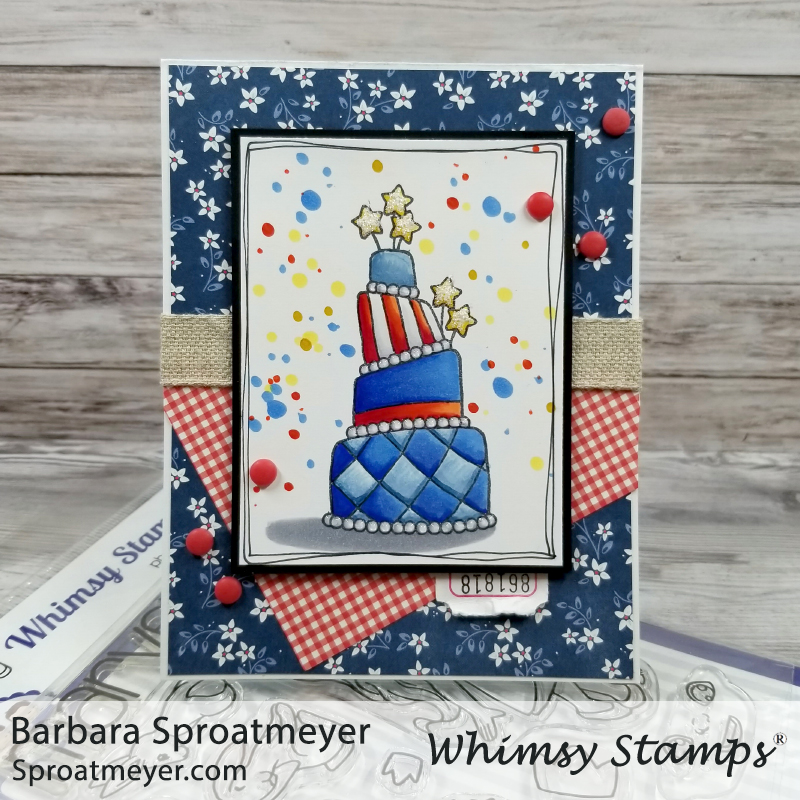
For this project, I used the cake, an accessory stamp from Polka Dot Pals Ophelia, and created a birthday card with a patriotic theme. I kept with red, white and blue to color and then added a little yellow in the stars and confetti background. I hoped that I could use it any time during the summer and not just for the 4th of July.
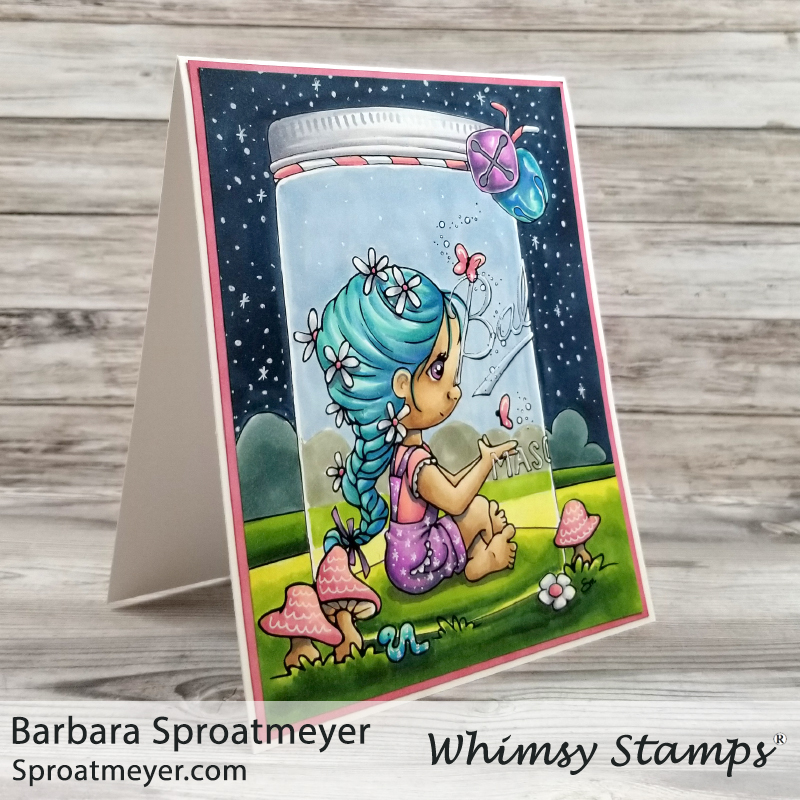
What can you do in an hour? Such a magical weekend and today I’m sharing with you the card I colored for the DigiMojo Facebook event using Polka Dot Pals Imogen in a Mason Jar from Whimsy Stamps. This is a digital coloring scene so everything is already merged together and you just print and color. I love how simple that process is and how quickly I can get into coloring. This specific card took me about an hour to color and you can watch the video of that on YouTube HERE.
I had colored this image a few times so I set out to color her differently. That started out with choosing different colors for her hair and clothes which then lead me to a nighttime sky. This specific Polka Dot Pal character is available in as shown as a Digital Coloring Scene HERE. But you can also pick up this gal as a clear rubber stamp set HERE to coordinate with all the other Polka Dot Pals and accessories.For this card, you can watch the video for insights on how she was colored. You can also visit some of my other blog posts for variations how how this digital coloring scene and/or the clear stamp sets have been used. THIS ONE features no lines coloring and extra twine colored in. THIS ONE features stamping and coloring on Neenah Desert Storm paper. THIS ONE features a blue and yellow color pallet. THIS ONE features an experiment in coloring a sunset with dots. THIS ONE features extra attention to the jar reflection and details with white. Finally THIS ONE features the use of a DoveArt background.
I just finished recording this coloring session featuring Sunbonnet Fireman Puppy rubber stamp from Little Miss Muffet Stamps. There were a few differences from my other card and I think most noticeably is the sentiment and the size of the fire hydrant. I like the sentiment on this one better but the fire hydrant size on the first card. I’m sure if I was create a third that it would also look completely different.
Anyway, there are still some spots left for this class which is now available on YouTube. You can sign up for it and others HERE.
The sentiment is HUG from the Big Hugs Word die from Whimsy Stamps and is a fun shape to add. You can add any sentiment you want. The last card I created (which you can see HERE, by the way) is one I purposed for a sympathy card. I think this card lends well to a variety of themes. One thing I forgot to do was add a shadow to the sidewalk under the boy and dog. Oops! So check out the first card for what that looks like and grab your BV23 to add that on.
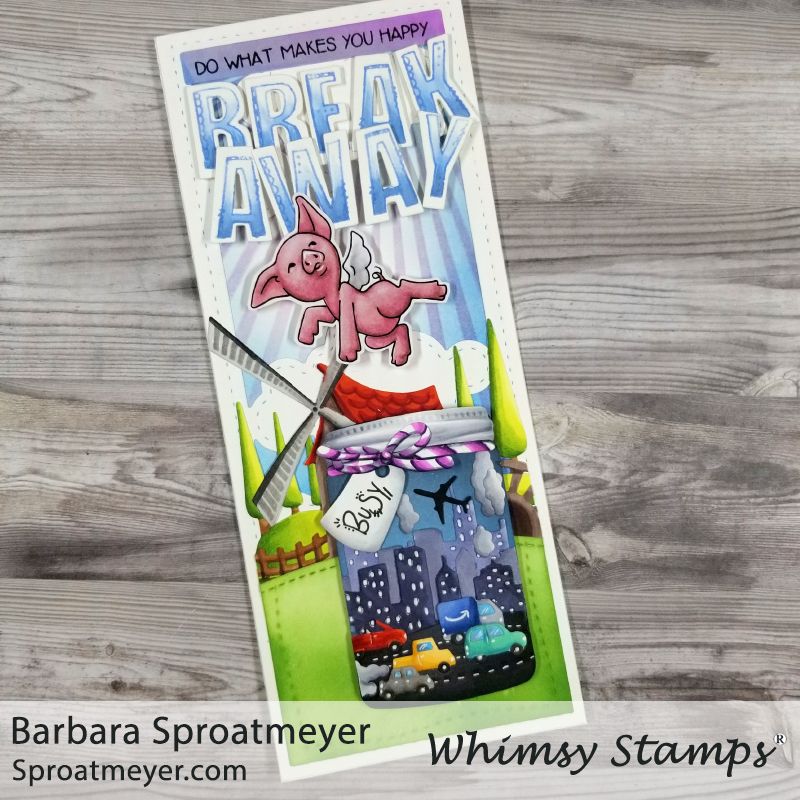
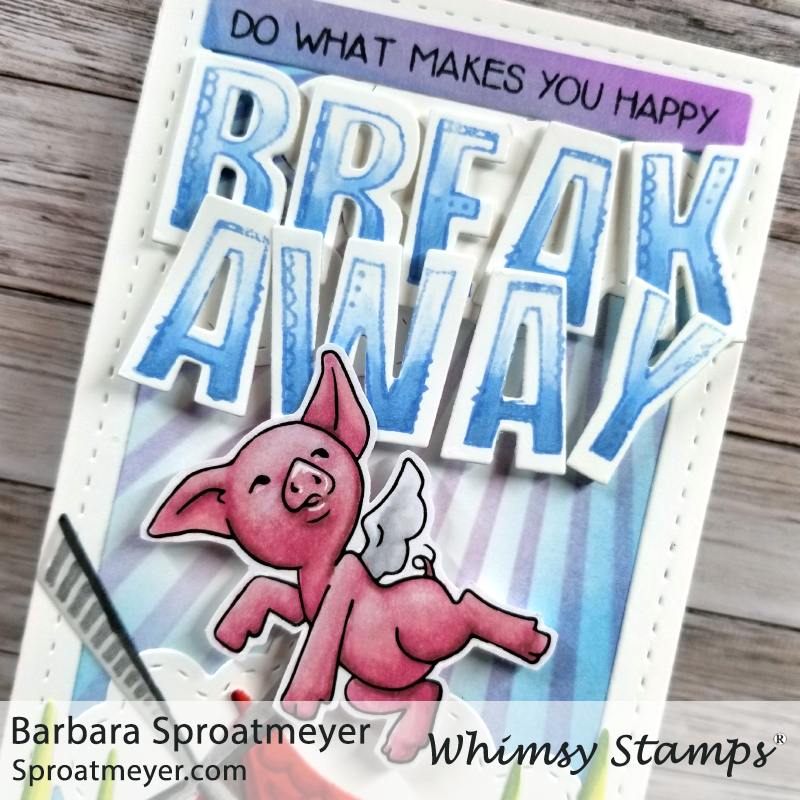
Take a break and do what makes you happy! We all need a break from our every day life and this card came about with that type of theme. I started with the Slimline Cityscape Die and tried to think of a fun way to use it – that’s when the Atlas Mason Jar Die came in mind to create a city scene inside. But one thing led to another and I ended up using seven different die sets, three stamps and one stencil to create this mega slimline scene. Read below for more details on how I create it featuring Pigs Can Fly Too as the star piglet in my story…
The city in a jar was created using the Atlas Mason Jar Die and Slimline Cityscape Die. I cut all the dies out in white cardstock so I could color them individually instead of searching for that many different colors to coordinate. Sometimes grabbing a marker or brush is quicker and it allows me to add more details such as the coloring the details on the jar’s lid or adding color to the ribbon/twine. After my jar was created, I started to work on the background. Since I had a city in a jar theme, I wanted the outside to be the opposite. That’s when I grabbed the Stitched Border Trio Die, Slimline Woodland Cottage Die and Slimline Clouds Die to create the background scene. I added color throughout such as stenciling the background with the Sun Rays Stencil and coloring the foreground elements. I love this Atlas Mason Jar Die! This could have been a great card to use lots of foam tape and really build up the layers but I decided to keep it simple and no more than two. On the first level, I raised the jar and BREAK lettering. On the second level, I raised the lid, bow and tag on the jar, then also the pig and the AWAY letting above that.
This adorable scene is the perfect combination of spring flowers and lazy summer days. In this class you’ll learn how to color Wisteria flowers, a stone background and flower pots – along with everything else. When you’re finished, you’ll just need to mount it on a card front and send it to one of your favorite peoples.
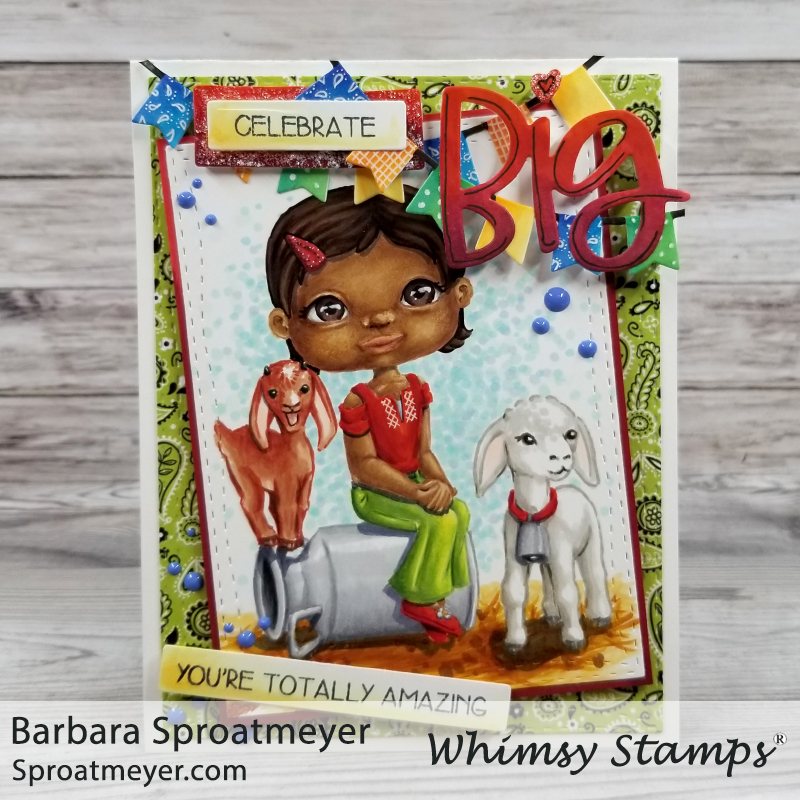
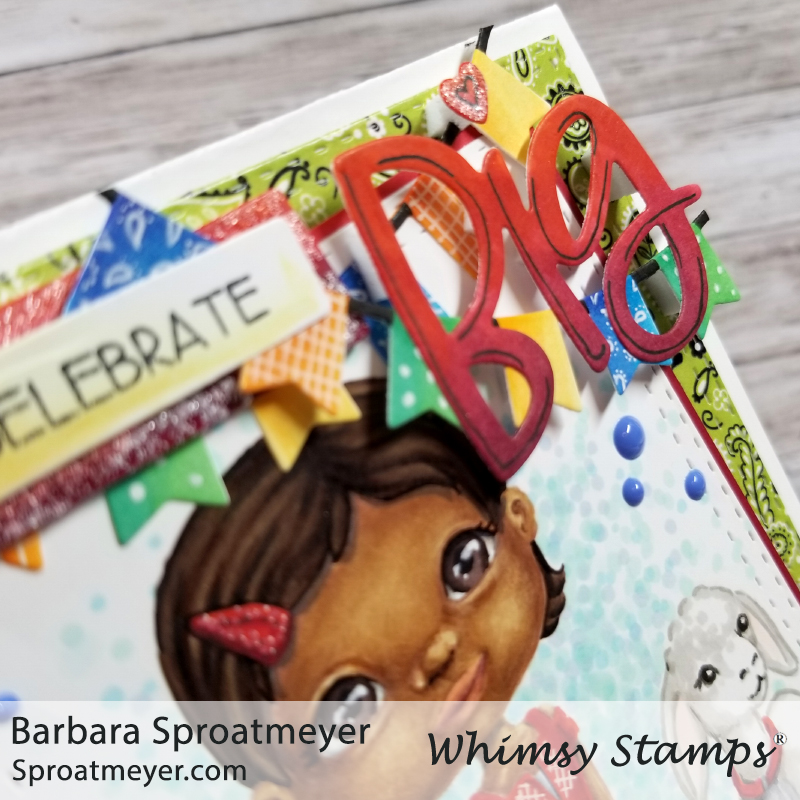
I set out to create a non-holiday green and red card but this is what I ended up with with – a little more than just green and red! But it’s very cheery and great for a birthday card. I used Polka Dot Pals Louisa as the main focal point with a face selected from Polka Dot Pals Faces set. Since she was sitting, I needed to find something for her to sit on and that’s how the rest of this scene came about… Polka Dot Pals Nour had the milk jug and goat to add. So in searching the the rest of my Pals, I found Polka Dot Pals Brianna with the lamb.
Polka Dot Pals Louisa and the accessories were stamped in a no-lines coloring ink. This is great that I don’t have to mask any of my stamps but sometimes it’s difficult to see unless I have great lighting. Because I had a lot of accessories and a larger scene, I decided to keep the background simple and put more time into the creation of the card. To assemble the card, I used a whole bunch of dies. Oh yea! The green Bandana decorative paper and main scene was cut using the Wonky Stitched Rectangles dies. The BIG word comes from the Big Words die set. The CELEBRATE and YOU’RE TOTALLY AMAZING sentiment came from the Simple Sentiment Strips set and Simple Sentiment Strips coordinating dies. I can tell that’s going to be a fun combination to use! Lastly, I was able to color up and add a few of the Slimline Bunting Border (I cut them in white then colored them with my markers and white gel pen).