Bliss

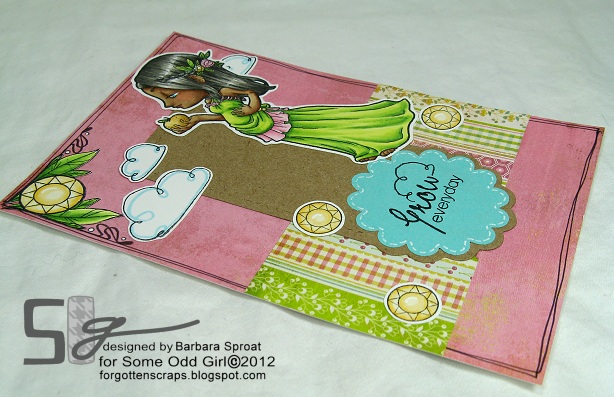
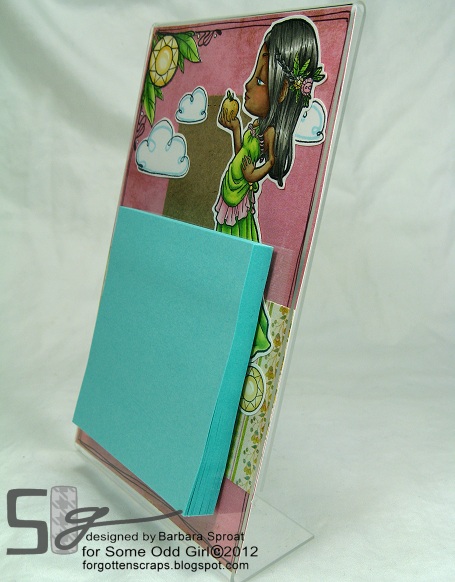
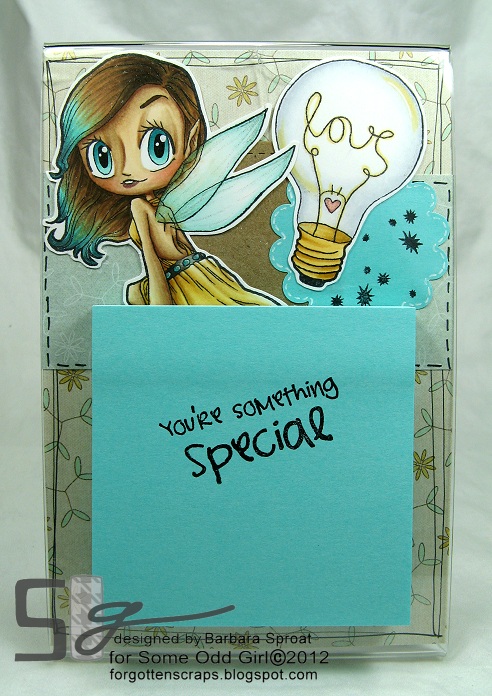
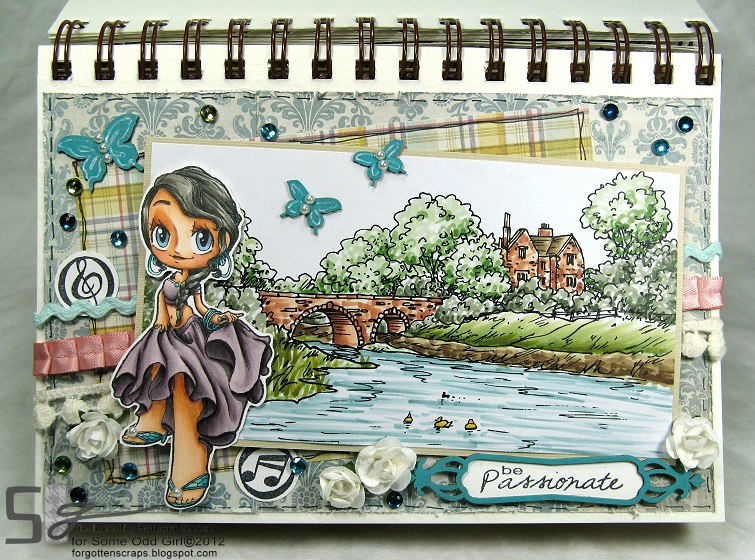
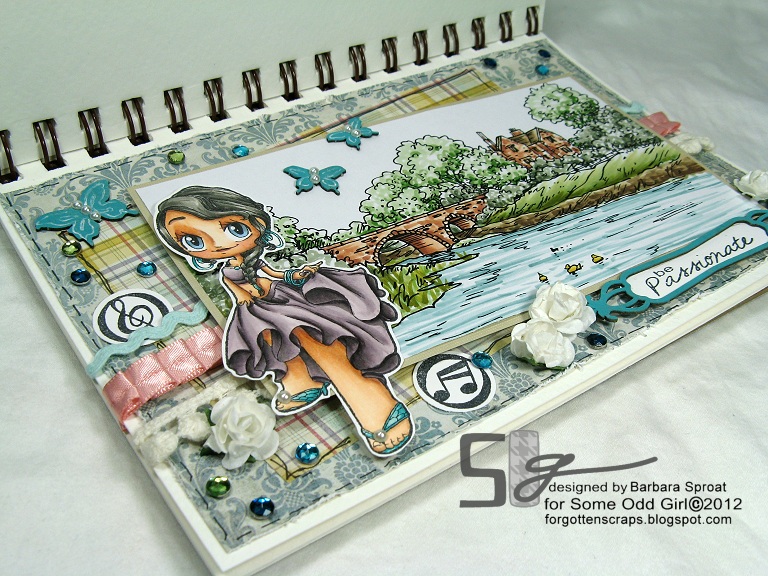
It’s another challenge at Some Odd Girl and the theme for March is a sketch! Be sure to head on over to the SOG Challenge blog to see the sketch and all the other fabulous inspiration from the design team. Here’s my project for the challenge…


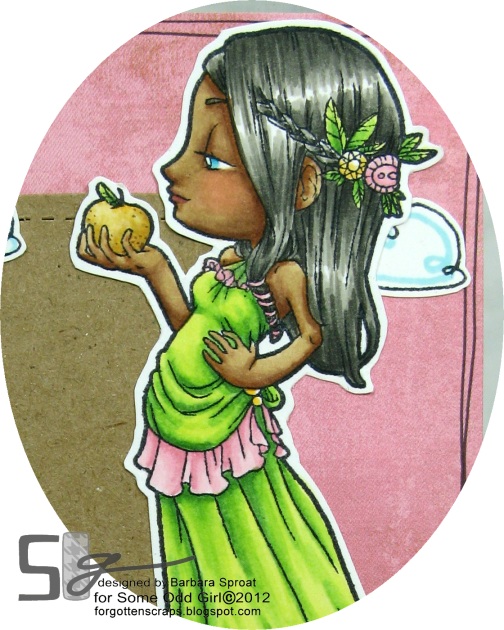
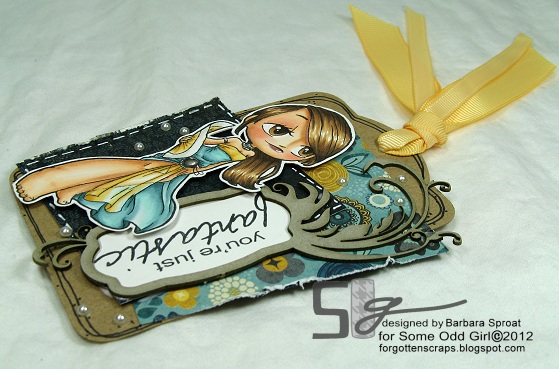
I used Bliss for the image from Some Odd Girls, one of the Nouveau Girls. The sentiment stamp is from Whimsy and the frame around it is a chippie accent from Make it Crafty. I’ve taken this sketch and turned it upside down then enlarged the center portion which is represented by the black gate. The gate was cut in Tim Holtz Grungeboard on the Cricut cutter and is from the Ornamental Iron 2 cartridge.


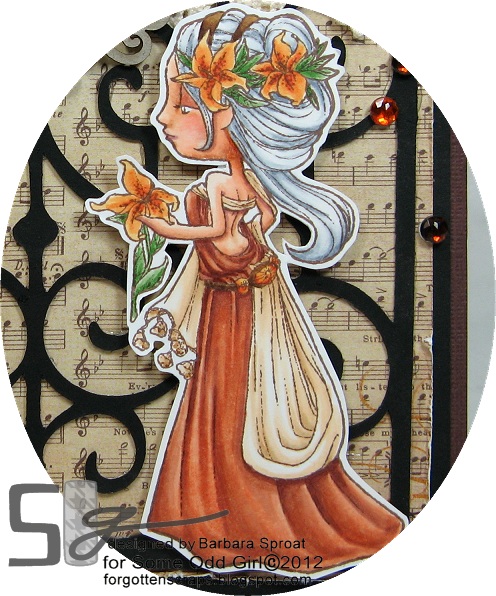
I colored her in autumn colors for two reasons… one, I’ve only seen her colored in spring or bright colors so it was a fun experiment; and two, the current challenge at Make it Colourful is autumn colors so I grabbed that for my inspriation. For a final touch I “sprinkled” some brown and orange gems on two of the corners.

Hope youve enjoyed this project for today and thanks for stoppig by! 😀

Grow

Surprise… two posts today!! Don’t miss out on my Halloween project HERE, or scroll down, then check out this fabulous teacher project. 😀 You might have remembered this project from before but it’s slightly different and features another cute Nouveau Girl! I made this project for an inspiration post over on the Some Odd Girls blog. Come on over to take a look and I hope you like it!


For this project I used Grow from where?.. you know where, from Some Odd Girl, of course! 😀 I love that it comes with the extra images and sentiments which I used all over.


I thought this image was perfect because of the apples but I sometimes wonder if teachers get tired of apples. LOL But I colored it yellow, maybe a Golden Delicious, to not make it so obvious. The papers I used is from last year and it always feels good to use up the old stash – at least it justifies buying more!


The frame is a simple plastic picture frame from Walmart and about the size of 4×6″. This project fits nicely inside and then I placed a 3×3″ sticky pad on the front plastic side. Then when all the sticky notes are gone, it reveals the hidden message “Grow Everyday.”


Here’s what the frame looks like on the side and as you can see would sit nicely on a desk. They’re super easy to make and I think I’ll do it again for Christmas too! Thanks for coming back! 😀

Fan

It’s the final day of previews for the new Nouveau Girl clear stamp releases at Some Odd Girl! Today we have our third beaut named Fan, and of course, she comes with her own sentiment and accessory stamp! All three of these NG are already available to head on over to the SOG store and get your fix. 😀 Plus don’t for get to check out the Some Odd Girl blog for a chance at some prizes!


For my project I did a quick tag using Fan, and the included sentiment, from Some Odd Girl. I also took advantage of the Notables 1 die from Whimsy and paired it up with the coordinating N1 Fancy Feather chipboard frame from Make it Crafty – they’ve been such a fun accessory to use and a new way to include a sentiment!


The papers have been distressed and I added some faux stitching and pearls to brighten them up a bit. Tags are so much fun to make and really come together quickly! It allows me plenty of time to spend on the coloring and even less stress. Why less stress you say?! Well, I don’t think I can fit another card into my many boxes of cards without pulling a blood vessel. LOL At least this way I can start a whole new box and feel good about it. He he he

Since I have so many tags… I thought I would finally add a new category to the list… Bookmarks ‘n Tags! Now you can click on that and get some ideas – they’re even great ideas for ATC.

Wishes

Welcome back! It’s day two of the Nouveau Girl release!! Today we are back with another beauty and this time she’s mysterious and dainty – Wishes! The adorable fairy comes with two sentiments and a small star burst stamp – perfect for celebrations, scrapbooks and more! For added sparkle to my fairy, I added glitter pen details all over including her hair, wings and the light bulb. Come check out the Some Odd Girl blog for more inspiration and a chance to win a prize!


On my project I used Wishes and also Electric Love, both are clear stamps from Some Odd Girl. The paper I used is Darling Dear by My Minds Eye and also what I grabbed the color combination from. There is a little bit of kraft paper and I even used some of the sticky notepad paper to carry the color theme around. And because my handwriting sucks, I used a sentiment stamp from The Greeting Farm as a message to the teacher.


Do you notice anything about my coloring? This is one of the great benefits with using real rubber stamps versus a digi!! I can choose the type of paper I used and of course I’m going to grab something that I can blend and blend and blend on! LOL So I get smother colors and shadows and better blending. So… can you tell a difference or am I just enjoying it more?!


This was actually suppose to be a Valentine project for one of my daughter’s teachers… however I’m a big late on that. So I changed the theme to everyday and got to use some of the new paper I found last weekend. The idea was from my sister – who is also a teach and a great source for teacher gift ideas! It’s just a simple picture frame from Walmart with a sticky pad on the front. (See that store is good for something! LOL) When they run out of paper they can simply stick another Post-it pad and start all over.


Here’s what the project looks like before it was put in the plastic frame. I included one of the sentiments that came with the stamp as a little surprise at the end of the paper. 😀 It was super easy to make and a lot of fun too – now I just have to make at least one more!

Dancer

Are you ready for some more new releases? Today I get to show off one of the newest Nouveau Girls from Some Odd Girl!! To start with, we’re showing off Dancer! This divine girl will be available in Clear Rubber stamp and she was a beaut to color – so much fun!

(This is my second post for today so you can scroll down or click HERE for my first.)


My project uses Dancer by Some Odd Girl and in the background is Bridge Scene by Just Inklined. I used papers from My Minds Eye and grabbed the color scheme from it. I was even able to use a few colors that were burried at the bottom of the stash. LOL For her dress, I used RV91, RV93, RV95, RV99 with a little N2 and N4 for shading.


I colored the background quickly to give a nice contrast between the two images. I was hoping for a watercolored look but not sure if it worked out or not. Even a distressed ink look would have been a good aim but I still have some practice to do. LOL Either way, I like the contrast between the well blended Dancer and background.


On the journal page I also used some accessory stamps that come with the Dancer. The two circle music note symbols and the sentiment made nice embellishments. The sentiment was stamped then cut out using the Notable 2 die from Whimsy then placed behind the N2 Simple Frame chippie from Make it Crafty.


Thanks for stopping by again today and don’t forget to head on over to the Some Odd Girl blog for more inspiration and even prizes to be won!

I’d like to enter this into the following challenges:

Always Crafting Challenge #2 – Anything Goes
Stamps R Us Challenge – Anything Goes
Art with no Boundaries Challenge – Let the Dancer in you Escape

Update: I was an honorable mention at Art With No Boundaries for this challenge!

Believe

Are you ready to get your socks knocked off? No, I’m not bragging about my project – but I have some exciting news to share!! I’m now officially an odd girl! I’ve been asked to join the Some Odd Girls Nouveau Design Team and I’m so excited! You can visit their blog to read about the other girls on the team but first, take a look at my project…


I used Believe from Some Odd Girls and paired her with the Timber Top Ridge from Make it Crafty. Also, all thee orange and red flowers are accessory stamps that come with the Believe stamp – they made a perfect embellishment. ;D Check out how gorgeous she is colored up…


This is another project I did where I experimented with the reds. Over at Make it Colourful the challenge is to use different colors to blend in with your reds. Earlier today I showed what red would look like with turquoise (click HERE to see) but on this I used RV91, RV 93 and RV95 as the base tone.


After I colored her dress with the RV tones, I went back in and recolored on top of that with the reds. I think I used R11, R21, R14, R24, R37, R46 and R59. It has more of a pinkish highlight to it like the light is reflecting at a different angle off of the fabric. Other than that, I didn’t noticed much of a change… maybe it’s more deep in tone? Not sure, but it was good to experiment.


Hope you’ve enjoyed this journal page and you’ll be seeing the rest of the Nouveau Girls featured through out this month. ;D Have a great Thursday!

I’d like to enter this into the following challenge:

Flutter By Wednesday Challenge #188 – Open (plus butterflies)