Fluffy Reindeer Tail Levi

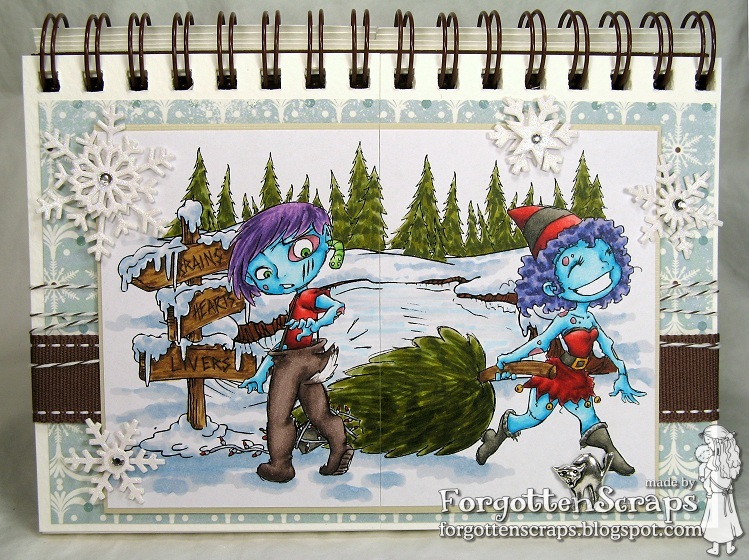
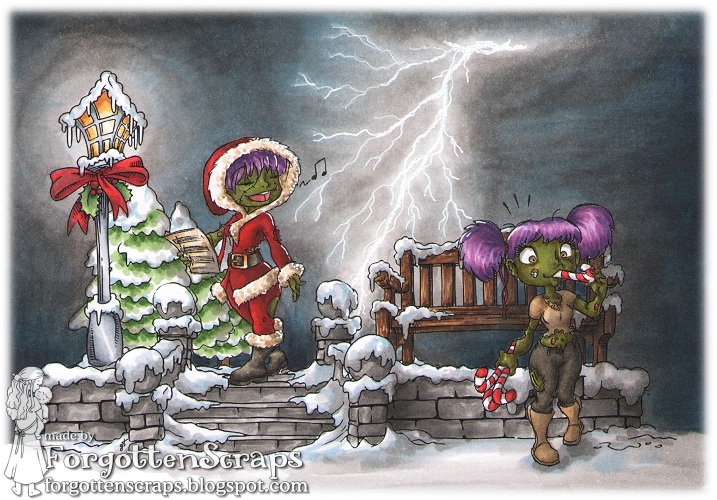
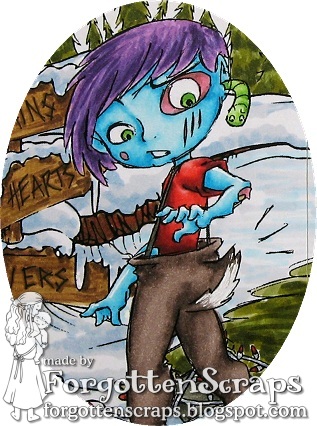
Your waiting has paid off and today I’m showing off the other half of my last journal page for the Sketchy Zombie release! Make sure you check out all the other inspiration from the DT over at the Simply Betty Stamps Challenge blog. Today we’re showing off Fluffy Reindeer Tail Levi and his cute little worm crawling living in his head. LOL


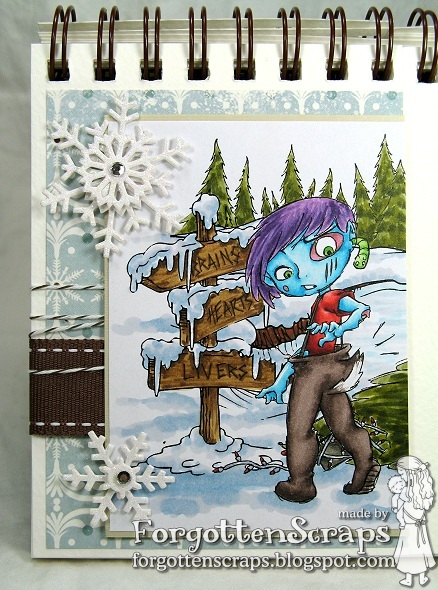
The background is from Make it Crafty and come from two combination packages… Winter Scene Elements and the sign is from Winter Elements. On a side note… doesn’t that sign have a technical term for it? You know… the “where is everything” kind of sign? I’m sure it does but I haven’t a clue! Santa is looking out for these buddies as it’s customized just for them… Brains, Hearts and Livers! LOL (An idea from the SBS DT. :D)


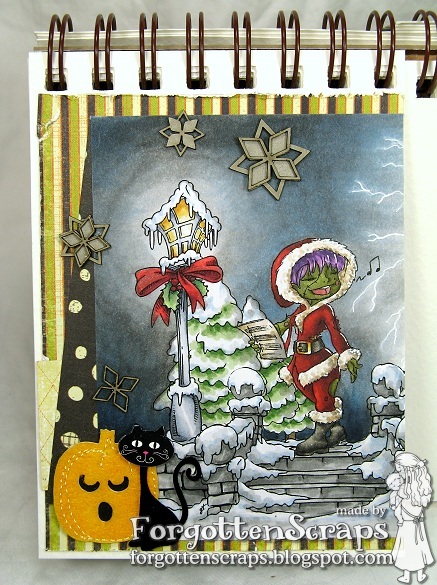
Here’s the whole page with the backing taped together. I love how the colors turned out and have the SBS DT to thank for their Zombie inspiration – they’ll have me converted over in no time! He he he. The snowflakes are stickers and left over from last year but I like how they add the final touch to this project. Hope you like it and thank you everyone for all your wonderful comments recently too! *Hugs

Rudolph Head Caleb

We’re on a roll – day six of eight of the Sketchy Zombies from Simply Betty Stamps! Today is all about Rudolph Head Caleb on the other half of the Christmas-Halloween melded journal page. ;D

The background is the other half of Mistletoe Archway with an added tree from the Winter Objects, both from Make it Crafty. There is even a skull stamp on the side I used from Inkadinkado! Here’s the full project with both sides taped together. It would have been fun to use the same background for all the pages and then I could flip to mix and match! Well… that’s why they say hindsight is 20/20!


Here’s a close up of Caleb with is blue hair (which I like better than the pink hair in the winter scene). In the background you can see the tree which was super easy to color – just dot YG61, YG63 and YG67 for the green and the shadow on the snow was done with B91 and C1. (Or it could have been C3.)


I also scanned this before cutting it apart – sometimes it helps me to look at it from a different perspective plus it’s also fun to look at it without all the embellishments. Hope you like it and be sure to come back tomorrow for the second half of yesterday’s project! 😀

Jinglin’ Jessie

Welcome back! Today we’re showing off Jinglin’ Jessie – another Sketchy Zombies from Simply Betty Stamps! This time I took the initiative from my teamies and colored her as a frozen zombie and I love the blue much better than the green or purple that I’ve been coloring.


The background images are part of the Winter Scene Elements from Make it Crafty. The other half of this project will be shown in two days. ;D Yep, I’m making you wait. LOL Make sure you head on over to the SBS blog and check out the other samples!

Peppermint Brooke

Whohoo – it’s the third day of previews for the Sketchy Zombies and I’m excited to show you the other half of one of my journal pages! LOL I had them all printed out before I realized what the order of previews was but at that point didn’t want to change it. He he he… So today we’re showing off Pepermint Brooke from Simply Betty Stamps!


Now you get to finally see the whole project with both half pages together! The image was colored as a whole when as I assembled it I cut each of the layers in half. For the picture I taped it on the back so it would be aligned. ;D


On this side of the project, I used ribbon, charms and more chippies (Mix ‘n Match Centres) from Make it Crafty. The background image is the same – Winter Park from Make it Crafty and this side you can see the bench. Here’s a close up of Peppermint Brooke. It would be funny if she was sucking on a segmented arm or bone … but then she wouldn’t be as cute. LOL


To get a better look at the lightning bolt, I scanned the image in before I cut and covered some of it. To read about how it was done then click HERE for the Falalala Lexi post. As you can see with the larger image I had problems with blending this time around and better paper would have solved that. Unfortunatly, I layered down the darks too fast and wasn’t able to smooth them out. None the less, it still turned out better than I expected.

Holly Jolly Ginger

It’s is the second day of Sketchy Zombie previews from Simply Betty Stamps and today we’re showing off Holly Jolly Ginger! I’ve done another half journal page and the background I used this time from Make it Crafty is Mistletoe Archway and with some more Mix ‘n Match Centres chippies. Again I went with the melding of Halloween and Christmas themes but I’m not sure how this one turned out.


The small bottle of potion is an accessory stamp from Kraftin’ Kimmie. If you’re curious, the background was colored with YG91, 92, 93, 95, N2 and N3. Then the moon was colored with E50, E51 and E53. This was a fun zombie to color and she can even be made into a cute Christmas sweetie too. Of course, the other half of the project will be shown in a couple of days. ;D

Falalala Lexi

I’m so excited to say that I’m the new DT member for Simply Betty Stamps! Whohoo! So I guess you could say my guest term was super short! he he he. To kick start the celebration right, I’m joining in on the Sketchy Zombie releases and today we’re showcasing Falalala Lexi!


Of course with a Christmas release I had to combine it with some winter scenes so I used Winter Park from Make it Crafty as the background; as well as a few snowflake chippies too (Mix ‘n Match Centres). ;D Finally, I used non traditional colors and even a few left over Halloween embellishments to finish up the project.


As you may have noticed I created a journal page, but you’re only seeing half of it! The other half will wait a few more days but I wanted to show the lightning bolt in detail. As part of a super-super difficult challenge this month, Make it Colourful is challenging you color storms with lightning bolts. Since I wanted the Zombie Christmas theme to be dark in nature I thought, sure, why not! LOL


I first colored the lightning bolt with a gel pen so I could see where it was. Then I started building up the colors around using the Neutral grays – keeping it darker around the outside and lighter the closer I got to a white line. I also added some B91, B93 and B95 once I had the gray tones laid down. Finally I went back over the white lines with the gel pen again to brighten them up.

Hope you liked the first day and make sure you come back for another six days of more previews with Simply Betty Stamps!! 😀