Fireplace Background

For a while, I’ve wanted to color this image and really make the fire glow.  I didn’t know how to do it, so honestly, it’s been sitting on my desk for over a year.  This year I finally decided to take the plunge and get into it – for better or for worse.   So this is what I worked on during Christmas while the kids were busy playing with their new toys.  I must say, I’m rather pleased at how it turned out.  Can I say that?  He he he

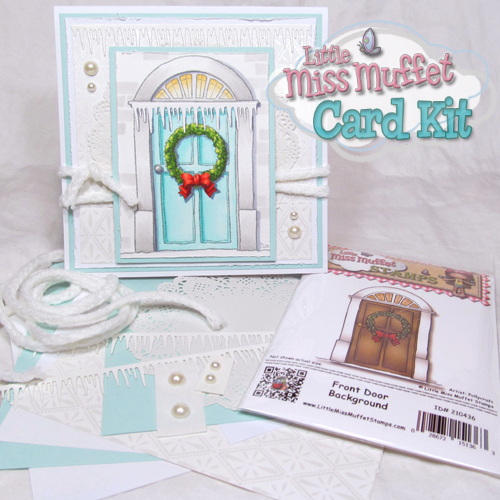
The stamp is Fireplace Background from Little Miss Muffet Stamps and the Icicles border metal die available at Little Miss Muffet Stamps.  For the fire, these are the Copic colors that I used …

Y00, 11, 32, YR12, 24

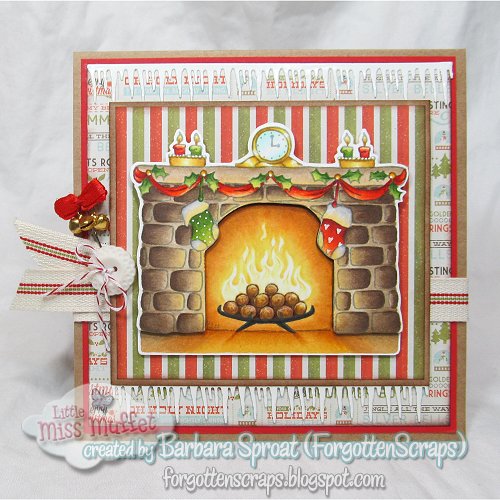
I started with Y00 and outlined the fireplace.  I thought I should leave that area white and not do anything with it.  Then from the outside going in, I colored from the darkest to the lightest and making sure it was blended.  When that was finished, the fire looked too white but I worked on the rest of the image before deciding what to do. 

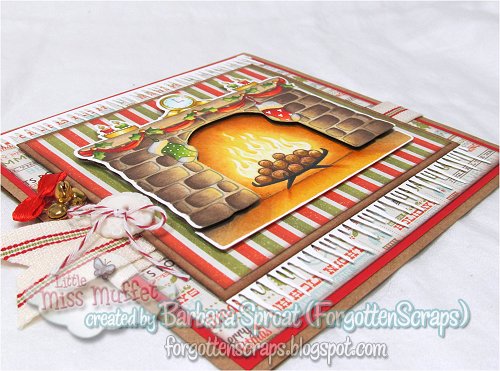
As you can see, the fireplace is on a separate paper and raised from the fire.  This was so that I could add dimension but mainly because when I was working with the fire, it was easier to not have to worry about the staying within the line.  LOL. 

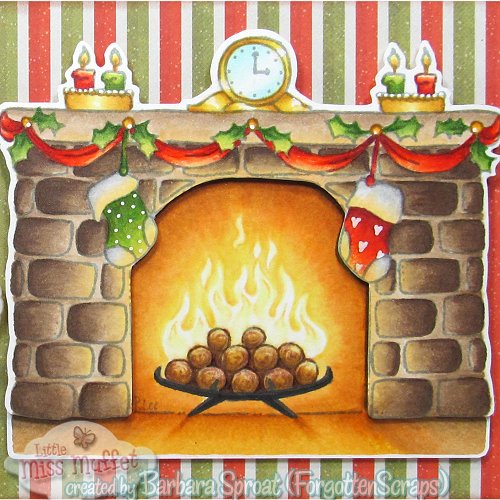
Once everything was complete, I realized the white of the fire really was too bright and needed something.  So I went in with Y00 and just a tad of Y32 to create some flames within the flames.  I added a bit too much color, in my opinion, so I used the blender marker just above the logs to remove some of the color.  That actually worked in my favor and I like the way it turned out.  What do you think? 

Forest Friends Orlando

It’s Christmas Eve and I’m so excited for tomorrow.  I love watching the kids and their excitement – it rubs off on me.  Squeal!  Today is also a quick release from Little Miss Muffet Stamps.  I have released all the Forest Friends in digital format and they are each adorned with something seasonal.  And the best part?  They are all listed at $1.00.  Oh yeah! 

This card is using Forest Friends Orlando rubber stamp.  I colored him while I was out camping one weekend with my Polychromos pencils.  Since I have two sets of pencils, I think I’ll be leaving those with my camping gear.  Hopefully that will give me more opportunities to color.  That would be sweet! 

Dexter Ice Cream

Little Miss Muffet Stamps is sponsoring the challenge today at Cards und More and I thought I’d join along with a project of my own.  The theme is “Christmas” and I wanted to share a tag I created using the Cutters Baggie and Tag die.   
Here’s my latest project using Dexter Ice Cream from Little Miss Muffet Stamps.  Dexter was colored with my Marvy Le Plume markers.  I had actually colored Dexter long before but went over a couple areas so I could use it on this project.  The ice cream and hat were more of a pink but I wanted a red.  This is one of those times that the alcohol markers come in handy.  I grabbed a red Copic marker that I liked and lightly colored over those areas until it turned red.  Simple! 
 

Front Door Background

Here is the latest Card Kit that I’ve created.  It uses the Front Door Background rubber stamp from Little Miss Muffet Stamps which is also the rubber stamp this is included in the kit.  I’ve been meaning to create a mostly white card for a while and I was inspired by the recent cold weather. 

Layering the card is pretty straight forward and you can create a card as large as 6×6″.  I usually create square cards that are slightly smaller, around 5.75″ x 5.75″, so I can place them in the envelopes.  However, with the supplies included, you can create a size that suits you. Each layer is 1/4″ smaller than the previous layer. 

I colored the door with light colors because I wanted the wreath to stand out. I have the colors I used somewhere on my desk so when I find them, I’ll update this section.  😀

Update: I found the Copic colors I used!  
BG000, 53, B00
YR23, 20
T0, 2
BV20, 23
YG21, 25, 28, 67
R5, 12, 17, 29, 89

This is a limited quantity card kit so grab it while you can!  

Clover Winter Friends Card Kit

Here’s a project that is a little different from what I normally do which made it all that more fun.  I’ll explain a little more below.  This is also a card kit, Clover Winter Friends Card Kit, for one lucky person since there is only one kit left.

The stamp is Clover Winter Friends from Little Miss Muffet Stamps. My goal was to eliminate all the white space around the stamped image.  I could do this by coloring around the image or by fussy cutting … I chose the fussy cutting and then decided to do something fun with her wings too. 

I also want to mention the new challenge that opened up today.
 – it’s Anything Goes so come show off a project this week.  😀

You can see how I layered and assembled the card.  I used foam dots to pop up the top layer and also the image itself.  The diecut is Birds on a Wire Metal Die, also from Little Miss Muffet Stamps.

I cut out the image and even clipped off her wings.  I usually don’t use a black marker to go around the cut edge but this time I did.  Since I wasn’t going to have the white base, I wanted to make sure the thickens of the paper didn’t stand out.  Check out below how I did the wings, which were placed on the card before I added Clover.

I stamped the wings twice on clear plastic and cut them out so I could layer them. This allowed me to use the ground plus a white gel pen for snow and to keep it separate from the image.  The wings were covered with Stickles glitter and I bent them a little at the base so they stood out from the card.  However, before I layered them on the card I also stamped the image, in black, on the decorative paper.  This helped to position the image too.  

I stamped the image I colored in gray and the one on the base in black.  You can use any sentiment that will fit the chipboard embellishment, which is from the Happy Days Tab Sentiment set from Make it Crafty.  You can see I doodled around the chippie too. 
Here are the Copic colors I used:
E0000, 27, 30, 31, 34, 35, R11
C2, 3, 4, 6, 7
RV000, 11, 19, 34
BG0000, 32, 34, 75
YR18, 23, 30, Y32
BV23

Fancy Sunbonnet Flag

This may not fit the theme but this is my Thanksgiving card this year.  Say what?  LOL.  I know, I know what you are thinking but it but it really is.  Last Thanksgiving, I was involved in a German project with my sister.  So this card is to give thanks for the great time we had together! 

This is Fancy Sunbonnet Flag from Little Miss Muffet Stamps and I colored the flag to look like the German flag.  I hope one day I can speak Germany fluently.  However, until then, I’ll have to settle for telling you my name, favorite color and what the weather is like. 

Hope you have a great Thanksgiving week!