Joyful Tilda

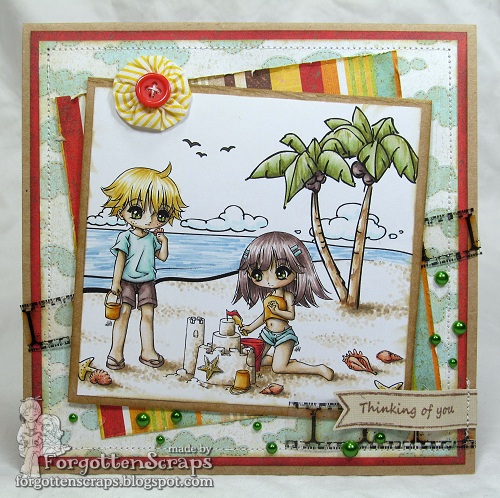
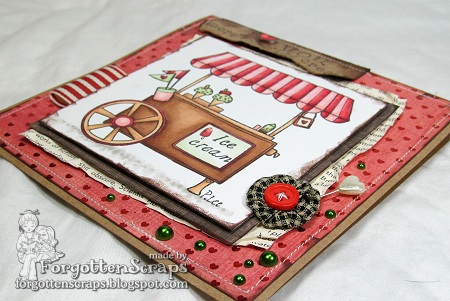
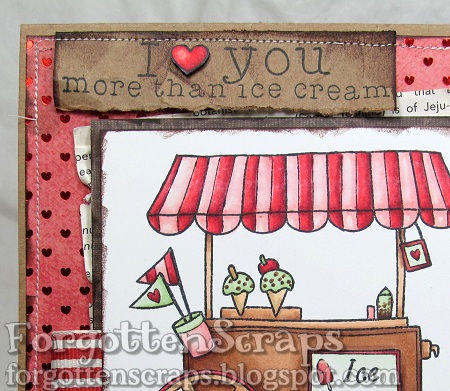
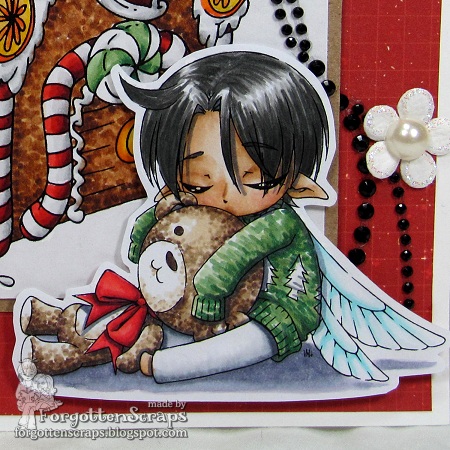
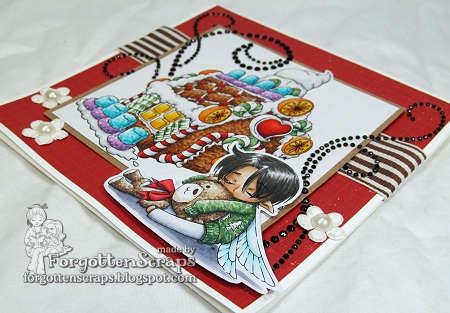
I had a little fun the other day and actually selected an image from my forgotten collection of stamps.  Ooooh, it felt good thumbing through all those image and it was hard to choose!  But I settled on this cute Magnolia image from the Christmas Story collection which was also perfect for a Valentine theme.  Check it out…

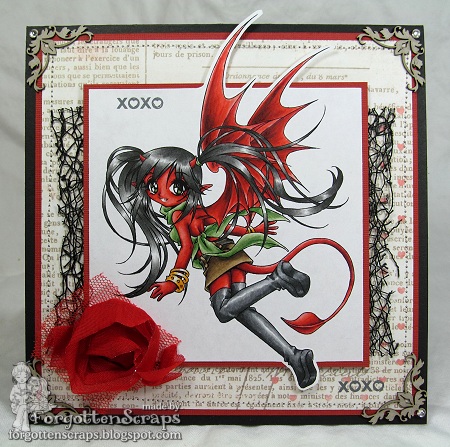
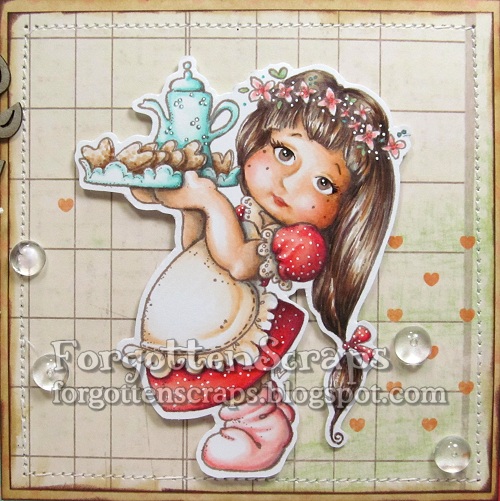
Did you notice anything different by chance??  LOL  I’m sure you did!  This is Joyful Tilda from Magnolia and I’ve shading in a face with details using my Copic markers.  I’ve colored others with faces (just click on the Magnolia tag and you’ll seen them) however, I think this one is my favorite by far! 

I stamped the image in brown so it was easy to use her existing eyes as the color of her new eyes.  Plus I think I like how the brown stamping turned out so I’ll certainly be using it more and more.  As long as I’m not using black to color parts of the image with then the brown blends in more giving the image a softer look. 

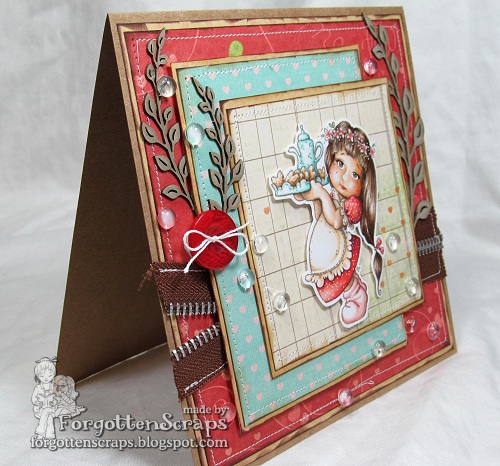
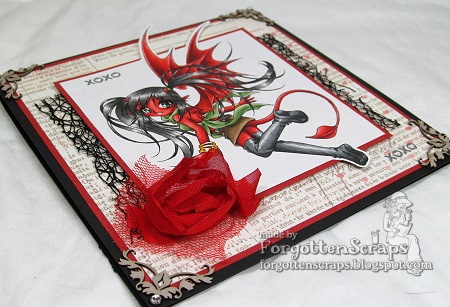
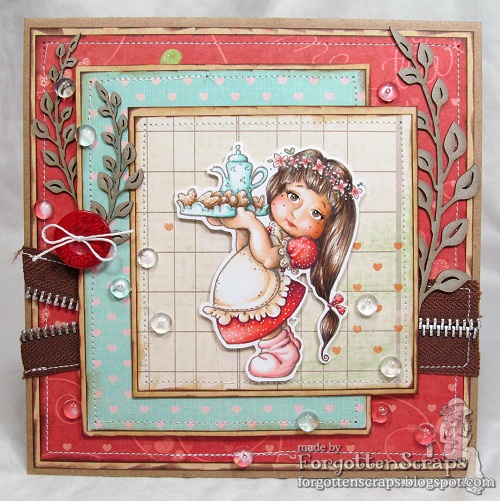
My colors were inspired by the zipper I bought over the weekend and I had to come home straight away and use it on a card!  I even used my sewing maching to stitch it down and add more elements to it.  Too bad most of it is colored up but it stll counts as being used.  ;D  Now I just need to find my missing needle (the one the kids got to) so I can use my sewing maching again.  LOL

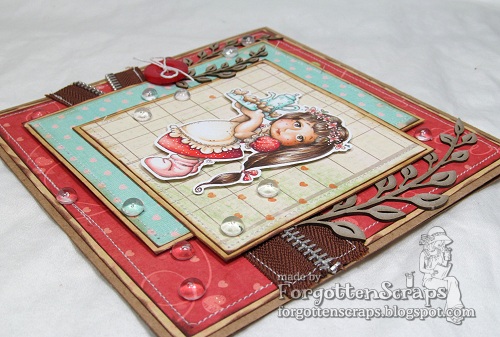
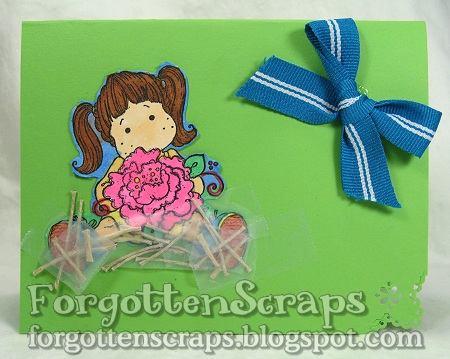
But wait, there’s more!!  For those who are joined in the Magnolia-religion, I also have a “pure” Maggie to share.  😀  This is Tilda with Peony Tails that my daughter colored up.  I think she did this card back when I was doing the Backyardigans Magnolia set.  Shhh… just don’t tell her it took this long to post it.  (o.o)

Thanks for coming by today and whether or not your a Magnolia purist or not, hopefully there was something here today to spark your creativity.  ;D  Have a great week!

Dylan & Ebony at the Beach

It’s a new challenge at Make it Crafty and this week’s (or I guess 2-weeks’) theme is “Sunshine, Beach and BBQ” with an optional color challenge of “Water.”   It’s perfect for those who are in the southern hemisphere and also for those of us up north who are wishing for some warmer weather!  I didn’t take the water challenge but my scene screams “Sunshine and Beach!!”  Make sure you visit the MiC Blog this week and see everyone’s projects.  😀

The papers I used were inspired by a gift package from Ruby which was perfect to get my creative juices going.  The image I had merged and if you look closely I’m sure you’ll spot a little mistake where something wasn’t masked properly – however don’t look or it will stand out like a sore thumb!  LOL  I also used the yo-yo embellishment for a sun which Arabella sent me.  (Thanks ladies for the goodies!)

After the coloring was finished then I assembled the card and even used my sewing machine.  I love that little thing and have used it on almost all my projects lately.  It’s a great way to finish off the edges plus I don’t have to use as much glue which warps the paper a little.  And the film strip?  I love that but can’t wait to use it all up!  It just so happens to be my daughter’s favorite thing to play with and I often find her running around the house with it trailing after her.  He he he

I used several images on this scene from Make it Crafty including the adorable little sentiment banner.

Make it Crafty Images:
Thanks for coming by and checking out my project.  I hope you’ve enjoyed the inspiration and will join in on the challenge!  Adios!

Dark Fairy Brittany

How about some Halloween?  Or at least, some dark magic to counteract the sweet Valentines theme?  At least it’s purple so the color scheme works well with the season.  He he he.  This was actually an image I was able to color over the winter break and was finally able to get it onto a card.  When I first saw this one I knew I wanted to have glowing hands plus it gave me the challenge to work with the colors reflecting which was fun too.  Check it out…

This image is Dark Fairy Brittany from Simply B Stamps which is currently still available as a digi.  I love this Jude line style which has always inspired me to really get into my the coloring and this one was no exception.  I first started by coloring the whole image, keeping in mind that there was two light sources – one from the upper corner and the other would be from her hands. The shadows are probably all over the place as I experimented with the idea.

Once the image was colored then I worked on the glow in her hands.  I started with the darker YG colors and worked my way out to the lighter colors.  The glow around the hands was done first then I added the reflection on the wings, shoes, face and clothes.  Finally as an added touch, I grabbed the white gel pen and added a few more details.

I really wanted the green to stand out as much as possible so I stayed away from those colors when putting my card together.  It’s not as bright as I had originally wanted but the over all effect and final result turned out better than I had thought.  Funny how that works!  LOL

I’d like to submit this into the following challenge:

Ice Cream Cart

I’m so excited to announce the latest release from Little Miss Muffet Stamps and this one you are bound to love!!  It’s the Valentines Release!!  Of course, pink and brown are my favorite colors so making cards for Valentines is extra double fun and this card is no exceptions.  AND ice cream?  I love ice cream!  Make sure you head on over to LMMS too and check out all the New Releases!

For this project I used the Swings ‘n Slides Ice Cream Cart plus the Swings ‘n Slides Sweet Sentiments rubber stamps from Little Miss Muffet Stamps.  Then I colored it with my favorite colors and added some mint green to color the Mint Chocolate Chip ice cream with.  Yummy! 

Then I started putting together the card – notice the sewing?  Yep, I still have my sewing machine out on the table!  😀  Then I added some embellishments from friends such as the green pearls from Ruby and the flower from Arabella – thanks sweeties!  Next I wanted to use the sentiment from this release so I stamped it on kraft cardstock and this is what I came up with …

The heart was stamped on white paper then cut and popped up on the sentiment tag which added a fun element.  As for the sentiment… well, I have to save these kinds of cards for really special people because I dooo love my ice cream!  LOL   So it makes for a perfect Valentine card from me. 

I hope you’ve enjoyed this card and make sure you check out all the other new rubber stamps at Little Miss Muffet Stamps – you’ll *love them more than ice cream!*  😀

Sweet Devilina

Who says cupid has to be a cute little chubby babe?  Not me, that’s for sure!  Of course this was originally going to be a Halloween card but after making some Valentine cards, with all the red and pink paper scatter around, I decided a Valentine card would be awesome… plus it totally fits my style to “Void the Warranty!”  LOL

The image is Sweet Devilina from Make it Crafty and one that I’ve had colored for ages!  She finally gets to be showcased on this Valentine card and I included a few chippie embellishments on the corner too.  The sentiments are rub-ons from Stampin’ Up and I think the papers are from K&Company (I think).

Do you see the stitching on the card?  I’m totally in love with my sewing machine again and have managed to leave it out for a whole week and have sewn on many cards!  I think I might have to re-organize my room to find a permanent spot … anyone want to come over and help?  😀

Fairy Bear

Get ready… It’s going to be crazy here at ForgottenScraps as I switch from one season to the next and from one holiday to the next!  I just finished four Halloween cards this past week and I still have a couple Christmas cards that are saved as drafts to share… but it continues on!  Valentine cards are coming out hot off my desk and I’m starting a summer card this week with a beach and everything.  LOL  But I’m sure you’ll love it all.  ;D

You might recognize the image on this card as I had shared it about a month ago.   And in keeping up with my New Year resolution, I’ve made a card with it but also had to color up a  new image to go with it.  These are Fairy Bear and Gingerbread Candy House from Make it Crafty. 

I used the same type of texture on the teddy bear as I did from the gingerbread house.  Then I thought it would be perfect on the sweater too but instead of dots I used short dash marks.  I thought it would be just as easy but I had a hard time remembering to make the dashes parallel and also “with” the grain of the fabric.  Luckily I started with the lighter colors and went darker so my mistakes were hidden.  😀

Oh… and I’m excited to say I now only have four Make it Crafty images to do something with and then I’ll be all caught up!!  After that I can count the multitude of Little Miss Muffet images I have colored and will start working on making projects for those too.  I might fall off my chair when I count, however, so I’ll save it for a weekend – it will give me plenty of opportunity to recoup.  LOL