SS Ring Out Those Bells

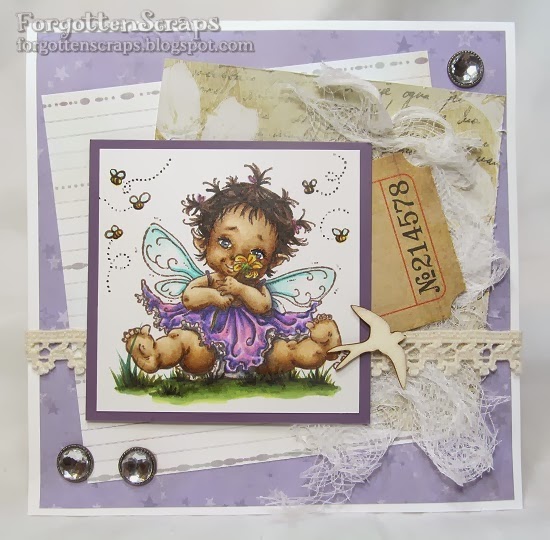
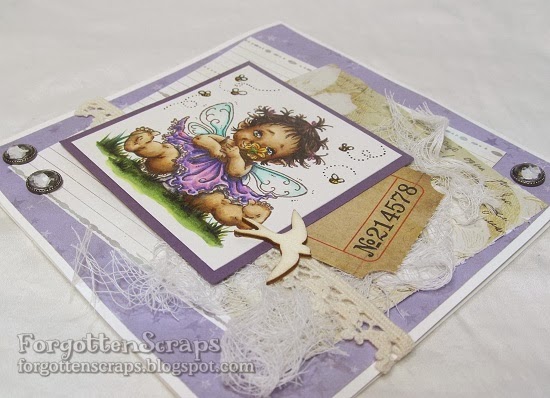
Do you think it’s too early for some Holiday Cheer?  Ok, so I won’t jump into a song and dance but I’ll at least show some winter inspiration using a Christmas stamp.  This is Swings ‘n Slides Ring Out Those Bells stamp drawn by Pollycraft and available at Little Miss Muffet Stamps.  I used the rubber stamp version and some scrap papers to create this card…

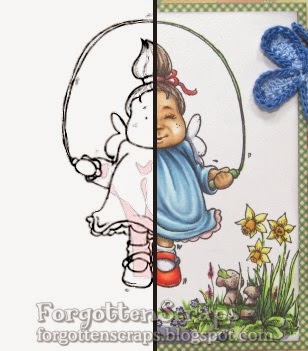
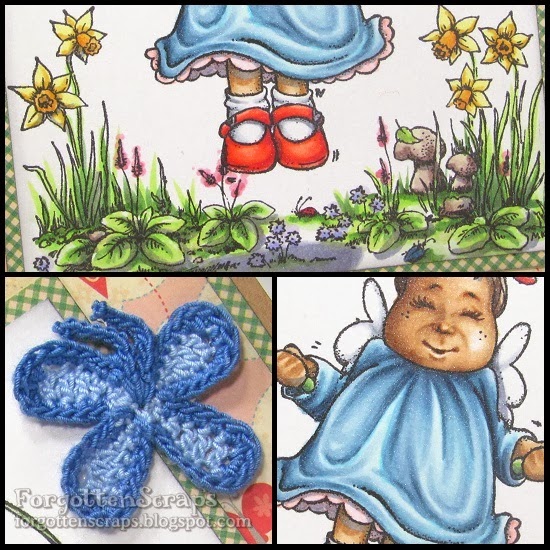
The colors are brown and blue because I wanted it to be on the boyish side to match the image.  But then I used lace and pastels for the card and hoped that it looked more like the icy cold outside would look like.  Here are some close ups of the coloring…

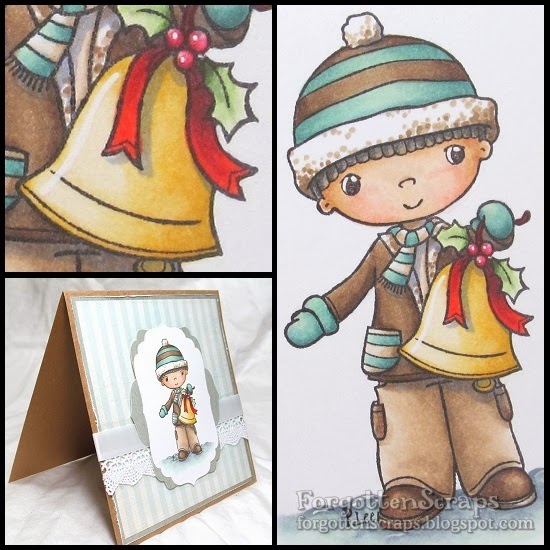
I also used a little bit of the white gel pen to create highlights on the bell and berries.   It’s not cold outside but I hope this has warmed your hearts a little bit anyway.  😀

Baby Fairy Flora

I had such a wonderful time at the Texas Coloring Retreat that it’s easy for my new pals to convince me to organize another!  So start marking your calendars for next year and we’ll be having another.  😀  For the next two weeks I’m going to post all the things we colored and did at the activity and share the fun.  But first, I need to photo graph everything.  This isn’t one of them but it’s something along the same lines… faces!

This image is Baby Fairy Flora from Mo Manning which had a face but there were two lines that looked like the bottom parts of eyelids so I went with that idea.

Here’s the image before it was colored.  This is a rubber stamp that I have but I think it also comes in a revised digital form.

I think the eyes are a bit too far apart but she still looks cute, I think, and better with eyes.  I added a couple extra bees around the edges to fill out the white area.  I hope you like it and thanks for dropping by!  Have a great mid-week and come back soon, ya’ll hear!

Hopping Tilda

It’s warming up outside and I’m getting ready for some spring gardening!  I was tempted to do it last week but I thought I’d wait a little bit longer just to make sure a surprise freeze doesn’t kill the plants.  Anyway, I thought this would be a great card to share… it’s using Daffodil Del from Make it Crafty (and one of the rubber stamps that I’ve selected to stock in the Little Miss Muffet Stamps store too!)

The other image is Hopping Tilda (or Jumping Tilda?) from Magnolia.  You may not recognize it as a Magnolia stamp but with some ECP (Extreme Color Placement) on the face, I’ve been able to add a little more character and tried to go for a joyful expression.  Here’s a side-by-side of the stamp and the colored version:

I like using the Daffodil Del stamp because the flowers are on the side which make it perfect to place an image in the center.  It’s one of those background stamps that go so well together that it looks like one large scene stamp. Here are some close up and also a closer view of the dress (also colored with ECP).

Thanks for dropping by and I hope you’re having a great week!

Animal Cracker Circus Koala

Here’s a birthday card I had fun with!  The image is Animal Cracker Circus Koala from Imaginisce and the sentiment is from Inkadinkado.  I have created a few birthday cards with images from this series and this is my last one to show.  Circus animals area always fun to color because of the little bits of color added from the clothing. 

The card was created and kept flat so that I could easily mail this one.  The image was colored with the Le Plume Marvy markers which are still fun to use.  Hope you enjoy and have a fab-tabulous weekend!

Pot Plants and Wooden Stools

Sometimes I color an image and I just don’t like how the coloring turned out and this was one of those instances.  I thought the colors were ok and even some areas the texture was good… but I just had too much ink!  But I was prepared to continue on and proceeded to create a card.  Then one of those happy accidents happen occurred and what once was bleah is now oh’yeah!

Make it Crafty Images:

Check out the Make it Crafty blog for all sorts of inspiration!
Here’s the original side:

The scene was created using an image from Pot Plans and also Wooden Stools from Make it Crafty.  When I was applying the sticky tape to adhere it to my card, I saw how the back of it turned out and decided I liked it much better!

So this is actually the reverse side of the image I colored!  I went back in a few areas that didn’t have any color, but for the most part, I kept it as-is.  And it even looks like I went through the effort to color with no-lines.  Who knew?!

Blossom Tree and Candy Floss

Blossom Tree and Candy Floss?! What a combination but they work together when putting these two projects together.  I have used Blossom Tree from Make ti Crafty along with Candy Floss from Mo Manning (plus a few buttons of my own) to re-create these pencils.  I had a few logo pencils to use, you know, the unsightly ones with the business logo or moto on them?  Very boring and they needed some pizzas!

I printed my images out on regular printer paper and sized it to what I thought pencil would be, giving a little extra fudging room.  Then I colored it using Prismacolor pencils and cut it down to size so I could roll the new paper on the pencil.  On one side, I left a little extra white paper and that’s the part I glued down first on the pencil.  Then when that was dry, I added a little more glue to the paper and rolled the rest of it on the pencil using the table to make sure it was a tight roll.  Be careful with the glue too – you’ll want enough to glue all the paper to the pencil but not too much to make it messy.

Lastly, take care in sharpening them.  I found that if the paper is loose then it really tears it up at the bottom.  But if the paper is tightly attached to the pencil then an electric pencil sharpener worked well.