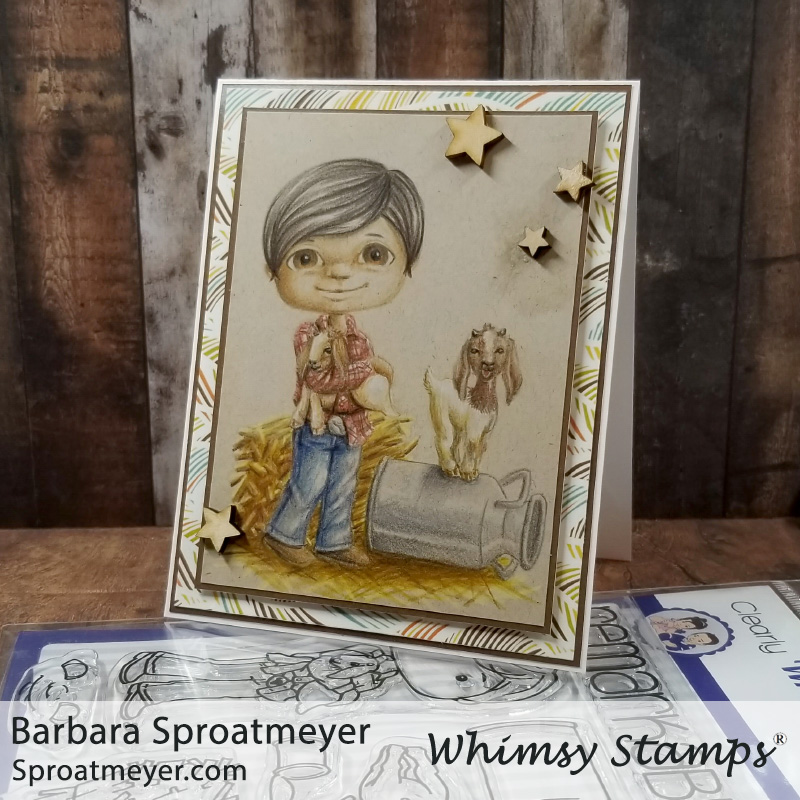
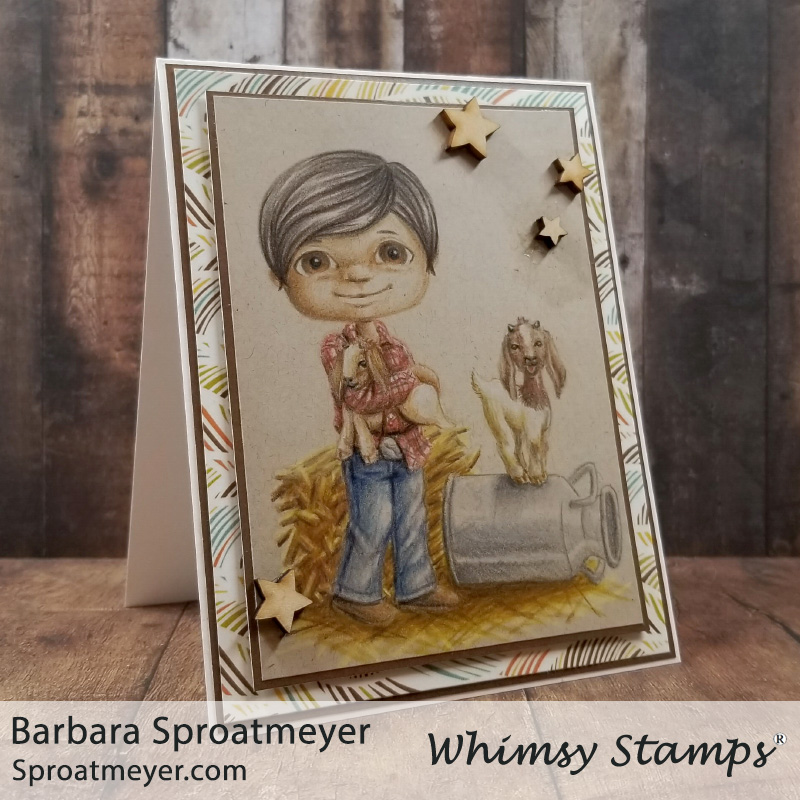
While out camping with the fam, I took the opportunity to get some coloring in and use my Faber-Castell Polychromos coloring pencils since I store them in the camper. With the sun shinning, out in the country and the cool weather, it was a perfect setting for Polka Dot Pals Nour.
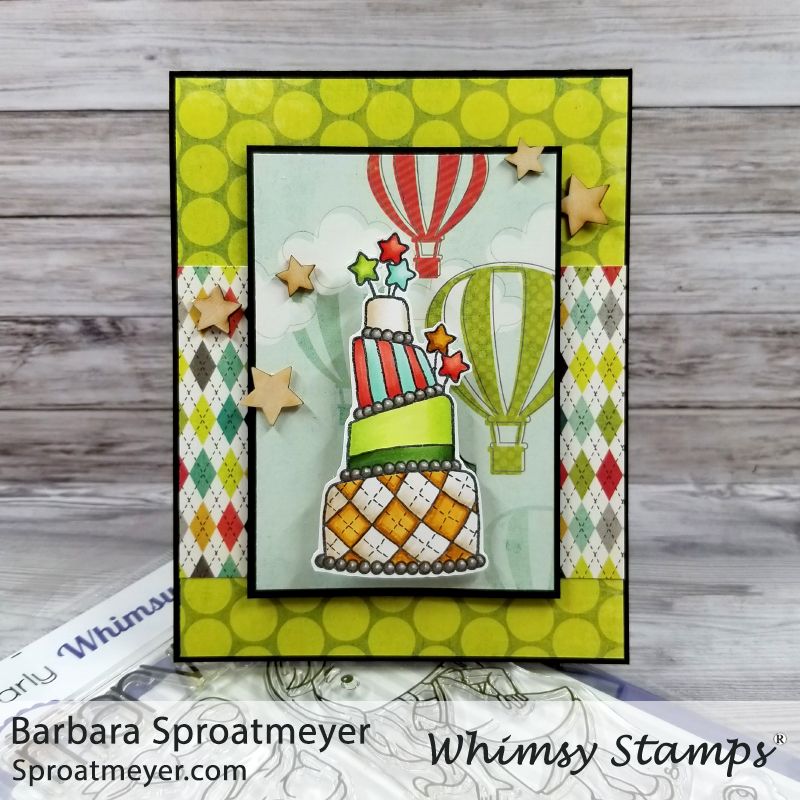
For this project, I used the cake, an accessory stamp from Polka Dot Pals Ophelia, and created a birthday card. I wanted to go for a boy card so with the color choices then I hope it worked. This cake makes for a simple and quick card and I like that. The accessory stamps are great!
I made this an action card too. You can see that below where I placed the cake on an Action Wobble.
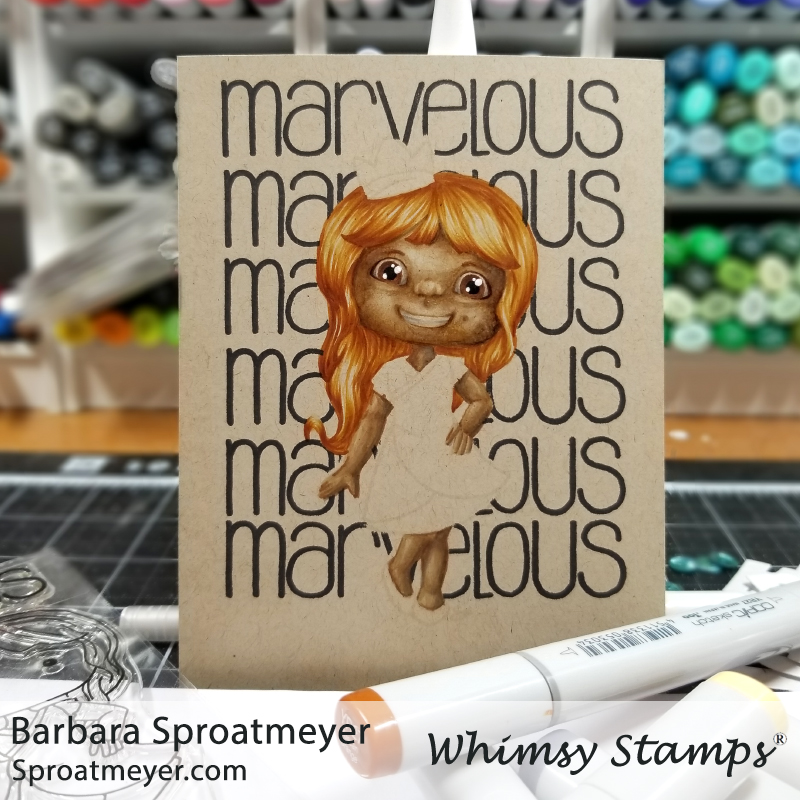
I’m interrupting the Lunar New Year cards this week for another one I created using Polka Dot Pals Ophelia. This is a good Valentine card but I’m going to be using it for a birthday card later on – or given as a promotion to a lucky customer. This marvelous girl is available at Whimsy Stamps!
This is one of those colors that sat on my table for a while and I worked on it a little here and there. After a week, she was finally finished and placed on a card. I enjoyed coloring the dress with pleats and sparkles and I also enjoyed coloring her hair with YR colors on the Desert Storm paper. I had some problems with my markers and got some great ideas and help through Facebook – so thank you everyone who responded. 😉
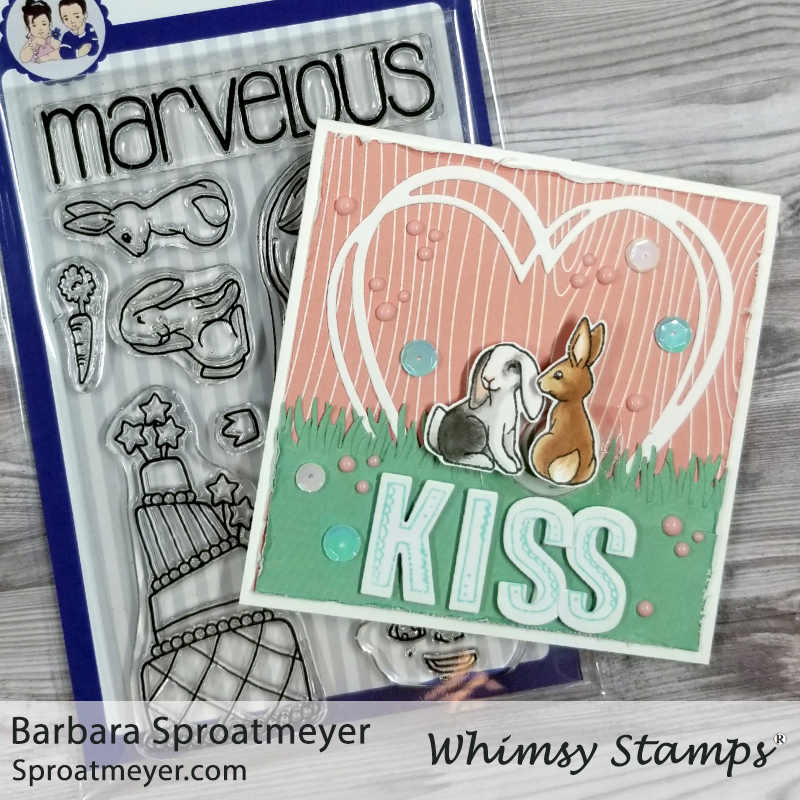
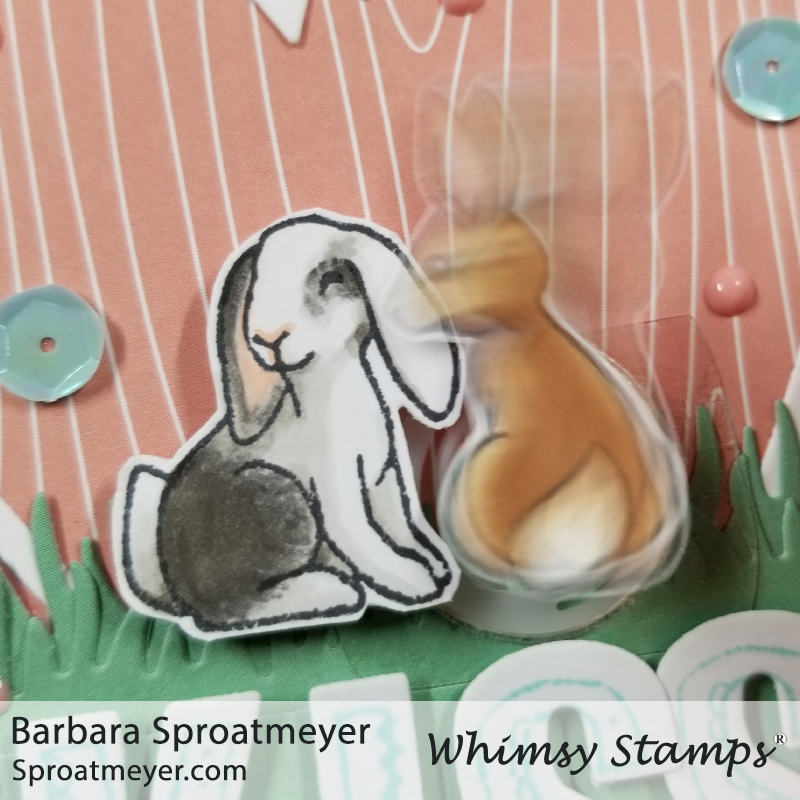
I made a card – it’s been a while but I made one. This one is a Valentine card using the two bunny accessory stamps from Polka Dot Pals Ophelia. These two make a great couple and I decided to create an action card. Read below for more details on how I created this card using these key products:
The base of this card was created with decorative paper and a grass die for the green. Then I used the Connected Hearts Frame Die for the heart in the background. The sentiment was created using the AlfaDoodles stamp and Bold ABC Die lettering. Then finally I added some sequins and Nuvo drops.The action comes from a wobble action spring and I placed it under the brown bunny. It was placed towards the bottom so when it springs, the bunny looks like he’s giving a bunch of kisses to his girl bunny. It’s cute.
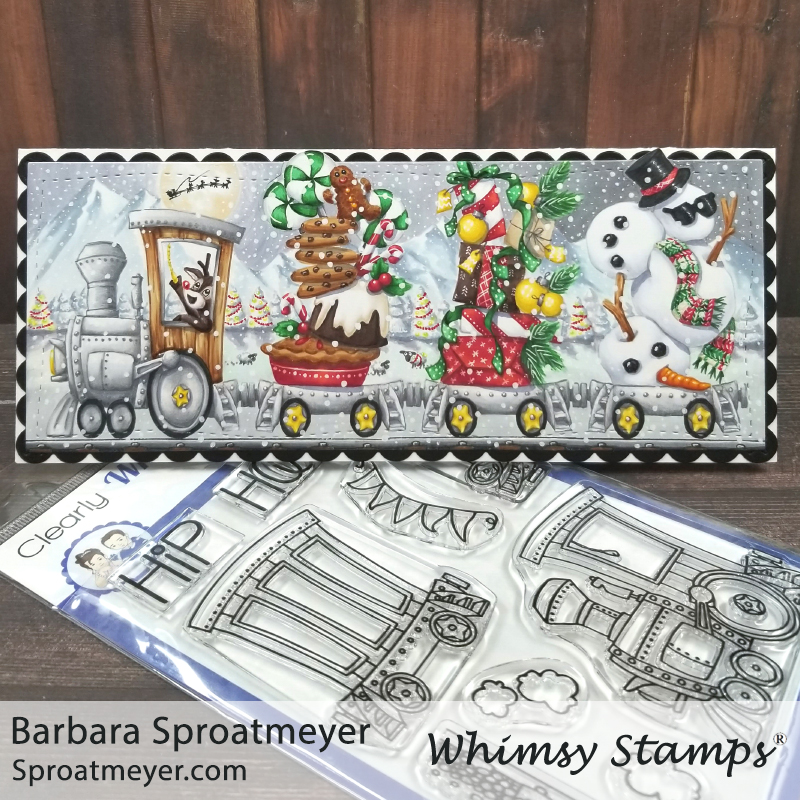
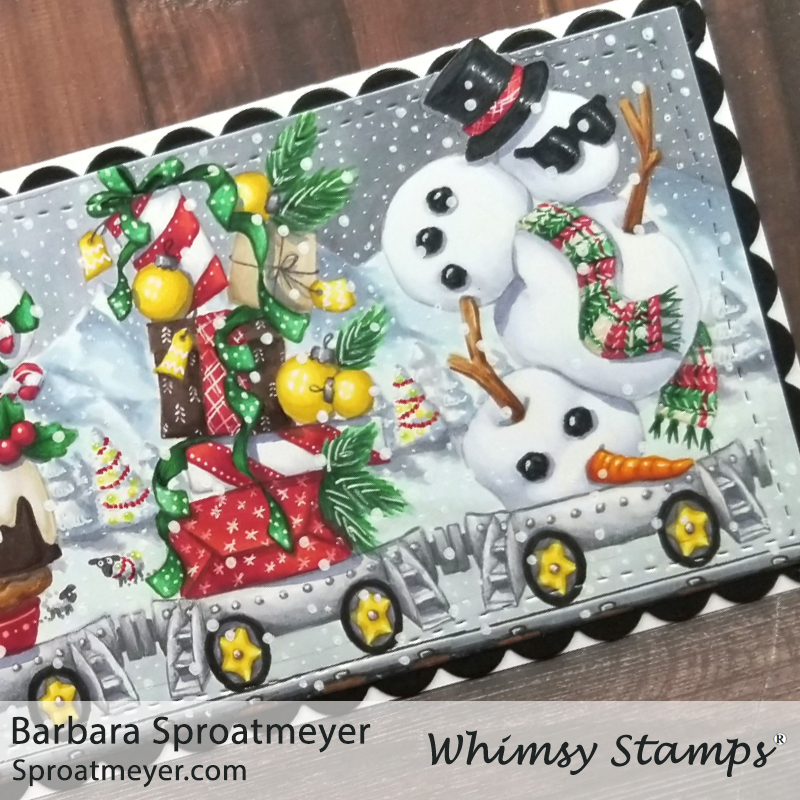
Here’s one last Christmas card that I made this year using Linking Train and it has quite a story to go with it. I wasn’t sure how it was going to turn out but just like life, it’s surprising. Read below for more details on how this card came about using these key products:
The Linking Train set is one of my favorites because it can be used all year around and the empty train cars give it “loads” of possibilities. For this project, I started with the train engine and three empty cars. Then I grabbed the accessory stamps from Polka Dot Pals Brianna and Polka Dot Pals Uzuri for two of the cars. The middle one was a Whimsy Stamp’s retreat freebie this year and worked great to complete the theme. I then added the train tracks on the bottom.Coloring the train went quickly and I stuck with a simple color theme – red and green, gold for accents, and browns and grays for the rest. After it was colored, I added some details with the white gel pen by giving patterns to the presents, ribbon and pie dish; and adding accents to the baubles, candy, berries and scarf. Next was to tackle the background and I wasn’t sure how I was going to do that… so I posted the unfinished picture on Facebook and asked for suggestions. Most of the suggestions were to keep it simple – maybe some hills or trees and a light sky. But one suggestion cracked me up and I had to go with it… Annabel suggested: “Station, bedecked with fairy lights. Pop a reindeer/Santa in the cab, have it floating thru the night sky? Delivering gifts? Long line of fir trees covered in snow, occasionally one dressed like a Christmas tree with baubles. Inside of the tunnel it is going thru, with icicles hanging down… Field behind filled with festive sheep and bemused sheep dog?” I wasn’t sure how I was going to get that ALL in there but I added as many details as I could. The bemused sheep dog is currently behind the pie laughing his ears off at the festive sheep. This was one fun card and the background was just as much fun as the Linking Train. Thanks Annabel for the inspiration. 😉
The DigiMojo Winter Wonderland 12 Days Event has been in motion and I’m thrilled to take part to bring you a fun challenge, inspiration and prizes too. It’s DAY 6 and Whimsy Stamps is graciously donating our featured digital stamp to three lucky participants by commenting in the DigiMojo Facebook group on each of our projects – Annabel, Jennifer and myself have selected three different Polka Dot Pals digital coloring scenes for our projects. We’re giving away our cards too – leave a comment on each of our blogs for a chance to win those happy mail parcels!
The challenge? Use any Whimsy Stamps’ non-winter image and convert it into winter! Extra kudos for using a Polka Dot Pals digital coloring scene. 😀 (Don’t have any Whimsy Stamps yet? Check out the freebies section.) Whimsy Stamps is also giving away a $15.00 gift certificate to the random winner of the challenge. The challenge closes on December 13 and cards must be posted in the DigiMojo facebook group.
Can you take a summer scene and convert it into winter? Challenge accepted! For this challenge I used the digital Polka Dot Pals Raden River Exploring scene. The first thing I need to consider is the color pallet – using cool colors represents a winter climate so I chose blue, teal and purple as the main colors. Secondly, I printed the color in a light gray so I could color over the line, such as the grass tufts, and not worry about about keeping that exact shape and converting it to clumps of snow instead. After the image was colored, the last thing I added was snowflakes…. lots of snow. I think these three tips will help convert any non-winter themed image into a winter one. Good luck!