Alvida the Pirate

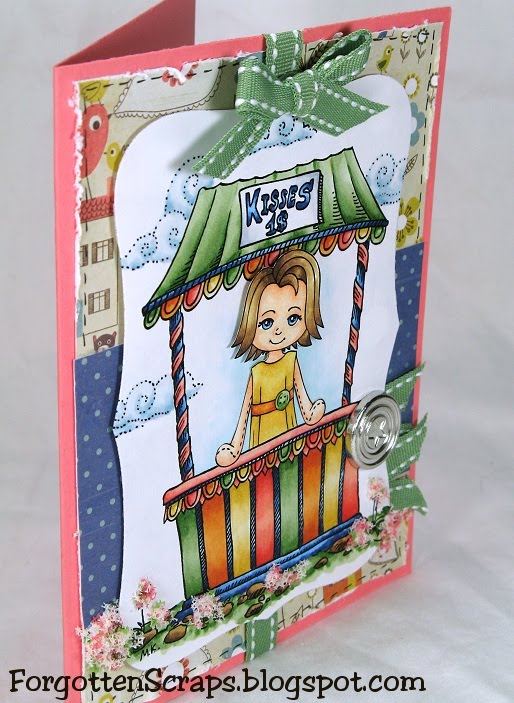
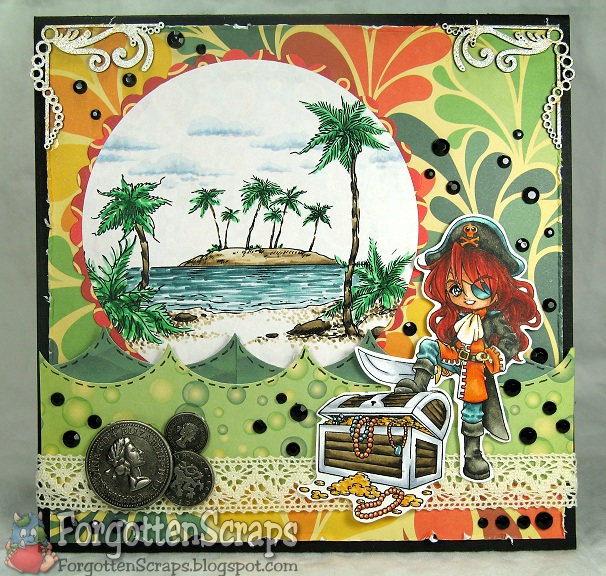
Welcome to another challenge day at Make it Colourful! Our challenge for you this week is to color a water scene, and with the new images from Make it Crafty, you’ll have lots to choose from! Our sponsor this week is Quixotic Paperie which has also started selling these rubber stamps!! I used three: Alvida the Pirate, The Cove and Treasure Chest.


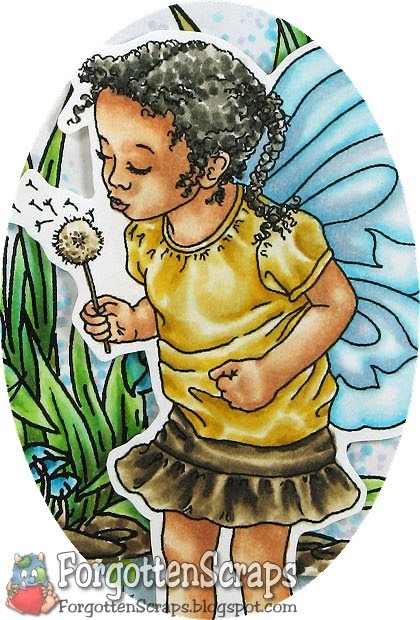
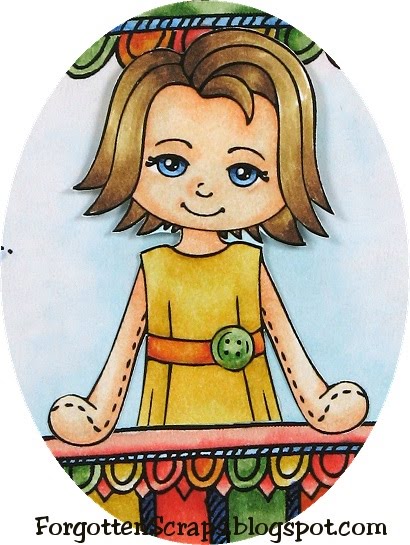
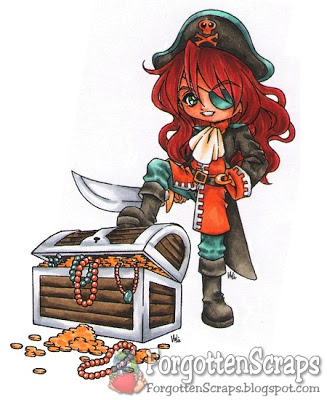
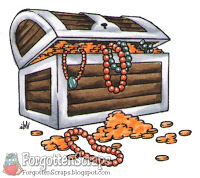
Here’s Alvida the Pirate with the Treasure Chest before it was cut out. I colored both images separate then put them together at the last minute. To do this I cut a slit above the Treasure Chest where the foot would go in. Once it was aligned then I taped it together on the back.


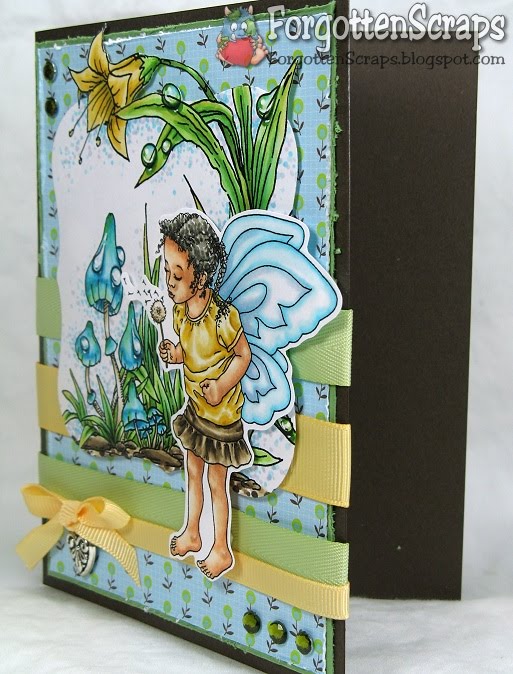
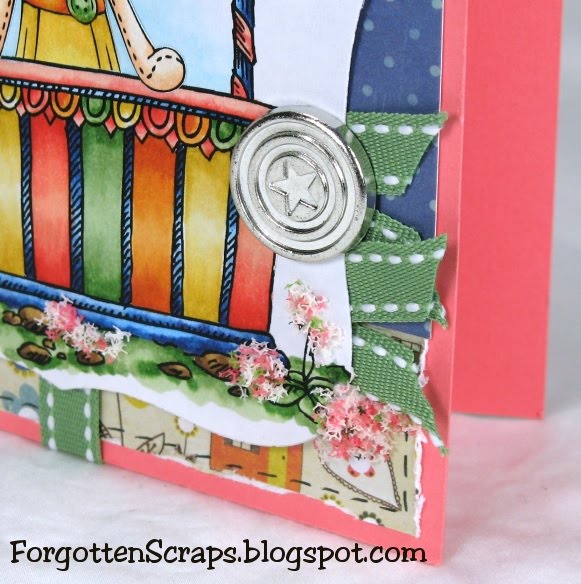
While looking for the right size die to cut the background with I noticed the Jumbo Scallop punch was upside dwon and so I thought it would be perfect for waves! I glued them to the base of the card then used foam dots at the top part to pop them out of the page. The money used to be charms and I cut off the necklace loop on each of them and attached them with large Glue Dots.


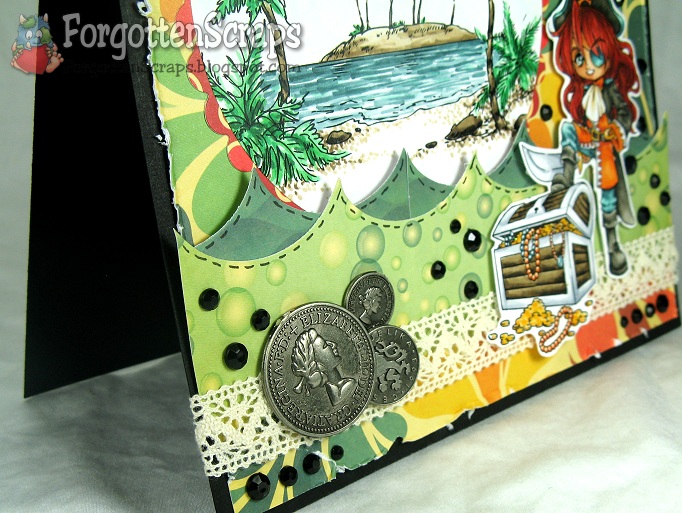
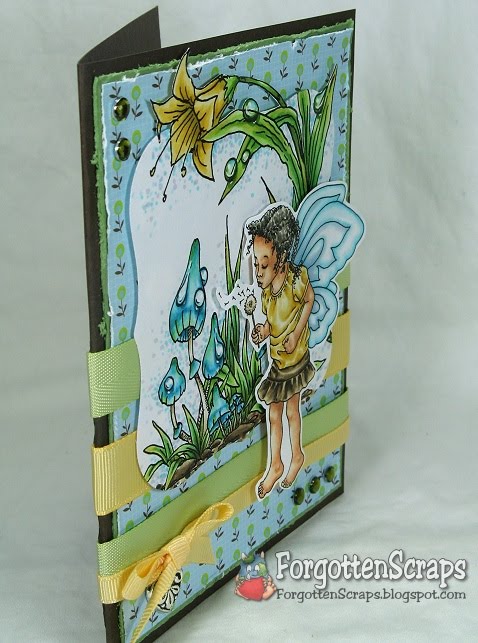
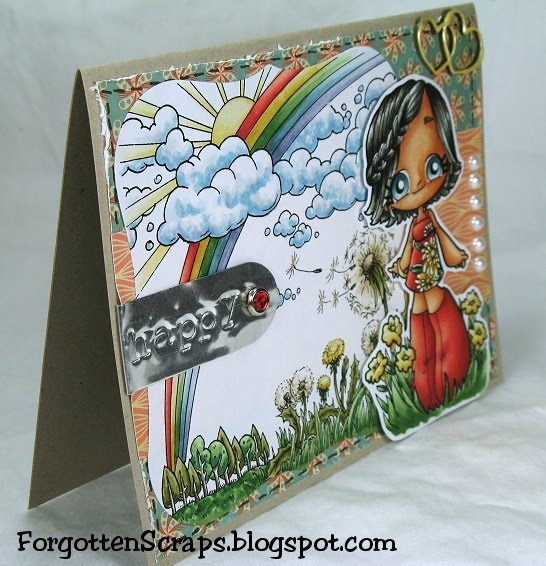
Here’s a full side view giving a good shot of the other embellishments. The corners are my favorite laser cut chipboards, also avialable from Make it Crafty, and I colored them with Adirondack Acrylic Paint Dabbers – it’s the quickest way and easy to get full coverage.


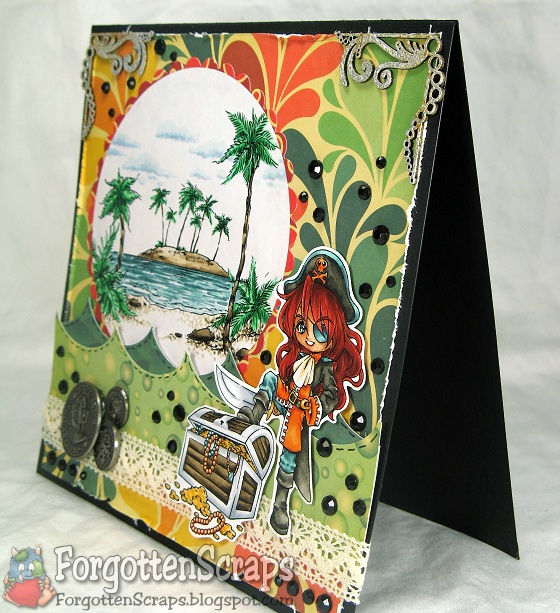
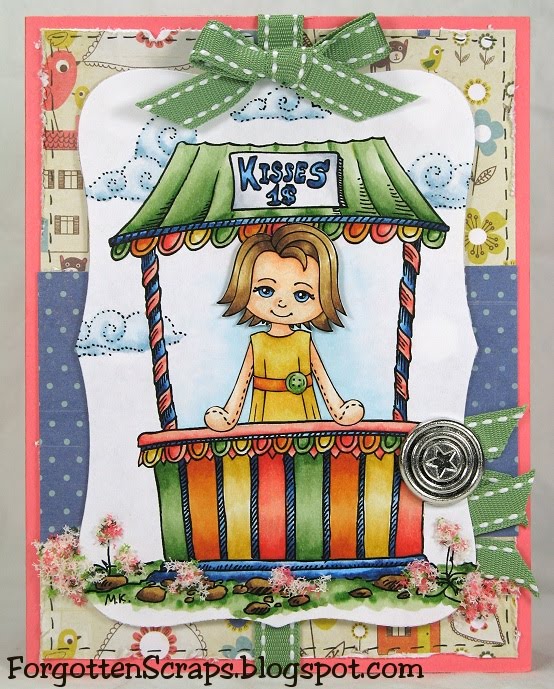
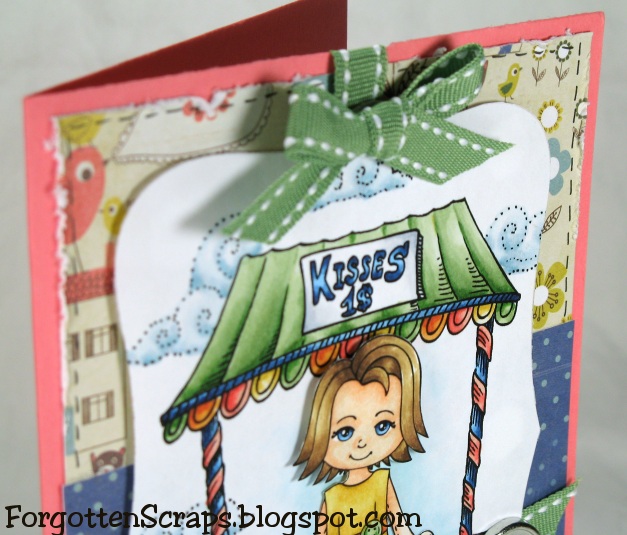
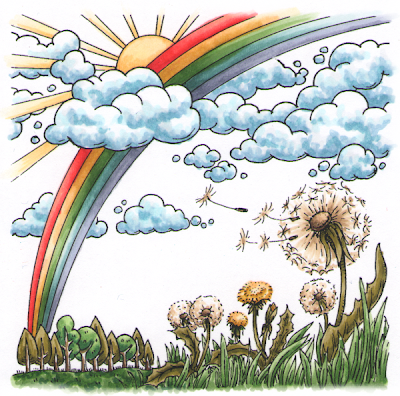
Here’s the background of The Cove before it was put cut. It helps to create an illusion if some of the white is left. Also the waters farther away are darker and so the close water is lighter in color. You might also notice the beach closet to us have dots for the sand but in the background is solid coloring because of the distance.

DT: Make it Colourful – Challenge #19 (water scene)
Main Stamp:
Alvida the Pirate, The Cove and Treasure Chest (MiC)
Patterned Paper: Salt Air (CC)
Chipboard: Swirly Corners (MiC) painted with Adirondack Acrylic Paint Dabbers Gold and Pearl
Metal Die: Spellbinders Nestabilities Circles and Mini Scalloped Circles, and My Favorite Things Die-namics Jumbo Scallop

Copic Markers colored on Copy Paper:
-skin tone: E00, E11, E13
-browns: E50, E51, E53; E41, E42, E43, E44, E49
-reds: E08, E19, E18, R17, R29, YR18
-oranges: YR12, YR16, YR18
-yellows: Y32, Y35, Y38
-greens: BG 34, G2, G05, B29
-blues: BG11, BG70, BG72, BG75
-grays: C1, C3; W3, W4, W6, W8
-clouds: BG0000, C1, B41

Did you know? I Am the Very Model of a Modern Major-General (often referred to as the Major-General’s Song or Modern Major-General’s Song) is a patter song from Gilbert and Sullivan’s 1879 comic opera The Pirates of Penzance. It is perhaps the most famous song in Gilbert and Sullivan’s operas. It is sung by Major-General Stanley at his first entrance, towards the end of Act I. The song satirises the idea of the “modern” educated British Army officer of the latter 19th century. It is one of the most difficult patter songs to perform, due to the fast pace and tongue-twisting nature of the lyrics.
[Major-General’s Song, Wikipedia.org]

Maya Making Wishes

Welcome to another day and a new challenge with Make it Colourful! This week we’re challenging you to color with the “dotty” technique, also known as stippling or pointillism, depending on the application. Check out the challenge post for a tutorial link and come play in the challenge this week!


I used two images on this card, the foreground being Maya Making Wishes from our sponsor this week, Chrissy’s Art ‘n Heart, and the background is Forest Flowers from… yep you guessed it, Make it Crafty! I loved how these two images came together to form a common theme.


I used the stippling technique on the ground to create rocks and again around the images to help give the illusion of a sky. I always start with the darkest colors and work my way to the lightest, then go back with some of the darker colors for more depth. On the sky, sometimes I like to give the image a uniform “glow” all around, however, this time I kept it sporadic on purpose to help with the fantasy look – like it’s got a mystical energy to it or sprinkled fairy dust. LOL


As you might have noticed, I gave it another go coloring raindrops. It’s my THIRD attempt however I’m not sure if any improvement was made towards the true challenge. I originally started with an all Copic technique, however, being a gluten for punishment and foolish use of plain copy paper, I had to finish each raindrop with a black liner pen and white gel pen. It really helped define the edges better and it matched the two raindrops that were already on the image.


Because the images were already busy with color I used solid ribbons to embellish the card and help tone down the business. Plus I have somehow accumulated quite the collection of ribbons that appears to be impossible to depleate! Although, I’ll sure try! ;D


I’d like to enter this into the following challenges:
My Mum’s Craft Shop Challenge #5 (to die for, diecuts)
Penny’s Challenge #53 (anything goes)
Creative Belli Blog Challenge #117 (S is for stippling)
Divas by Design Challenge #1
(anything goes)
Crafty Creations Challenge #118 (aything goes)
DZ Doodles Digital Stamps Challenge #10 (phot inspiration)

DT: Make it Colourful Challenge #11 (dotty backgrounds)
Main Stamp: Maya Making Wishes (CAH) and Forest Flowers (MiC)
Patterned Paper: Spotted Owl Soup (Jillibean Soup)
Metal Die: Spellbinders Nestabilities Labels One

Copic Markers colored on Copy Paper:
-skin tone: E000, E00, E11, E13, E04
-browns: E41, E42, E43, E44, E45, E47, E49
-yellows: Y32, Y35, Y26, YR30
-greens: YG11, YG13, YG17, G28
-blues: BG000, BG01, BG02, BG05, BG07, BG09; B00, BG01, BV20, BV00
-grays: W2, W4, W6, W8

Did you know? Stippling is the creation of a pattern simulating varying degrees of solidity or shading by using small dots. Such a pattern may occur in nature and these effects are frequently emulated by artists. In a drawing or painting, the dots are made of pigment of a single colour, applied with a pen or brush; the denser the dots, the darker the apparent shade—or lighter, if the pigment is lighter than the surface. This is similar to—but distinct from—pointillism, which uses dots of different colours to simulate blended colours
[Stippling, Wikipedia.org]

May Kiddos Challenge

It’s time for another kiddos challenge at Make it Colourful and you just have to check out what the Junior Colour Addicts did this month! The theme is dots and is sponsored by Little Miss Muffet Stamps – that’s me and I’ve even provided a freebie for all the kids to use!

Here’s what Cassandra has made for you this week:


She paired up The Ivy Swing from Make it Crafty and Butterfly Kisses from Little Miss Muffet Stamps. Coloring was done with Prismacolor Pencils and the dot theme was incorportated in with her background using varoius circle punches.

Here’s what Lydia has made for you this week:


She made a card for her pen pal and was inspired by last month’s circus theme. She used three images from Imaginisce Snag ’em Stamps: Animal Crackers Elephant, Monkey and Koala. They were colored using Primsacolor Pencils and she created her own “dot” embellishment too!


Aren’t those darling? Be sure to head on over to Make it Colourful challenge blog for details on your free image and let your junior enthusiasts come play with us! Creations using a Little Miss Muffet Stamp are also eligable to enter in the Little Miss Muffet Challenges too!

Cocoa

Do you remember my Monster Pains card from just a little while ago? It was a top pick at {Cupcake Inspirations} and they’ve asked if I could be their Guest Sweetie for this week. Of course, they send the inspirational cupcake picture as a preview and I loved the color combination – so I had to play along. I used Cocoa from Little Miss Muffet Stamps and Kissing Booth from Make it Crafty.


I took inspiration from the bold bright colors of the cupcakes, trying to use the pinks, blues, greens, and oranges; and added it to the overall feel of a spring weekend! The images on the cupcake reminded me of Saturday activities and going to a carnival or fair is always a fun day.


I’ve been wanting to make this card for a while and combine the two images of Cocoa leaning over the Kissing Booth. I also tried out a new skin tone color combination of E000, E01, and E02 on Cocoa. Here’s what the kissing booth looks like before Cocoa was added:


I used Flower Soft on the ground and covered up the flowers on the Kissing Booth image too. I got this idea from the Mo & Zo’s Carnival Blog Hop and had to try it.


Cocoa was cut and placed on top of the Kissing Both after they were both colored. I fussy-cut close around the edges on the girl then glued her directly to the paper at the bottom near the table. To give it dimension I added foam dots behind her head to she looks like she’s actually leaning out of the booth.


Guest Designer: Cupcake Inspirations Challenge #109

I’d like to enter into the following challenges:
Creatalicious Challenges #21

(pink, green, yellow, blue)

Party Time Tuesdays Challenge #13 (anything goes)
Amber’s Crafts and stuff Challenge #7 (use digital)
Papercraft Star Challenge #43 (photo inspiration)

Main Stamp: Cocoa (LMMS) and Kissing Booth (MiC)
Patterned Paper: Neighborhood (Crate Paper)
Metal Die: Spellbinders Nestabilities Labels Eight

Copic Markers colored on Copy Paper:
-skin tone: E000, E01, E02
-browns: E55, E57, E59
-reds: R12, R14, R17
-oranges: YR12, YR14, YR18
-yellows: YR30, YR31, YR21, Y26
-greens: YG61, YG63, YG67
-blues: B32, B34, B37, B39
-sky: 0, C1, B000, B52, B91

Did you know? “There once was a man from Nantucket” is the opening line for many limericks. Its popularity can be attributed to the limerick genre and the way the name of the island of Nantucket lends itself easily to humorous rhymes and puns, particularly obscene ones. The earliest variant was published in 1902 in the Princeton Tiger:

There once was a man from Nantucket
Who kept all his gold in a bucket.
But his daughter, named Nan,
Ran away with a man
And as for the bucket, Nantucket.
[There once was a man from Nantucket, Wikipedia.org]

Pinky

Welcome to another week at Make it Colourful Challenges for a fantastic color combo challenge! This week we want you to color with black and add red accents. We’re sponsored by Tiddly Inks and I chose to use an adorable girl, Pinky, and pair her up with the Alchemist Chamber from Make it Crafty.


I used some old papers and new embellishments I picked up this week on my shopping spree. The metal flowers are from Stampin’ Up! and were glued on the card. I then went back in with Liquid Pearls and added a white pearl to the center of each flower.


Here’s what the Alchemist Chamber looks like before it was cut down for the card. There is a lot going on in ther and some fun details to color. Somehow, a cupcake was made inside that “kitchen.” Now you just have to decide if the cupcake contains a secrete potion or not! LOL


I used Annika‘s cloud technique and colored the top part of the sky to help fill it in and also to bring in some more blue. It’s a simple technique and really helps complete the image.


The words are actually from boy themed scrapbook tag that I cut up. I originally cut it up because I thought “adorable” was out of place but ended up using all the words anyway, except for “boy” of course. Two of the strips are popped with dimensional foams.


The metal tag was handmade. I used a thin sheet of metal and cut out a tag using a Cuttlebug die. I then used metal chip art stamps and impressed the crown before attaching it to the card with eyelets.


I’d like to enter into the following challenges:
Desert Island Crafts Challenge#7
(choose 3: black, words, no flowers)

DT: Make it Colourful Challenge #16 (color back with red)
Main Stamp: Pinky (TI) and Alchamist Chamber (MiC)
Patterned Paper: Oliver (BG)
Metal Die: Cuttlebug Tiny Tags
Chip Art Metal Stamps: Ornamental Crowns

Copic Markers colored on Copy Paper:
-skin tone: E000, E00, E11, E13, R11, R12
-browns: E31, E23, E37; E55, E57, E59; E42, E43, E44, E47
-reds: R30, R12, R14, R24, R37, R59
-oranges: YR21, YR2, YR14, YR18
-yellows: YR31; Y000, Y32, Y35, Y38, Y26
-greens: G40, YG61, YG63, YG67; YG91, YG93
-blues: B01; BG11, BG72, BG75, B91; O, B0000, B000, B52, B91, C1
-grays: W00, W1, W2, W4, W6, W8


Did you know? The fossa is a cat-like, carnivorous mammal that is endemic to Madagascar. It is a member of the Eupleridae, a family of carnivorans closely related to the mongoose family. is the largest mammalian carnivore on the island of Madagascar and has been compared to a small cougar. It has semi-retractable claws and flexible ankles that allow it to climb up and down trees head-first, and also support jumping from tree to tree.
[Fossa (animal), Wikipedia.org]

Update: I was a featured Guest at the Tiddy Inks Challenge Blog!

Update: I was a winner at Desert Island Crafters for this challenge!

Flower Kaylee

How did you like the Mo & Zo’s Carnival Blog Hop?! Well, it’s still going on for a few more days so you can get in on the action! Plus don’t miss out on the MEGA Blog Candy Blog Hop which has several chances for you to win.

Welcome back to another weekly challenge with Make it Colourful from our break last week! This week our theme is to color black hair and we’ve pulled together some variety for your inspiration! I used W00, W4, W6 and W8 Copic markers on the hair.


Our sponsor this week is Some Odd Girl and I used Flower Kaylee and paired her up with the Rainbow Dandelion from Make it Crafty. I was inspired by flowers on her dress and thought she would be perfect in front of those dandelions!


I wanted both images to be large and take up the most amount of space on the card… at the time, I was in a coloring mood, not a creating mood. LOL. Here’s a picture of the background before it was placed on the card. I love this image and how the foreground is featured in a close up perspective. That makes this image so versatile as you can add any size image with it.


Even though the images took up most of the card, I managed to add several embellishment and final touches, including the faux stitching, metal tag with gem eyelet, some pearls and the lasercut chipboard hearts! The tag was stamped with a lowercase alphabet metal stamps and a hammer which is nice for any type of sentiment. The lasercut chipboard hearts were covered with Liquid Pearls, of course.


I’d like to enter in the following challenges:
Kaboodle Doodles Challenge #63 (thoughts of spring)
Simply Create Challenge #42 (use metal)
Stamp Insanity Challenge #56 (use metal)
Pixie Dust Studio Challenge #71 (spring forward)
Fussy and Fancy Friday Challenge (springtime)

DT Challenge: Make it Colourful – Challenge #15 (black hair)
Main Stamp:
Flower Kaylee (SOG) and Rainbow Dandelion (MiC)
Patterned Paper: Togetherness (CC)
Chipboard: Love Heart Swirls (MiC)
Metal Die: Spellbinders Nestabilities

Copic Markers colored on Copy Paper:
-skin tone: E000, E00, E21, E11
-reds: R11, R12, R14, R17, R29
-yellows: YR30, Y23, Y26; YR30, YR31, Y000
-greens: YG61, YG63, YG67; YG91, YG95, YG97; G40, G24, G28
-blues: BG70, BG72, BG75, BG78; B0000, B91, B52, C00
-purples: BV20, BV23, BV25
-browns: E41, E42, E43, E44, E47
-grays: W00, W4, W6, W8

Did you know? Glitter describes an assortment of very small (roughly 1 mm²) pieces of paper, glass or plastic painted in metallic, neon and iridescent colors to reflect light in a sparkling spectrum. Glitter was invented by Henry Ruschmann. Accounts conflict as to when glitter was invented—some say 1934 and others shortly after World War II. Today the company he founded, Meadowbrook Inventions, is the world’s leading manufacturer and supplier of glitter. Glitter can occasionally be used in criminal forensics, as its distinctive color, size, thickness, material and patterns can link perpetrators to victims or locations, if glitter was present at the crime scene or a related location.
[Glitter, Wikipedia.org]