Attitude

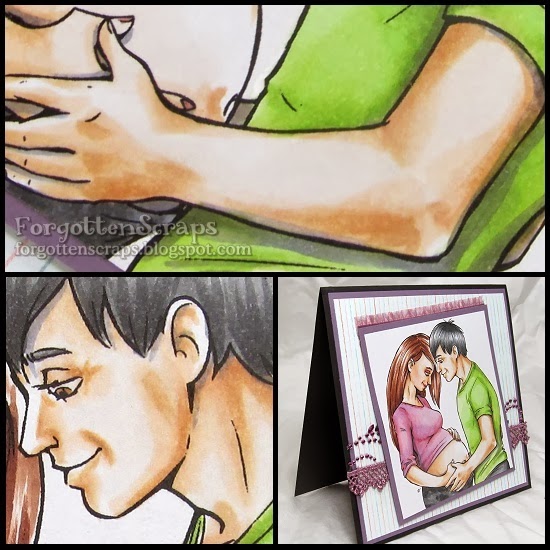
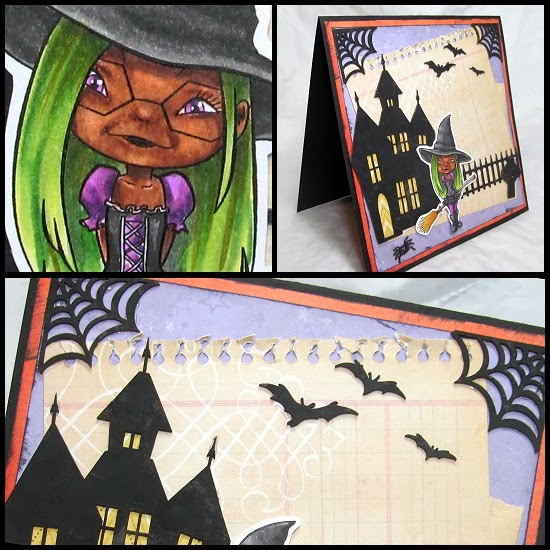
I just wanted to share a project I had made using the November sketch.  I used a faceless stamp by hÄnglar & stÄnglar and colored in a face using my Copic markers.  This was a little different than what I’ve normally worked with since the eyes are a little closer together and I had to figure out a work around.  But after coloring up this darling, I thought the best background would be a little ground stamp from Make it Crafty and I just so happened to have the rubber stamp of Petals and Palings – perfect! 

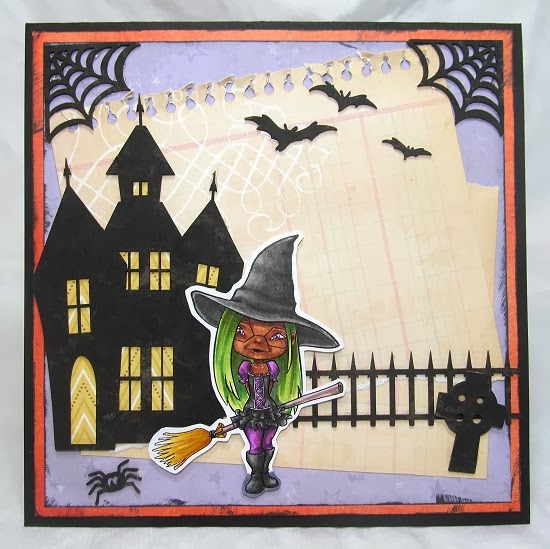
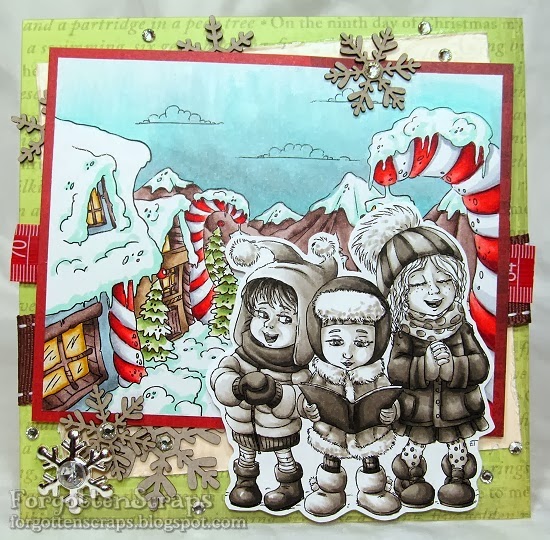
I stamped the edges of the Petals & Palings fence on both sides so I didn’t have to mask the girl stamp.  So basically… the left side is on the right and the right side is on the left.  😀  Then to put the whole project together, I used the fabulous sketch provided for this month and some fun spring time decorative paper.  It’s not exactly spring in my area but they were just the right colors to go along with this red head. 

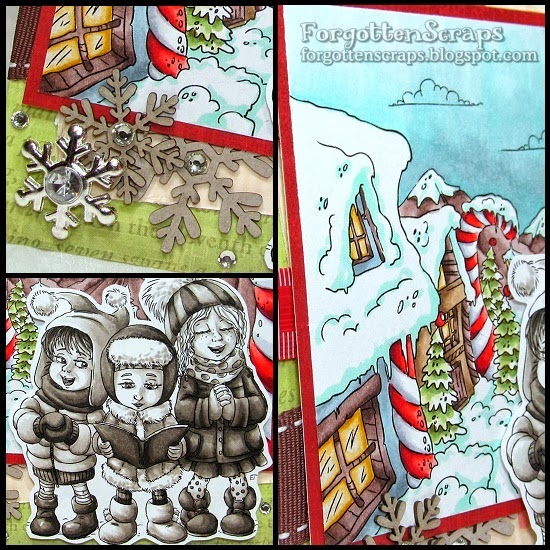
Finally as a last embellishment, I used a flower corner punch to punch out the yellow flowers.  They were curled using an embossing tool and glued on top of the flowers in the image.  Then a self sticking gem was placed in the center.  I hope you like this project and thanks for coming by!

Make it Crafty Images:
Other Images:
Attitude by hÄnglar & stÄnglar

Couple Expecting Baby

The challenge at Make it Colourful for the month of November is about “skin and muscle definition” and there’s still time to participate.  The image I colored for this challenge is Couple Expecting, which you’ve seen already, but now I have it mounted on on a card.  This one isn’t my favorite but I worked wanted to work with colors that I normally ignore; hence the green and purple combination.  The card is simple and I added just a few self-sticking gems and ribbon.

The muscle areas I tried to focus on was the man’s face, neck and arm; I even gave him laugh lines at the corner of his eyes!  😀  For her, I left the muscles soft and less pronounced then tried to work a little bit on adding makeup to her eyes, cheeks, lips and fingernails.

Make it Crafty Images:
To see the original post on the Make it Crafty blog, click HERE.

Girl Hug

Today (well actually, two days ago) is my opportunity to add a project to the MiC Store Blog!  This is a project that I did for the Whimsy Magazine last month and I’ve combined images using Whimsy and Make it Crafty to create this scene.  The Make it Crafty images are all set on the sides of the images and then cropped so I only show half of it – in effect, it creates a more personal image and one that looks more like a real picture.  After all, how often are our pictures taken where *something* hasn’t been cropped!  LOL

Make it Crafty Images:
 
Other Images:
Girl Hug (Whimsy) 
Papers: K&Company TC Blossomwood, Recolections The 12 Days, brown cardstock

Ink/Coloring Medium: Copics

E43, 21, 11, 000, R20, C3
E29, 27, 25, 23
R37, 35, 32, 30
R59, 46, 14, 21
YG67, 63, 61, G20, YG21
C1, 3
E43, 42, 41
E19, 17, 13, 11
B91, 93, 95, 97
BG70, B91, 93
W4, 5
Y26, 11
BV23, 20

Other: blue ribbon, red tape measure ribbon, pink glitter

You can see the background was created using several elements from different themes… such as Paris Elements (to create the bottom of the wall), Winter Scene Elements (for the snow, of course) and the door, windows and Christmas tree were also included.  Why the window is open on a cold winter day?  I don’t know but maybe they burnt the turkey and needed to air out the house a bit.  LOL 

Once the background was built, I added the characters.  Even though these are everyday characters, I thought they would be perfect for a Christmas themed card and that big hug says it all!  😀

Thanks for coming by today and I hope you have a great weekend!

Little Witch Ariel

Shuckie-darn!  😦   I’ve totally missed out on all the fun action over at SBS Challenge where Betty likes to have a 12 Days of Halloween challenge every year.  It’s such a fun way to get into the festivities.  But I’ve managed to catch the tail end and I’ll be able to finish out the month with a few days at least.  😀

For my project I’ve used Little Witch Ariel which is a Simply B Stamp image and part of the Jude and His Shenanigan Crew Halloween theme.  Then for the card, I used some chipboard embellishments from Make it Crafty and created the Halloween scene.  The house was backed by yellow paper to light it up.  😀

I’d like to enter this into the following challenge(s):
Simply Challenged Challenges – Who’s that Ghoul
12 Days of Halloween

Girls Singing Carols

Today I’m posting this wintery project on the Make it Crafty blog and I hope Zoe can forgive me as I’ve completely forgotten what day I’m suppose to post on!  Maybe that means the guilt will get to me and you’ll end up with an extra project here and there that I’ll share to make up for it.  LOL  I started coloring this scene up for an assignment which, after getting nearly done, I found out that it didn’t even come close to matching the requirements – yikes!  Luckily I had enough time to get the real project done and posted; although I still had to finish this one up.  😀

Make it Crafty Images:

 
I’ve been playing around with a bit of black and white coloring and it helps me to focus on the shadows and contrast a lot easier than with colors.  However, to add a bit of color and contrast in a designing aspect, I colored one image black and white and the other image in full color.  It worked out a lot better than I expected!  Then because I was too lazy to get my Christmas cards out, I just grabbed the closest green and red paper and used that.  As a result, I think it has more of a vintage feel to it and I like that effect.

This image is also perfect for practicing coloring faces with the same light source but in three different angles.  I was able to focus on the cheeks and noses and could have gone a bit darker but started to get worried that I’d mess it up.  So, you’ll have to look closely for *those* details!  Thanks for dropping by and I hope you’ve enjoyed this little bit of wintery inspiration!

Graffiti Zowie

This is my little apology project I had to color to make up for the last urban graffiti project I had colored.   I feel much better about this one!  I also thought it would be fun to share graffiti terminology and I posted that on the Graffiti Party blog to share with every one… check it out by clicking HERE and add a few words to your vocabulary.  😀

Remember there is still time to get your urban graffiti project into the challenge for a chance to win several grand prizes!!  Check out the Graffit Party blog!

The Make it Crafty and Little Miss Muffet images I used on this project are as follows:

I’d like to enter this into the following challenges:
Anything Goes Challenge #101 – Out with the Girls