Agent Cupcake Aiming

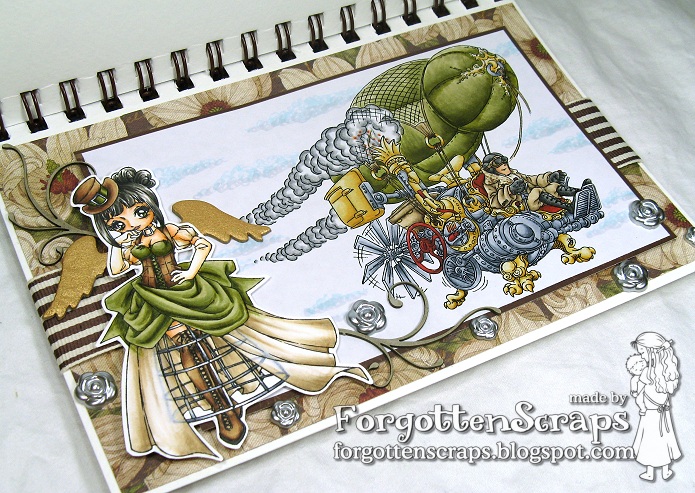
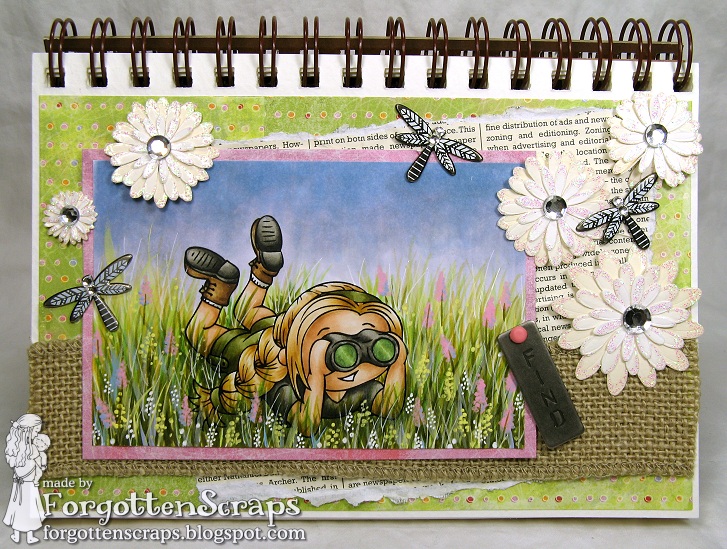
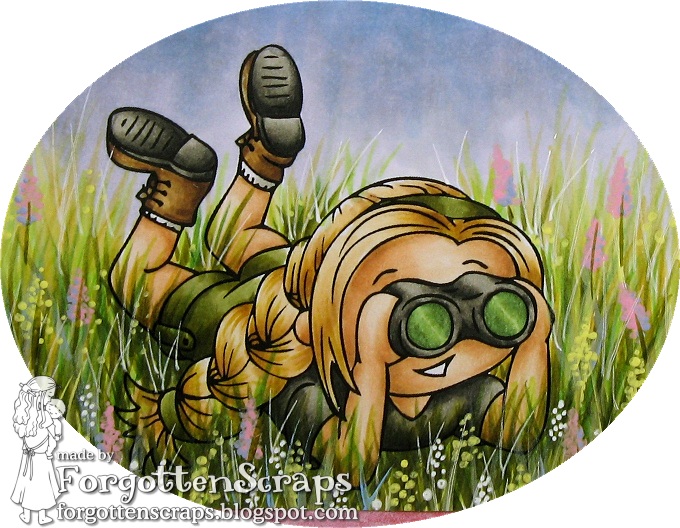
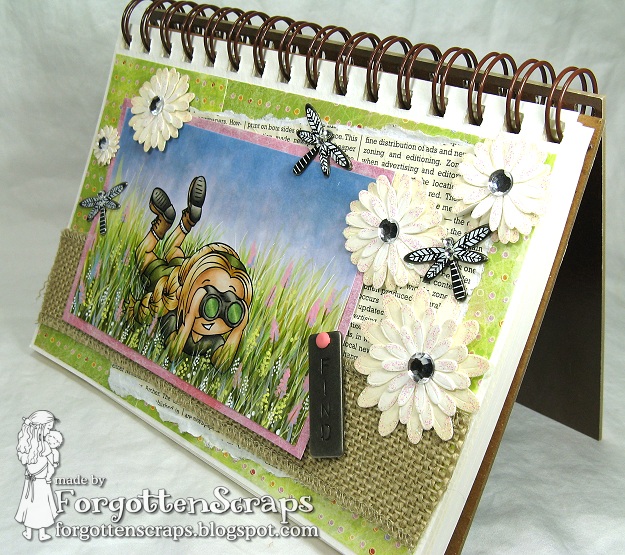
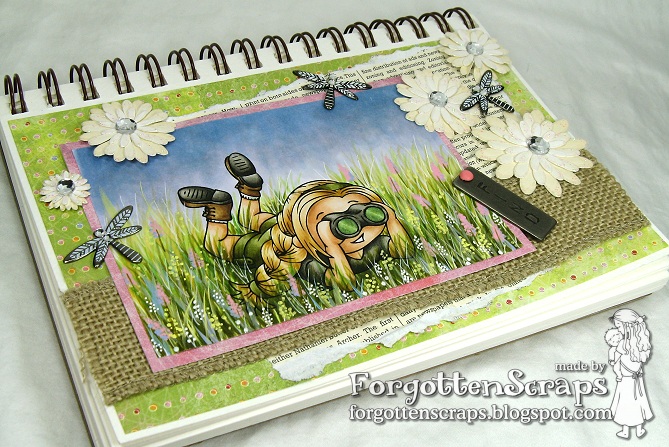
Welcome to the second day of previews for Little Miss Muffet Stamps and today I’m showing off the newest Agent in the Operation TREEHOUSE series… Agent Popcorn Aiming! Be sure to head on over to the store to see the Agent Popcorn in her cute pose too. ;D


Phew… this project took the longest time to finish as I had one mental block after another. I had colored Agent Popcorn a couple days ago then printed out a background to work on. However, today I made the mistake of changing out the kids summer clothes for winter ones before crafting and now I wish I had done it the other way around! LOL Now as I “rest” and enter in my details, I’m terribly distracted by a cute little movie called The Gruffalo. It’s darling and I’ll have to get the book from the library tomorrow.


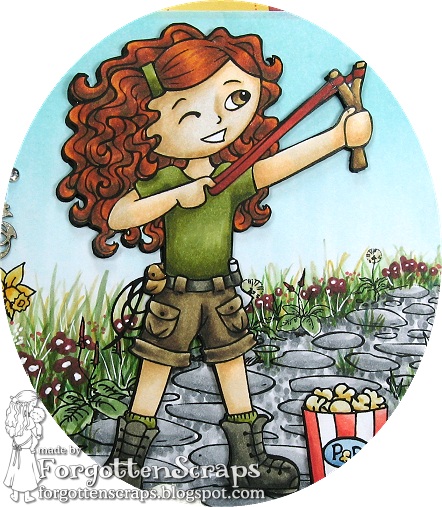
Anyway, back to my project. He he he. This is Agent Popcorn taking aim against the boys next door. But don’t let those jumbo popcorn pellets fool you as I’m sure they’re filled with something gooey… maybe even something smelly too.


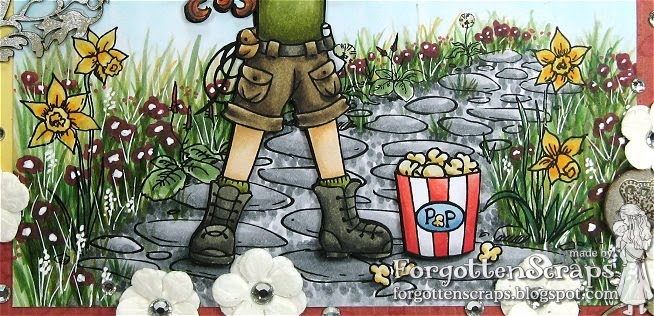
The background is Pebblestone Path from Make it Crafty. I had merged the images and printed them out together then realized I wanted to use dimensional for her so I colored the background ignoring the character. This gave me the opportunity to work on the grass and sky without worrying about lines. Afterward I colored the character black in case you could see between the layers. Once the project was finished I used dimensional foam and “popped” that girl right on. Enjoy!

I’d like to enter this into the following challenges:

Lollipop Crafts Challenge #53 – no sentiments
Jen’s Digi Stamps Challenge – fight like a girl
My Mum’s Craft Shop Challenge – food and drink
Shelly’s Images TTT Challenge – anything goes
Use it Tuesday Challenge #17 – metal (I hord these brads and chippies!)

Mitten & Button

It’s new release week at Little Miss Muffet Stamps and there are four adorable images going out! Today I’m using a couple Animal Friends, Mitten and Button, to create a warm holiday scene next to the Hearth & Home fireplace from Make it Crafty.


These two images were inspired by a few animal friends of my own – our little Ginger was a recent addition to our home but there was already an image of that name so I named her after my childhood pet dog, Mitten. We couldn’t have someone getting a puppy for Christmas without a kitten in the mix too so I drew Button after another past companion.


The Hearth & Home fireplace is from Make it Crafty and gave me another opportunity to color a fire. I wanted to focus on the inside of the fire pit as I wasn’t sure how to color it so this time I looked up images in Google and found a good image to reference. It’s not exact but still turned out nicely.


I colored each of the images large so creating the journal page would be quick and easy. I covered the back with decorative paper, wrapped a large ribbon around and positioned my images. Then added some MiC chippies, couple of pearls and lastly a few snowflake buttons – finished! 😀

I’d like to enter this into the following challenges:

Crafting When We Can Challenge – Christmas
I Did it Creations Challenge #77 – animals
KB Cute Monday Challenge #31 – anything goes
Karen’s Doodles Challenge – animal antics
Make it Monday #59 – anything goes

Mystic

Here’s a project that I created for the Whimsy Magazine online that was published back in August and if you head on over there you can see the newest release published just last week! The August issue has all the supplies extra supplies listed for this project but the main stamps are Mystic and Birthday Letter Seals from Whimsy Stamps and the Tropical Waterfall from Make it Crafty.


This was actually the first project that I made in my second journal and it wasn’t too long ago that I finished my last page… so I guess to answer that question it takes me two months to fill a large journal. ;D


Most unicorns I’ve seen have been colored white so I wanted to give a try at a black one – but to keep the details showing I colored the tail a fiery orange. To balance out the project I also elements of the waterfall in darker colors too. Oh… and the page behind it is ripped out of a Winnie the Pooh book that I have on hand just for this occasion. ;D Hope you enjoyed the project as much as I enjoyed making it.

Aussie Outback Shack

It’s October and the perfect time for some spooky creations. This one is the first one in response to the new monthly Make it Colourful Challenge “Spooky Night Sky” and you can find some chatter about it in the MiC Message Board.


To start my project, I first studied the inspirational pictures in the challenge post and noticed a few similarities… for the most part, they were on an angle and monochromatic in a certain color. A couple of them had eerie things in the clouds or moon, spiderwebs, fog, etc. So with these things in mind I merged some images together and tilted the scene 15 degrees to the left.


After printing it out I looked online and found a Mean Skull that I sketched into the moon with a pencil. I wasn’t sure if it was going to turn out so started playing around in coloring the moon I was surprised how it turned out. I was so excited that I started coloring the rest of the image using the Warm grays. With the darkest tones I added my shadows and worked my way to the lighter tones. The clouds were done the same way except I started with the lightest and went darker.


After the whole image was colored in the monochromatic tones I started adding in YG91 and YG93 from the sides inwards. Next time I think I’ll go darker on the outer edges. Next I added the spiderweb using a gel pen. For this I wish I had more branches at the top so I colored some in, however, better positioning of the tree would have been better.


Lastly I thought it could use some eerie mist but I wish I could have applied it differently – I was looking for more of a chalky soft look so I’ll work on that technique next time. Finally I placed the finished image on a journal page and added fun elements such as dripping blood, tombstones and other such things. Hope you enjoy it and come on over to play along in this super duper challenge!

Flying Balloon Contraption

Here’s my Annabelle project for the “Sheer Clothing” challenge at Make it Colourful! I placed her with the Flying Balloon Contraption that I’ve had colored for a while and grabbed some scraps to made a journal page out of it. Here she is…


I added some wings and thought they were appropriate… maybe this guy is flying in the air on a quest looking for his loving angel? LOL The rest of the page was decorated with wide ribbon, silver resin flowers, and some Make it Crafty chippes.


This is also my LAST page of my second journal – as you can see it’s bulging and will never lay flat again. ;D I’ve had it propped up on my desk like this and enjoy looking at my last project.

Just a few reminders… come on over and join in the Christmas-Birthday Blog Hop were you’ll find lots of blog candy, freebies and inspiration galore! Plus don’t miss out on my own Blog Candy – both events end on Wednesday.

Agent Bubblegum Spying

Welcome to the second day of previews from Little Miss Muffet Stamps! Today we’re showing off Agent Bubblegum Spying and a fairy, Breena Stitching…. and I chose to make something with Agent Bubblegum Spying. 😀 Come on over to the LMM Challenge blog and see the rest of the inspirational projects the DT have made for you!


My source of inspiration came from Chris at Sketching Stamper as I was very impressed by her grassy fields of flowers and wanted to try it out. I love her coloring too and the way she adds multiple colors for shading – which I also wanted to try, but one thing at a time. ;D Here’s just two of her fields… Explorer Tilda and Spring Walk.


I started with the grass and used several of the YG colors with a few of the darker G range. Plus I added some Y in the mix and kept drawing in strands of tall grass until the pallet was completely covered. For the flowers, I got out some pink, blue and yellow acrylic paint and colored them with along with a few more strands of grass. Finally, I added some white strand with a gel pen and a few white flowers in the foreground.


I thought about adding a tree or some leaves at the top but then thought the image would be more in it’s place if there wasn’t any additional cover around. So I colored in the sky with B91, B60, C1 and C2. It’s not an exact duplicate but I like how it turned out enough that I think I’ll try it again. ;D I think it’s the yellow and flowers that really make it happen. Thanks Chris for the inspriation!

I’d like to enter this into the following challenges:

C.R.A.F.T. Challenge #123 – bright colors
Simon Says Stamp Challenge – sparkle & bling
Inspire Me Fridays #27 – anything goes

Make it Monday #57 – anything goes
Pixie Dust Studio Challenge #94 – anything but a card