Yee Haw Ali & Giddy Up Oscar

Are you ready for some more Jude and the Rockers Just for Fun from Simply B Stampss?!  Well, today I have two for you that I’ve combined on a journal page – they were just perfect together and I’ve been excited to start a new journal book all week!


For my project I used Yee Haw Ali and combined her with Giddy Up Oscar from Simply B Stamps. In the background I used Garden Picket Fence from Make it Crafty which I colored in black and white to give a contrast between the foreground and background.  Then I loaded it up with embellishments and what nots… yeah!

Let’s see here, the main paper is Nana’s Kitchen from DCWV but I don’t remember where the Bingo paper is from.  I also used the Tim Holtz clock die and a printed clock face from stash.  The best part, however, is the ribbon which I found in the dollar section at my local scrapbook store – it looks just perfect for a western theme, don’t you think?

Here’s a close up of Yee Haw Ali blowing bubbles…

And a close up of Giddy Up Oscar too…

Thanks fro dropping by and I hope you’ve been enjoying this release as much as I have.  Don’t forget to check out the SBS Blog for more inspiration and thanks for dropping by.  😀

I’d like to enter this into the following challeges:
Inky Impressions Challenge – Anything Goes

Metal Shroom & Breena Stitching

I’ve finally got around to making some more journal pages and I’m happy to share one with you today.  😀  This is for the Make it Colourful challenge this week which is to practice color metals, specifically to color copper!  Think you can handle that?  Well, it’s pretty simple and we even give you a couple color combinations to try out.  Come on over and check out the MiC Gallery!


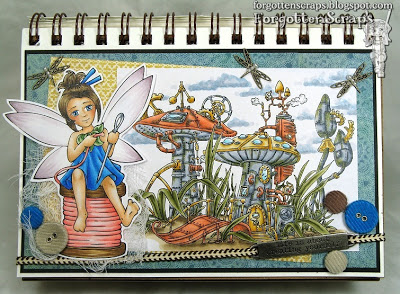
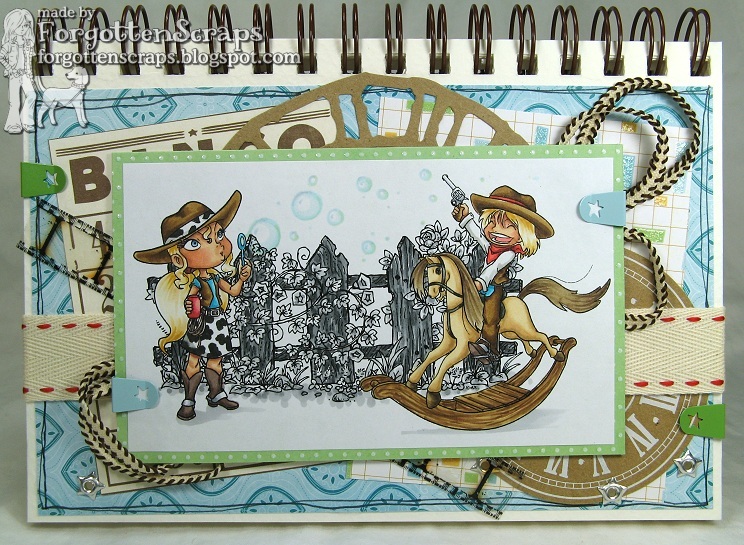
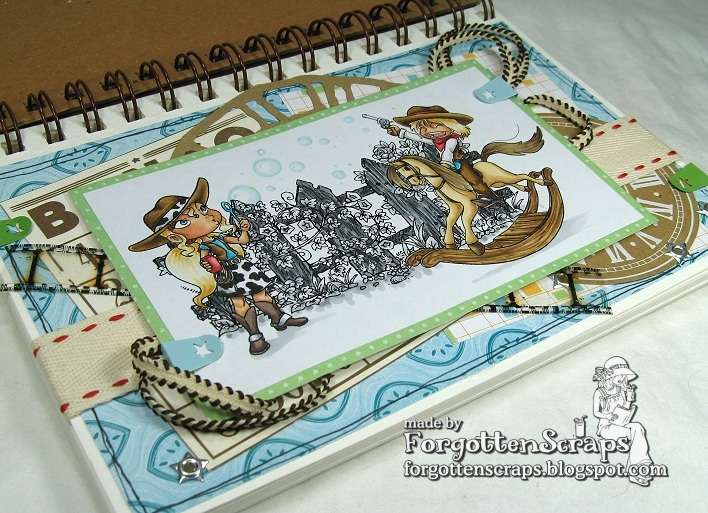
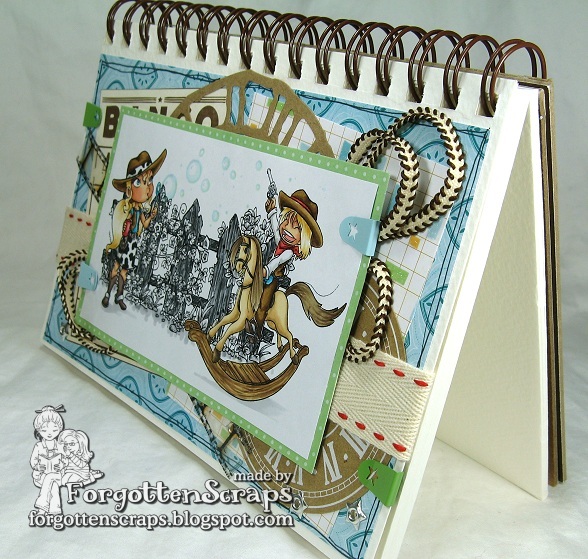
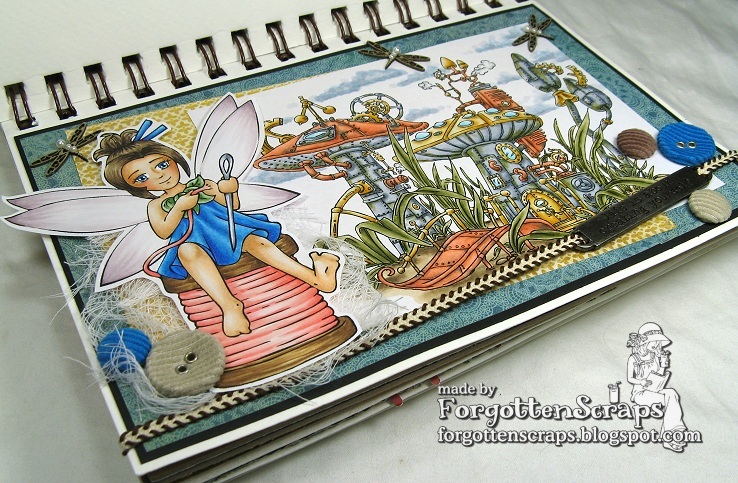
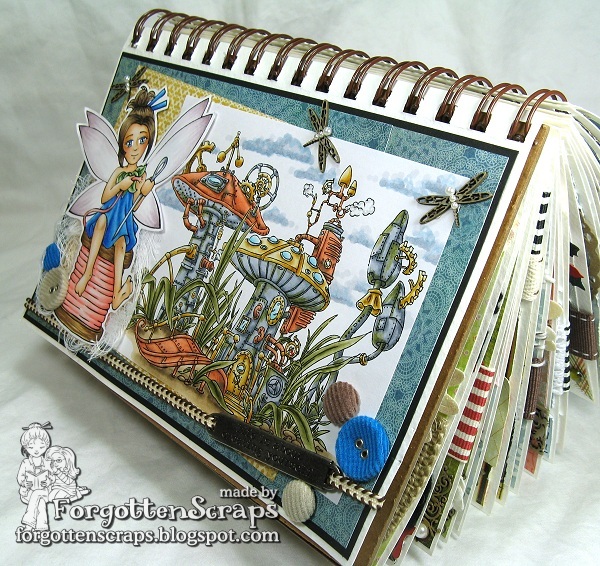
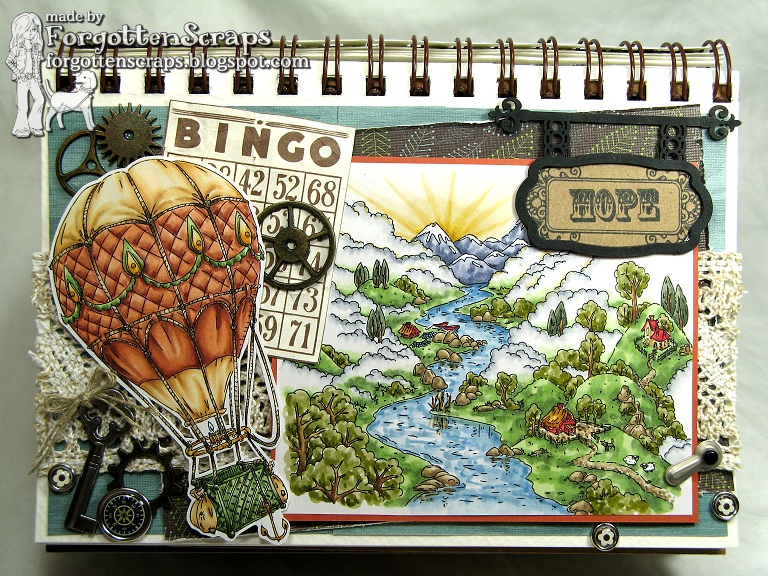
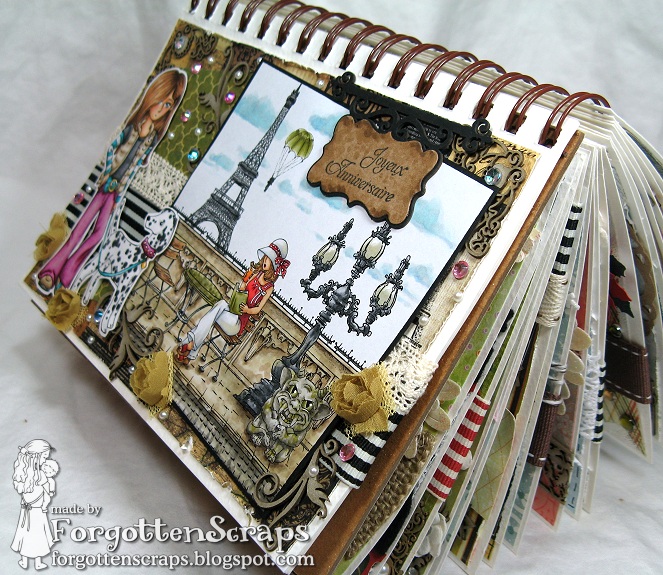
 For my project I used the Metal Shrooms from Make it Crafty with some Dragonfly chippies then paired it with Breena Stitching from Little Miss Muffet Stamps. The corduroy buttons are from Stampin’ Up and the metal embellishment sentiment is from Tim Holtz.  I don’t remember where the paper came from but the ribbon was something I picked up at the local scrapbook store.  Other than the cheesecloth, I think that pretty much covers all the supplies.


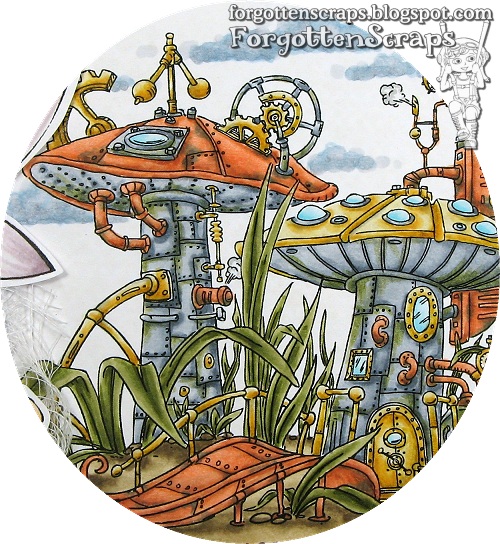
Now down to the metal coloring part and for my image I experimented with copper, brass and steel.  A little back history… when I was a wee kid, I used to help my Father when he was making repairs.  I might have been in the way a little more than I knew but I always felt like the important assistant holding the tools and passing along the wrenches.  Anyway, we’d work a lot with copper, new and aged, so my color combination came from my memories of what copper looks like.


The colors I used for the copper is E13, E93, E95, E97 and E99 then for the aged look I added BG93 and BG96.   I put the BG color near seams and places water might frequently drip down.  I think it would be great to have more of a shine but sometimes copper has a dull finish to it so I guess it’s still acceptable.   


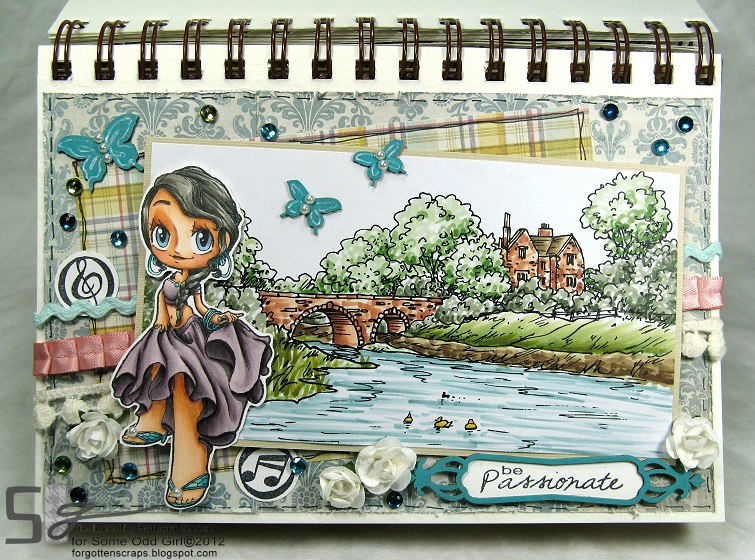
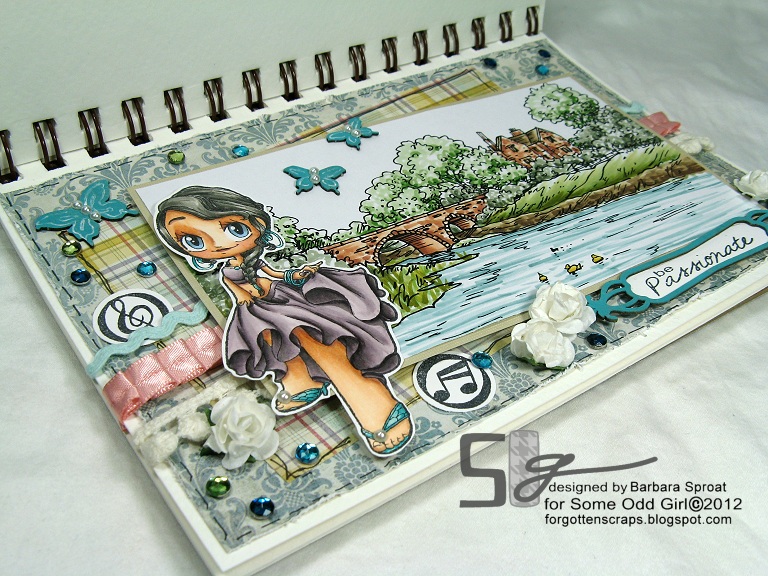
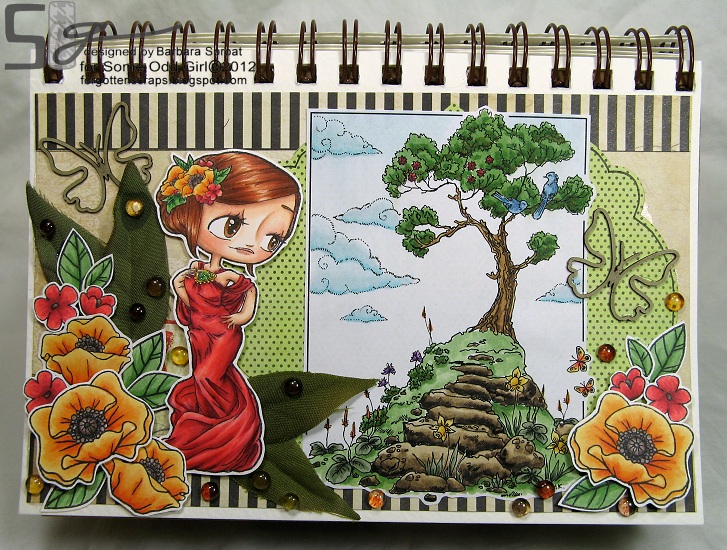
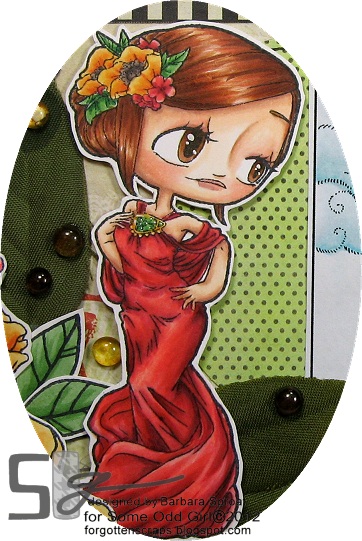
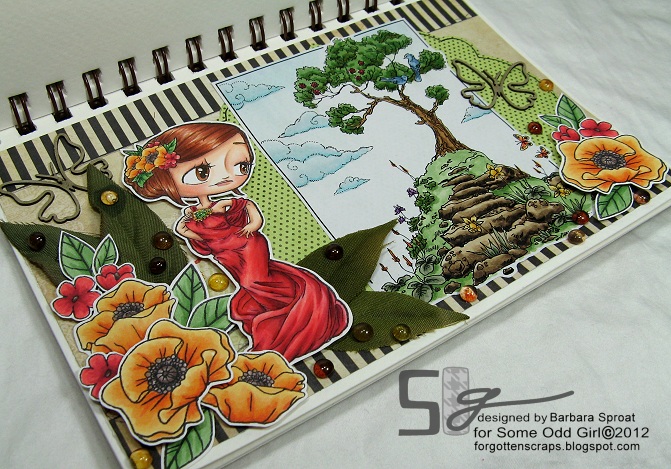
The fairy I used was already colored and I thought would be fun to pair up with the shrooms.  Of course, fairies and mushrooms are always a great combination but the contrast between soft textiles (the thread) and the metal was an interesting combination that I wanted to explore.  Actually, I had both images colored up and on the side of my desk so it felt good to get some of those used. 


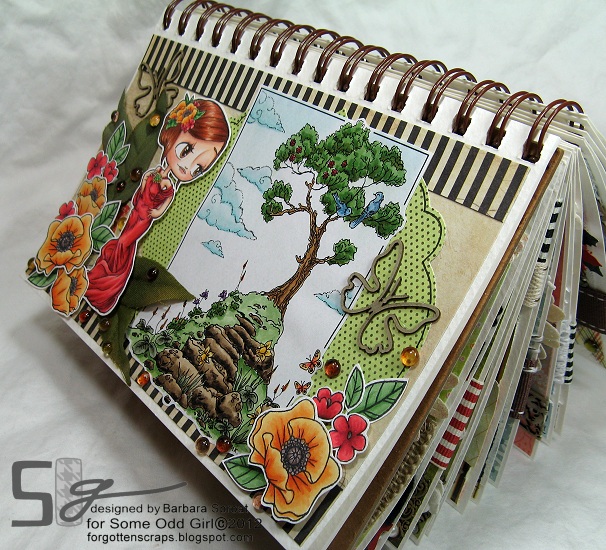
That’s about it… come on over and play this week at Make it Colourful and let’s see what color combinations you use!  By the way, this is my last page in my journal book and I’m excited to start a new one!!  LOL  Thanks for dropping by and have a great weekend.  😀

Hot Air Balloon

Here’s another mid-challenge inspiration reminder and this one is for Make it Colourful where the them is to “Colour with Green!” You’ll have to check out the blog and gallery for more projects as the design team has done an awesome job!!


For my project I used Hot Air Balloon and Valley Above from Make it Crafty plus a few chippies from the N1 Fancy Collection. The chippies coordinate well with the new Whimsy sentiments so I took advantage of that and stamped one from Stylized Notables 1. The rest of the journal page was put together with odds and ends found around my crafting space.


The Valley Above was a fun image to color and I used three different combinations of green for all the greenery. YG90’s was used for the tree and BG90’s was used for the evergreen trees. Then the grass and fields are basically colored with the G20’s. With the three different tones of green it helps to define the scene.


I used a little green in the Hot Air Balloon but the rest was colored with contrasting rusts and tans to help set it off. The balloon was fun to color and I even got to add a few pleats. 😀 Hope you’ve enjoyed this journal page and thanks for stopping by!


If you’re interested in being on the design team, then now is your chance! Zoe is having her first ever DT Call and this will be your once in a blue moon opportunity… perhaps an orange moon opportunity. ;D Good Luck!

Dancer

Are you ready for some more new releases? Today I get to show off one of the newest Nouveau Girls from Some Odd Girl!! To start with, we’re showing off Dancer! This divine girl will be available in Clear Rubber stamp and she was a beaut to color – so much fun!

(This is my second post for today so you can scroll down or click HERE for my first.)


My project uses Dancer by Some Odd Girl and in the background is Bridge Scene by Just Inklined. I used papers from My Minds Eye and grabbed the color scheme from it. I was even able to use a few colors that were burried at the bottom of the stash. LOL For her dress, I used RV91, RV93, RV95, RV99 with a little N2 and N4 for shading.


I colored the background quickly to give a nice contrast between the two images. I was hoping for a watercolored look but not sure if it worked out or not. Even a distressed ink look would have been a good aim but I still have some practice to do. LOL Either way, I like the contrast between the well blended Dancer and background.


On the journal page I also used some accessory stamps that come with the Dancer. The two circle music note symbols and the sentiment made nice embellishments. The sentiment was stamped then cut out using the Notable 2 die from Whimsy then placed behind the N2 Simple Frame chippie from Make it Crafty.


Thanks for stopping by again today and don’t forget to head on over to the Some Odd Girl blog for more inspiration and even prizes to be won!

I’d like to enter this into the following challenges:

Always Crafting Challenge #2 – Anything Goes
Stamps R Us Challenge – Anything Goes
Art with no Boundaries Challenge – Let the Dancer in you Escape

Update: I was an honorable mention at Art With No Boundaries for this challenge!

Julia & Taylor

To keep up the celebrations – we’re having another blog hop!! Come hop around with us “in Paris” this week with a New Release Blog Hop!! Check out the Little Miss Muffet Challenges Little Miss Muffet Challenge blog for all the details and prizes!!

You should have arrived here from the talented SHIRLEY!
However, if you get lost along the way you can see the complete list HERE.


Have you heard the big news? Whimsy, Make it Crafty and Little Miss Muffet Stamps have come together to give you a little romance in Paris this Valentine season! You can join the festivities and read all about it on the ThreeCompaniesTeamUp blog. But wait… have you heard the really big news?! Little Miss Muffet Stamps has now released images in RUBBER! That’s right – so pop on over HERE to get your rubber fix. 😀


My project uses several images from this release to create this scene. From Little Miss Muffet Stamps, I have used Julia, Taylor, Agent Éclair Dropping and Naw the Gargoyle. Then from Make it Crafty I used a bridge scene that Zoe put together using Paris Elements and Eiffel Tower, plus a whole bunch of chippies, N3 Rustic Frame, Flower Leaf Swirls and Swirly Corners.


The sentiment stamp is Élégance Élémentaire frm Stampin’ Up! and translated would be “Happy Birthday.” I used Whimsy’s cordinating Shapeology Die, Notables 3, which coordinates with the chippie so nicely! The rest of the journal page is deocrated with oddds and ends from my stash – pearls, rhinestones and various ribbons.


Check out all the Paris themed New Releases at:
Whimsy, Make it Crafty and Little Miss Muffet Stamps

Lastly, before you leave to your next hop… don’t forget to check out the Joint Release challenge at ThreeCompaniesTeamUp and submit your enteries using any of the products form any of the three companies. It’s an easy theme too … “LOVE!”

Your next stop on the hop is the fabulous VICKY!

I’d like to enter this into the following challenges:

iCopic Weekly Challenge #70 – coloring animals
Make it Monday Linking Party #77 – Anything goes
Simon Says Stamp and Show Challenge – Paris, London or New York
There She Goes Challenge #144 – Animal theme


Update: I was in the Top 3 at Simon Says Stamp and Show for this challenge!!

Believe

Are you ready to get your socks knocked off? No, I’m not bragging about my project – but I have some exciting news to share!! I’m now officially an odd girl! I’ve been asked to join the Some Odd Girls Nouveau Design Team and I’m so excited! You can visit their blog to read about the other girls on the team but first, take a look at my project…


I used Believe from Some Odd Girls and paired her with the Timber Top Ridge from Make it Crafty. Also, all thee orange and red flowers are accessory stamps that come with the Believe stamp – they made a perfect embellishment. ;D Check out how gorgeous she is colored up…


This is another project I did where I experimented with the reds. Over at Make it Colourful the challenge is to use different colors to blend in with your reds. Earlier today I showed what red would look like with turquoise (click HERE to see) but on this I used RV91, RV 93 and RV95 as the base tone.


After I colored her dress with the RV tones, I went back in and recolored on top of that with the reds. I think I used R11, R21, R14, R24, R37, R46 and R59. It has more of a pinkish highlight to it like the light is reflecting at a different angle off of the fabric. Other than that, I didn’t noticed much of a change… maybe it’s more deep in tone? Not sure, but it was good to experiment.


Hope you’ve enjoyed this journal page and you’ll be seeing the rest of the Nouveau Girls featured through out this month. ;D Have a great Thursday!

I’d like to enter this into the following challenge:

Flutter By Wednesday Challenge #188 – Open (plus butterflies)