Tips, Tricks & Techniques 0x015

Here’s a simple solution for displaying cards in your hobby room and it will work on any smooth vertical surface, including cupboards, doors, windows and walls. I had four plain hutch doors above my work area and mounted eight rulers; in all, I can display up to sixteen cards.

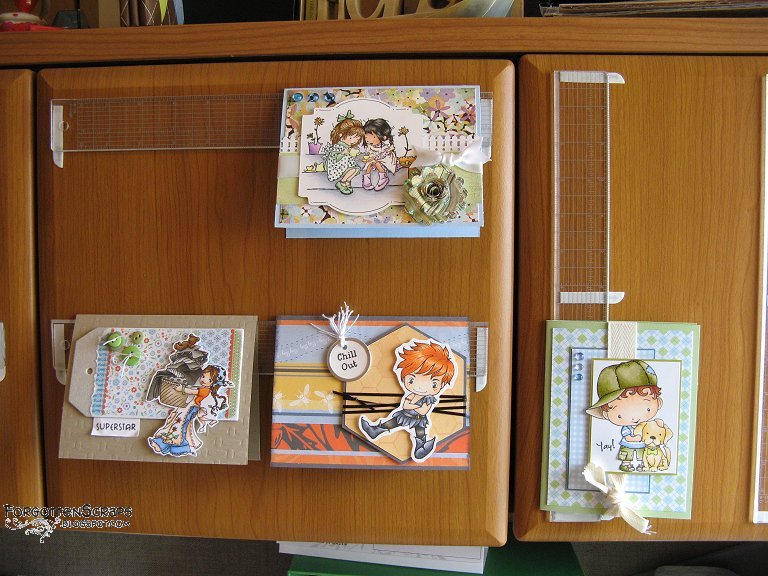
For this project, the supplies needed are acrylic rulers and 3M Command mounting strips (removable double-stick foam strips). I cut the Command strips lengthwise, and mounted the rulers with one half on each end. In the center of the vertical rulers, I added an additional half strip so the top card wouldn’t slide down. Voila!

Never Ever

The challenge is to create a card, layout or other craft project based on the theme “School’s Out For Summer!”


Challenge: Cute Card Thursday – Challenge #120
Main Stamp: Never Ever (TGF)
Patterned Paper:
unknown scraps
Cricut Cartridge: Winter Wonderland

Copic Colors:
-skin: E000, E00, E11, YR18
-hair: YR61, YR65, YR68, YR18
-other: B93, C7, C6, C3, C1, W3, W5, W7, YR21, Y35

OA Buddies – Amelia

The challenge is to use any stitching or sewing method and incorporate it in at least two layers of cardstock or decorative paper. Since I don’t have a sewing machine setup, I improvised and did faux stitching in white around the center green decorative paper. The second challenge category was to use ribbon.


Challenge: The Greeting Farm – Farm Fresh Friday
Challenge: Quirky Crafts – Challenge #31
Main Stamp:
Oliver & Amelia Buddies (TGF)
Patterned Paper:
Nana’s Kitchen (DCWV) Handmade Garnish (K&C)

Copic Colors:
-skin: E000, E00, E11, E13, R20
-hair: E44, E47, E49
-other: YR000, YR12, YR14, YR18, G21, G24, G28, W1, W3, W4, W5, W6, W7

Treasure Tempestwind

The challenge is to create a card, layout or other craft project based on the theme “Water!”


Challenge: Secret Crafter – Saturday Challenge #90
Challenge: Stamp and Create – Challenge #3
Main Stamp: Treasure Tempestwind & Eddy (CCD)
Patterned Paper:
unknown scraps
Dry Embossing: Papertrey Ink Impression Plate In Bloom

Copic Colors:
-skin: E000, E00, E11, R20, R22
-hair: C1, C3, C5, C7
-other: R22, R24, YR21, YR23, YR24, BG13, BG18, C1, C3, C5, C7, 0

Update: I was awarded the top 3 at Stamp and Create for this challenge!

Tips, Tricks & Techniques 0x014

Cutting off the unwanted areas on a stamps is probably an old-hat by now, however, here are a few tips that might help anyway. When cutting cling-mounted rubber stamps, keeping the paper backing on while cutting will help the scissors make a straighter cut through the foam and gives the stamp a cleaner edge.

As for cutting, I prefer to make cuts vertically straight through the rubber and foam. However, I know some like to cut angled outward so the foam base is slightly larger than the rubber. Either method will help achieve a clean stamped image. Just be wary of cutting inward on an angle (where the foam is smaller than the rubber) which might cause a slightly blurred edge when stamping. For this reason, I also make short straight snips with the scissors and avoiding longer curved cuts.

Most stamps are round or square in shape and therefore are easy to cut around. However, concave areas, areas that curve in or are hollowed inward, are the most difficult to get to. In this situation, instead of making a curved cut with the scissors, I’ve found best tool is a hobby knife or Xacto knife. This allows me to finish cutting those areas while still preserving the clean straight edges that I aim for.