This is a fun interactive card that I made for a birthday using Beam Me Up from Lawn Fawn. The alien can actively beam up to the space ship and there’s also a glow-in-the-dark component with the stars in the sky. It was a fun card to create! With both the glow-in-the-dark and pull tab, this will be a fun interactive card to receive.
The idea started out with the Nuvo Crystal Drops where I wanted to make glow-in-the-dark eyes with them. So I dropped the white, then the green, followed by black and a small dot of white again. I let those dry while I worked on the card. I later came back to color the aliens and cut them out.
The ground was created using the Forest Border die with black paper and cut the rest of the project with the border dies and slider dies. The beam was stamped on mulberry paper. I would have liked vellum but I didn’t have any. This was the the second best choice.
The background was cut using a die and I blended ink on top using purples and black. I popped that layer up with foam tape after positioning the slider mechanisms. Then I used Nuvo Crystal Drops, the glow-in-the-dark ones, to fill in the stars and holes. It worked out great.
The larger alien just barely fits behind the space ship so that when it’s pulled all the way up that one is hidden. It would have been fun to have only one alien which appeared inside the ship but I couldn’t figure out how to get that double mechanism to work out. So that’s why I added the little guy to man the ship.
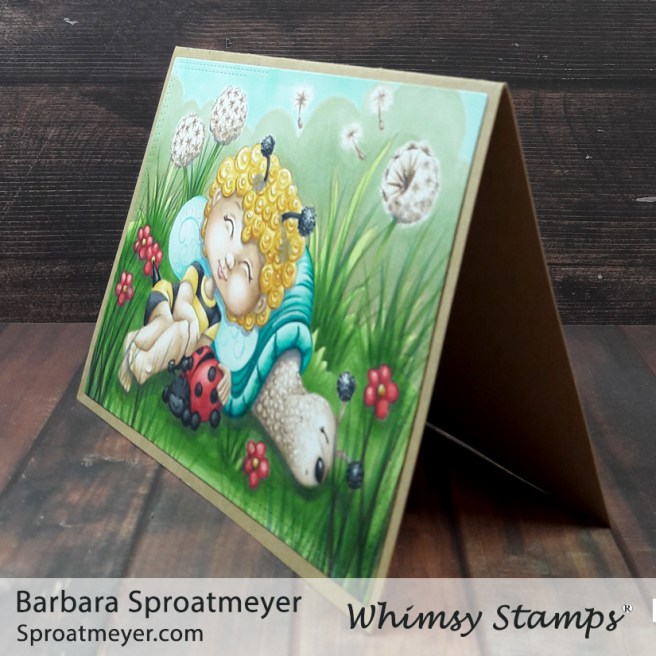
Looks like it’s time for a nap for this little bee and her friends. This Polka Dot Pals Zara Fairy Dreams Scene and is one of the newest digital coloring scenes released this week at Whimsy Stamps. With this project, I tried to use some inspiration from Annabel and her amazing work with snails and curly hair!
I knew there was going to be a lot of green on here so I wanted to pick colors that would stand out especially since the girl was going to be in black and white. I felt that I couldn’t get away from the traditional yellow/black and red/black for the bugs and went with it. I added turquoise and tans to coordinate and hopefully calm them down. They’re sleeping so I suppose it worked. Ha
The flowers in the background, I chose to color as dandelions blown by the wind. So I guessed at what that would look like but added some seeds floating to make it easier to identify them. I think that worked and it was fun to add some details through creative color placement.
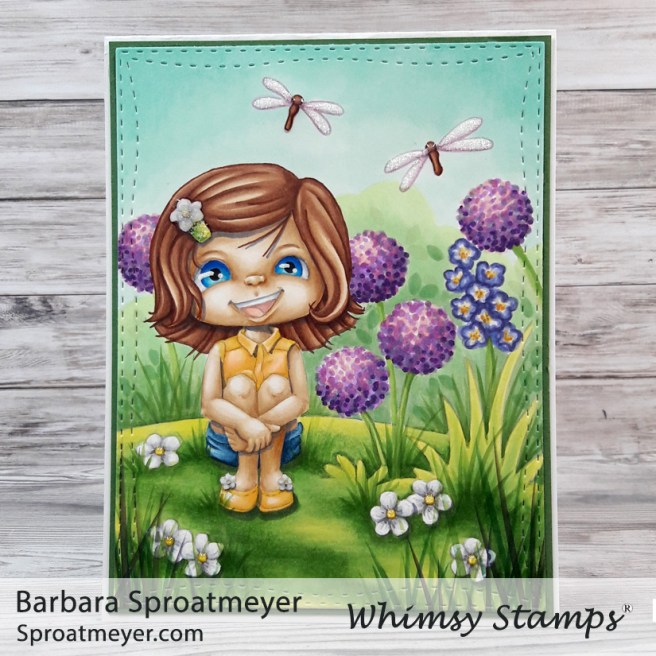
Two new digital coloring scenes were release today and I’m pleased to tempt you with this one – Polka Dot Pals Brook Reflecting Digital Coloring Scene. You know you want one now, right?! I printed it on Hammermill paper in a light gray so I could have the no-lines look. As I was coloring the purple flowers (which are called Alliums) I thought I would make that my focal point so I decided to add a few more in the background.
To be honest, I wasn’t sure I would enjoy these digital coloring scenes. I’m a skeptical kinda person but I’ve come to really like them. Now when I craft with family or friends, (or out camping) I don’t have to pack a trunk full. And at my Mom’s where I can use her markers, I just have to take the printed scene. It’s been soooo nice!
I always have a hard time including purple in my projects because I don’t see that I’m coordinating colors very well. It’s a me thing, totally. For some reason, that color really stands out like a sore thumb. However, I’m getting better and finding combinations that are easier on the eyes.
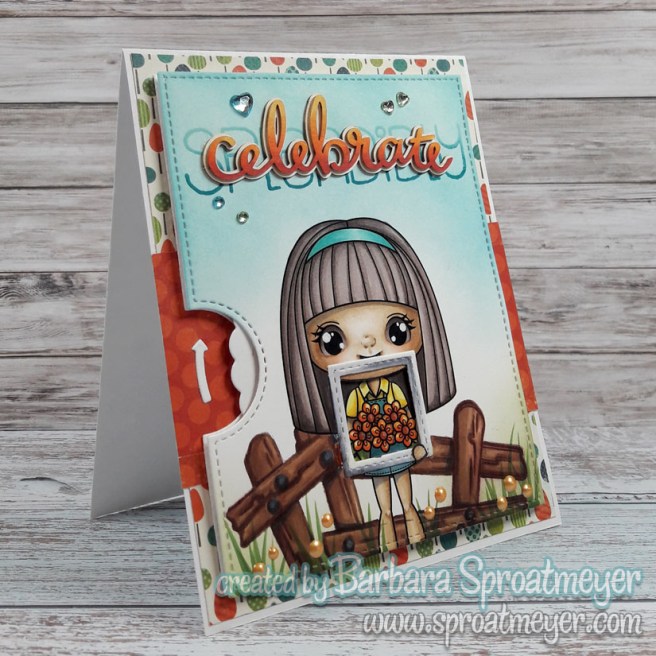
I have a love-hate relationship with this project and I for one am very happy it’s off my desk and ready to send to someone. The main components are Springtime Girl stamp from Stamp Anniething and the Lawn Fawn Reveal Wheel die. Either of these on their own would be simple but I had the idea of using all four images for Springtime Girl in the wheel. I mean, how cool is that?! I’ll describe some of my troubles below but in the end, I’m very happy that it worked out. Yay!
So my problems were two fold – first, I’ve never used the Reveal Wheel before so there was quite a learning curve. Then second, I was using a digital stamp and the Reveal Wheel relies on stamping the images on the wheel. My first wheel was a disaster but then I found a solution that worked by fussy cutting around the image and then gluing it onto the wheel.
Lastly, the puzzle I had to work out was where to put the window. I hadn’t taped down the wheel, like it was suggested, and ended up with a double cut in the window making it difficult to work around. (mainly because I had already cut the heads off of the part that goes on the wheel so the misalignment meant she didn’t have a chin. LOL Which really shows up with the cactus one.) So even though it’s higher than I would have liked, having the frame there (to help cover the mistake) was actually a cute addition.
The fence in the background is from Polka Dot Pals Fern to help complete the scene. My favorite part, beside feeling accomplished, is the face. I think I like how her eyes turned out and might be the right look I was searching for. It’ll be something I try again.
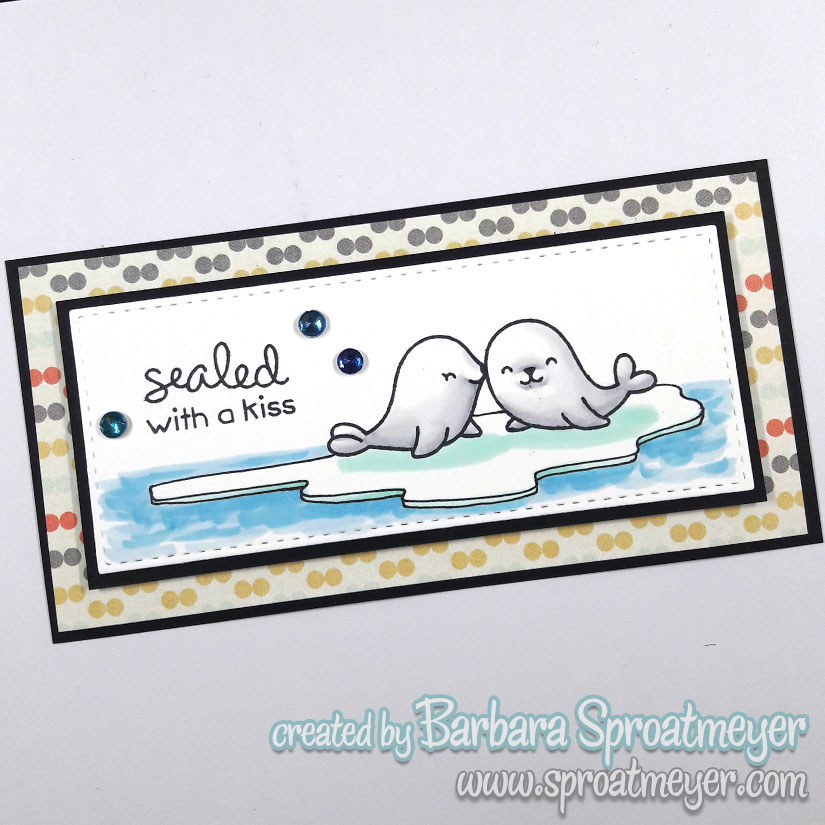
This is a quick post to match how quickly the project came together. I think I did this little note in less than ten minutes. Perhaps I was too hasty because I just noticed the paper doesn’t match any of the colors I used. Ha! The stamp is Lawn Fawn’s Sealed with a Kiss and an easy addition to your Amazon cart. At least, that’s what happened with me! I drew the ice the seals are on and kept the coloring simple. It’ll be a fun bookmark for someone special.
I couldn’t resist another cotton candy transformation and swapped the ice cream cone for some fluffy cotton candy. This is Polka Dot Pals Kezia and she’s a new release. The set comes with lots of fun accessories including a cute little dog. I then used the face from Polka Dot Pals Khadija and added some background details through creative color placement.
I colored this project on Desert Storm paper and stared out with my Copic markers. Then I came back in with some pencils to refine a few areas on her face, shirt and skirt. The background was penciled in. Then the black was colored with Copics and the rest with colored pencils, The shine was added with a white Posca pen.
The cotton ball for candy floss is the best part and it sticks out from the card and looks so fluffy. I used two cotton balls and glued it to my project in small sections to create the swirl. I thin this one turned out better than the last one but I think that’s mostly contributed to the cone – the last one had a stick and I like the cone shape better.