Animorphia Postcard Owl

I’ve been wanting to color some images by Kerby Rosanes and found a small booklet of Animorphia Postcards that were just the right size. I started out with the owl since I didn’t have to think about the colors too much.  My daughter said she’d finish the little doodles on the back if she could mail it so I thought that was a good deal.  

Fireplace Background

I squeezed in one last project for the year using Fireplace Background rubber stamp from Little Miss Muffet Stamps.  I colored it using Polychromos Pencils.  I don’t like this one as much as the last Fireplace Background card I colored (I don’t think anything I can do will compare to that one in a long time).  But I learned a few things from this – so that’s a good thing.  While I was working out the hard shadows from the fireplace, I realized that the ones further away from the source would need to be longer and not has harsh.  Something to know for the next time. 

I also used the Jolly Word Chipboard from Make it Crafty for the sentiment and colored it to match the green stocking. 

Polka Dot Pals Lirienne

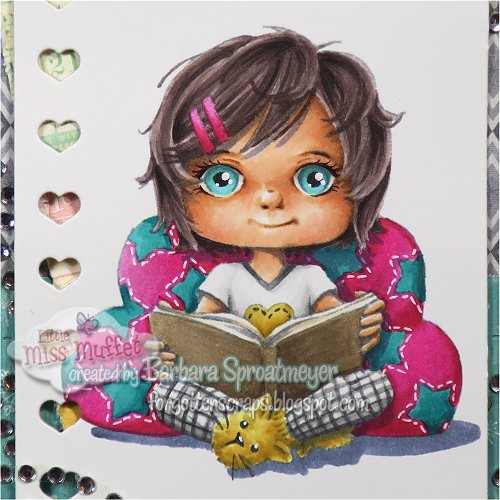
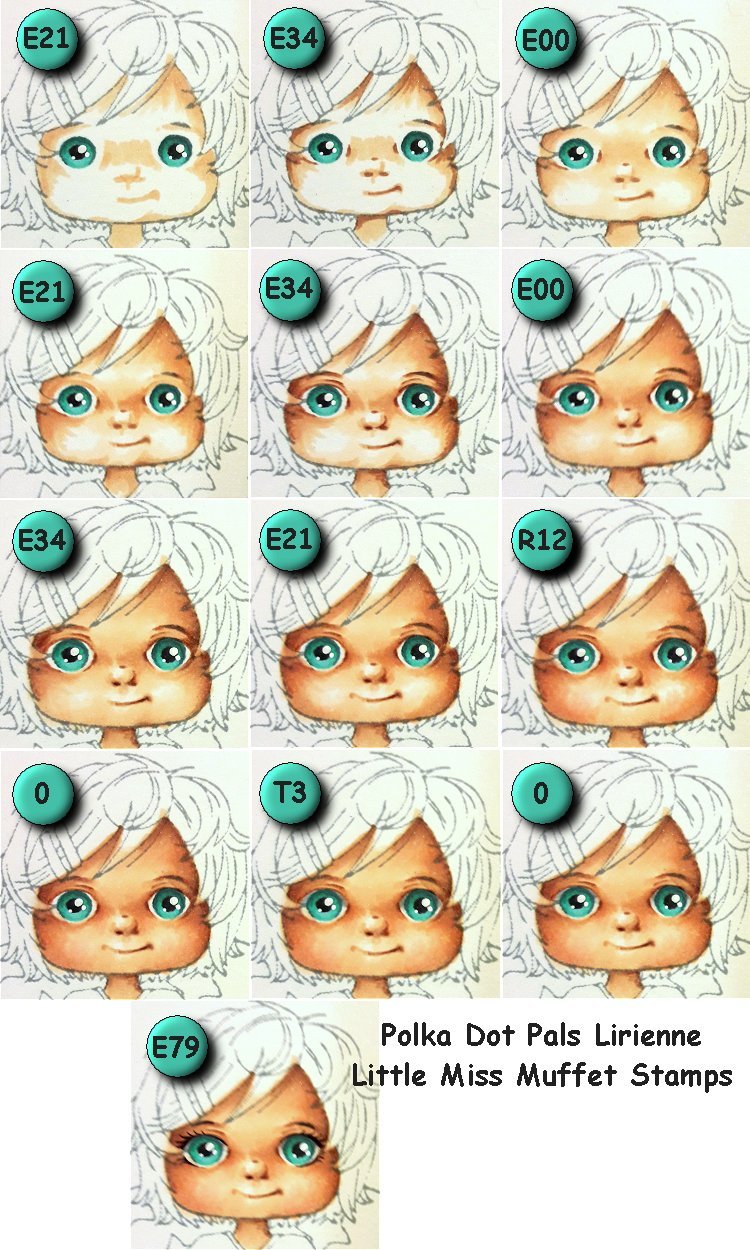
This is Polka Dot Pals Lirienne from Little Miss Muffet Stamps that I used for an eye and face tutorial (a bonus below).  It was fun to use these colors and I’m always a sucker for images with books.  This has been one of my favorites for a while and I had a hard time waiting to post it.  So I hope you enjoy it too!

Come enter in one of your projects into the Anything Goes challenge at Little Miss Muffet Stamps.  Any stamp, any theme, any project!

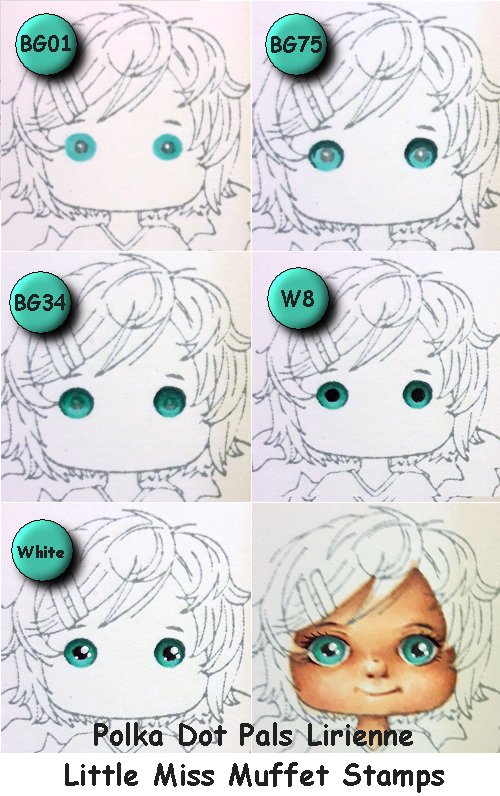
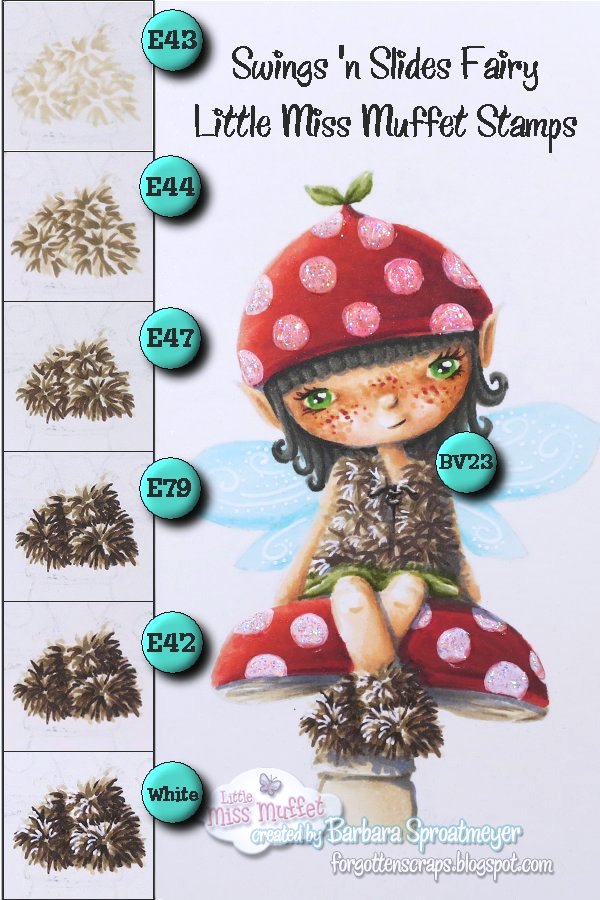
Here are the two step-by-step tutorials I did with this image.  The first was how to color the eyes.  I basically follow these few steps anytime but just change the colors a little. Lots of times I wait until the whole face is done before doing the eye.  This helps for when I’ve chosen colors that were too light.  When that happens, then I make it darker at the top otherwise I think she’s a bit too wide-eyed. 

Here’s the other step-by-step that shows how I build the face.  I only use a couple colors but layer it on while blending and blending.  Hope it helps.  If you are looking for something in between a blank face and this, check out the Polka Dot Pals Add-On Faces, available in both digital and rubber. 

Swings ‘n Slides Fairy

Here’s Swings ‘n Slides Fairy from Little Miss Muffet Stamps that I used on this project. I also used this one for a step-by-step tutorial, which I added below so you can pin or bookmark it if you’d like. 

The Snowflakes Chipboard are from Make it Crafty and are always fun to add to a project.  I tried to color these white with the Faber-Castell Gelatos Double Scoop stick but that stuff smeared and got all over.  I don’t know what that is actually used for but not what I was expecting.

Here’s the side-by-side that you can see the colored version and non-colored version. I stamped it in gray and then I was able to change the eye a little so I could add more color.  This also shows the fur vest and shoes, which has a how-to down below. 

Agent Eclair Dropping

This is Agent Eclair Dropping from Little Miss Muffet Stamps and is from the retired collection Operation Treehouse.  There are a whole bunch of retiring stamps and products in the Retiring Products section of the store – which includes a bunch of stamps that can’t be restocked or manufactured anymore.  Grab them while you can! 

Come enter in one of your projects into the Anything Goes challenge at Little Miss Muffet Stamps.  Any stamp, any theme, any project!

I love the Stitched Mountain Borders from Lawn Fawn which created this scene and several of my other recent projects.